Mascara History, Tips, Vegan Recipes, And Tutorials


Mascara and Lashes
Lusccious lashes 136786013

Welcome to our blog, thank you for visiting and the very welcome likes and shares that you do. We truly appreciate it, without you, it would not be a blog.

This week 275 we are sharing lots of tips, history, and facts about mascara. In my personal makeup, I can go without many steps but definitely not without mascara. The eyes are such an important part of our expressions and they reflect not only the state of our moods and health but at the same time our deepest inner being. There is a saying that the eyes are the windows to our soul. With that said we will take you into the mascara world, we are sharing the use of it and how mascara came about. It is quite fascinating for us to know the history of products and how they came about it makes the products a collaborative effort just to acknowledge the effort that went into it. Aside from knowing what we are placing on our bodies, thank you for your time and attention.


No eye makeup is complete without the frame that lashes curled and defined can give to the final look.  For a semi-permanent solution ideal for vacation consider having your lashes color tinted, but for every day there are mascaras to color, thicken, volumize, lengthen, curl and condition.  Waterproof formulas withstand rain, tears, and swimming they can be a very helpful for wearers of contact lenses.  Clear mascara gives a dewy look to natural lashes and can also be used to hold brows in shape and tame the stubborn hairs.


History of Mascara


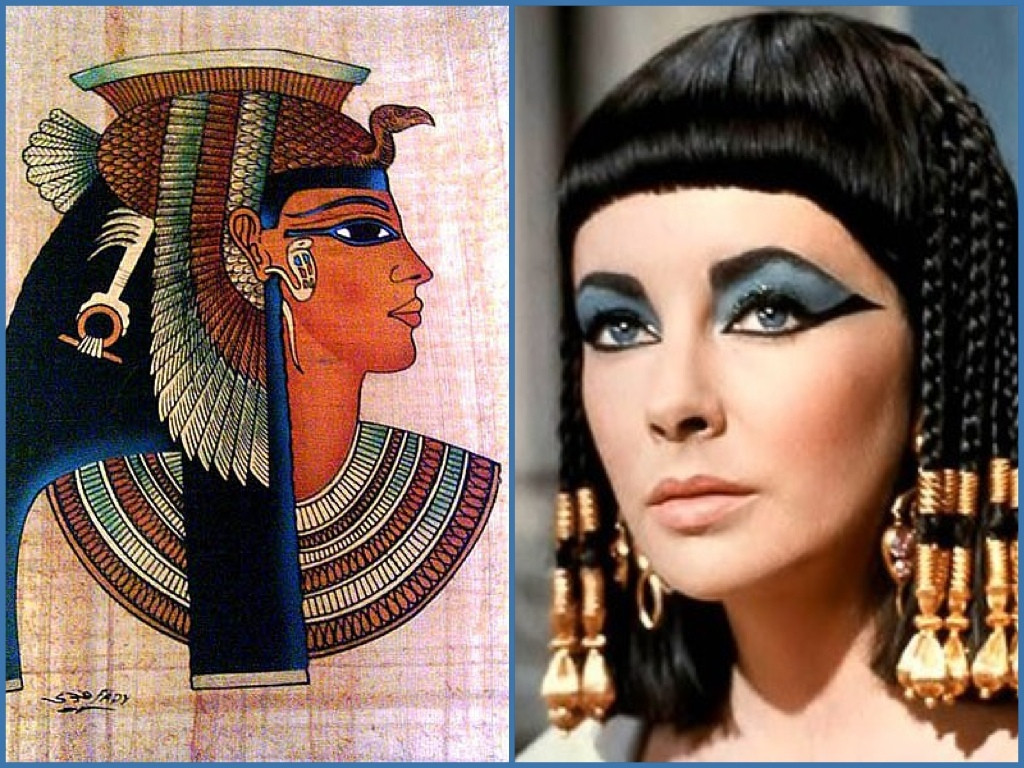
Mascara started thousands of years ago, early examples of those attempts can be found in the archaeological research at several ancient civilizations digs such as Mesopotamia and Assyria, where dust of ground precious stones were used to decorate women’s lips and eyes, but the true revolution of mascara for eye-related cosmetic products was found to came from Ancient Egypt.

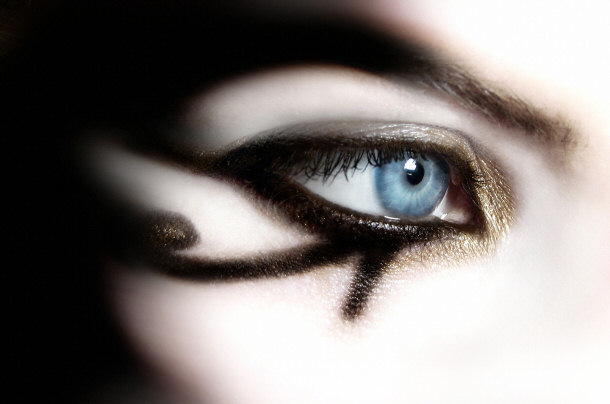
egypt-eye makeup

Egyptian society slowly built fashion that integrated not only with their medicine but at the same time with their religion and deep beliefs. Egyptians viewed fashion as a way to honor their beliefs, and a majority of the population used Facial and body painting on a regular basis. Eyelash and eyelid products that appeared at that time speak of a substance called kohl it was one of the most widely used cosmetic products in both ancient and to this day in the Middle East culture, it was made from charcoal or soot, honey, water and strangely enough, from crocodile stool, wow who would have thought!!


Kohl and ground up minerals 

Khol and ground Cristals for make up


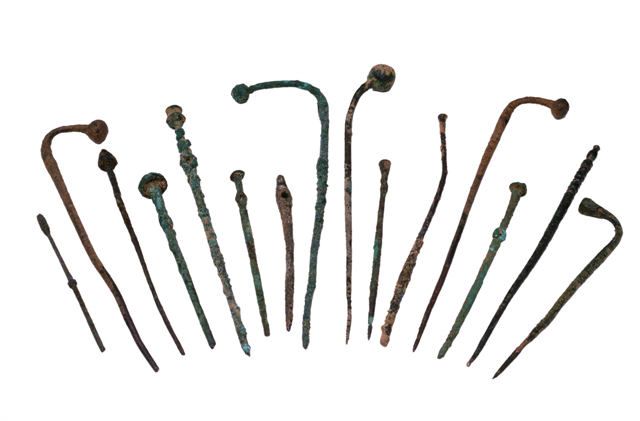
Ancient Egypt Eye Makeup Applicators


Antien Egypt eye make up applicators

They used this tools it to darken eyes, eyelashes, and eyebrows, protect their eyes from harmful dust and microorganisms that were blown by the wind, (we tend to forget that eyelashes are for protection of our eyes that is their main role) and of course, this substance and accompanying applying ritual was a part of their religion (most often it represented preservation of wearer soul against harmful evil spirits) and still that is a reason to wear eye make up in certain ways in many cultures.


Eye Makeup as a protection in Egypt


egyptian-eye-make-upasprotection


In Ancient Egypt, men used to style their lashes just as often as women. They used kohl and ointments to darken the lashes, which also served as protection for their eyes from the sun’s harmful rays, dust, wind, and natural elements. Women also used malachite on their lashes as they believed it worked as an aphrodisiac Hmmm that’s a thought!maybe we should give it a try!

After the fall of Rome, Europe fell into dark times, in this era when cosmetics were viewed as vanity items of rich and powerful people. The changed during the reign of English Queen Victoria (1837 – 1901, fashion style continued to live until 1912) cosmetic products and elaborate clothing became a major part of woman life of mid-class and high social classes. Elaborate beauty routines, the assortment of complex fashion styles, and public promotion of cosmetic pushed women to spend many hours a day applying and maintaining makeup on their faces. Mascara represented a very important part of every woman cosmetic collection, and the illusion of dark and long eyelashes became their obsession.

Victorian women are really into their makeup, and with painters from the Pre-Rapahelite Brotherhood celebrating lovelies with extremely long lashes, mascara formulations once again abound. Recipes include everything from a blend of ashes and elderberries to lampblack, which is the sticky soot from oil lamps (very toxic).

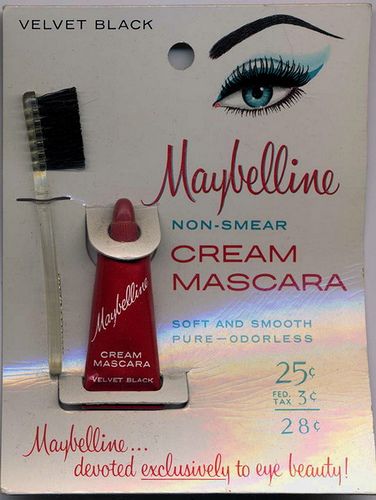
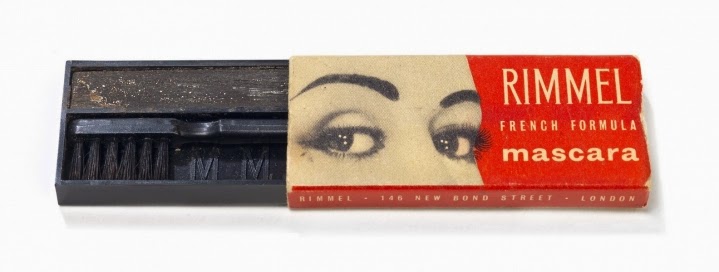
It was in 1913 when French chemist and perfumer Eugène Rimmel produced the first industrial made non-toxic mascara. This product was far from perfect, messy and inconsistent, never the less it managed to become massively popular across Europe, South America, and other continents, where several countries still call mascara products as “Rimmel” and in Chile where I am from we still do. Worldwide acceptance of mascara came from the mind of T. L. Williams who devised very similar packaging and formula as Rimmel, but he managed to market it better and eventually form his company “Maybelline” which is even today well known  for their mascara he created the first modern day mascara by mixing coal dust and petroleum jelly. Ouch!!!! Toxic right?

Modern mascara gained large popularity only after much promotion and marketing by Helena Rubinstein (1870 – 1965). Her influence and constant promotions by various movie actresses of 1930s, 40s, and 50s made mascara socially acceptable in any situation and an important part of almost every fashion style makeup all over the world.

Eyelashes are as a natural rule about one-third as long as the eye is wide and this is the ideal length for diverting airflow to keep eyes from drying and protect them from the elements, our main takeaway is that they’re just as consequential to our eyes health as they are important for our vanity.


The first nontoxic Rimmel Mascarafirst-non-toxic-mascara-by-rimmel
Maybelline Cream Mascara 

bd5fb6c8184d08bb39d9a4b7283fb951

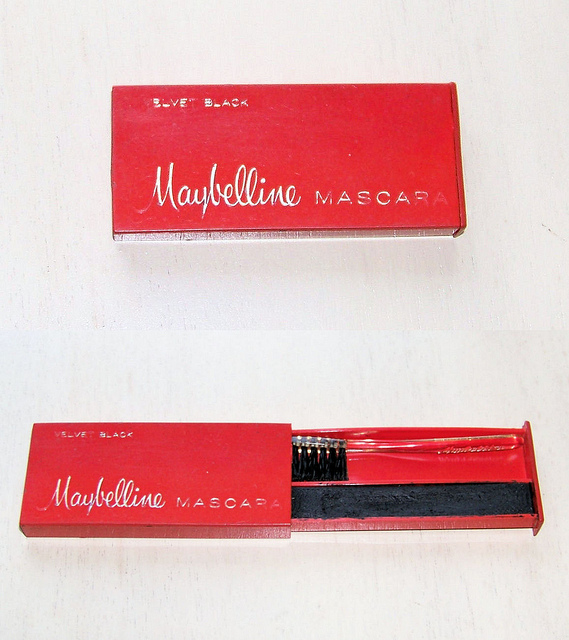
Maybelline Cake Mascara


Maybelline cake mascara

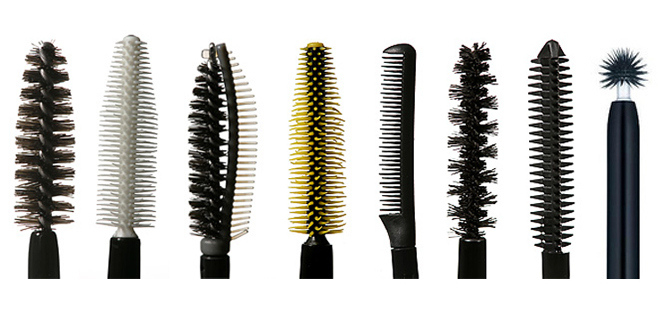
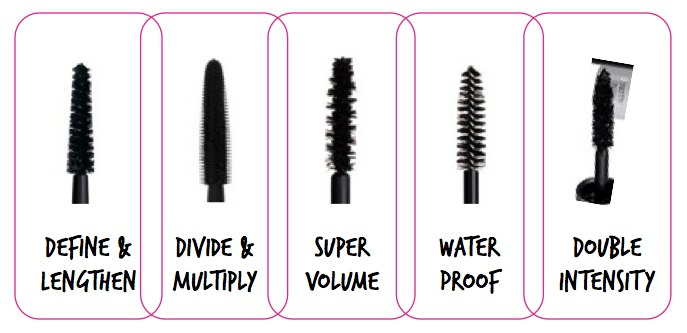
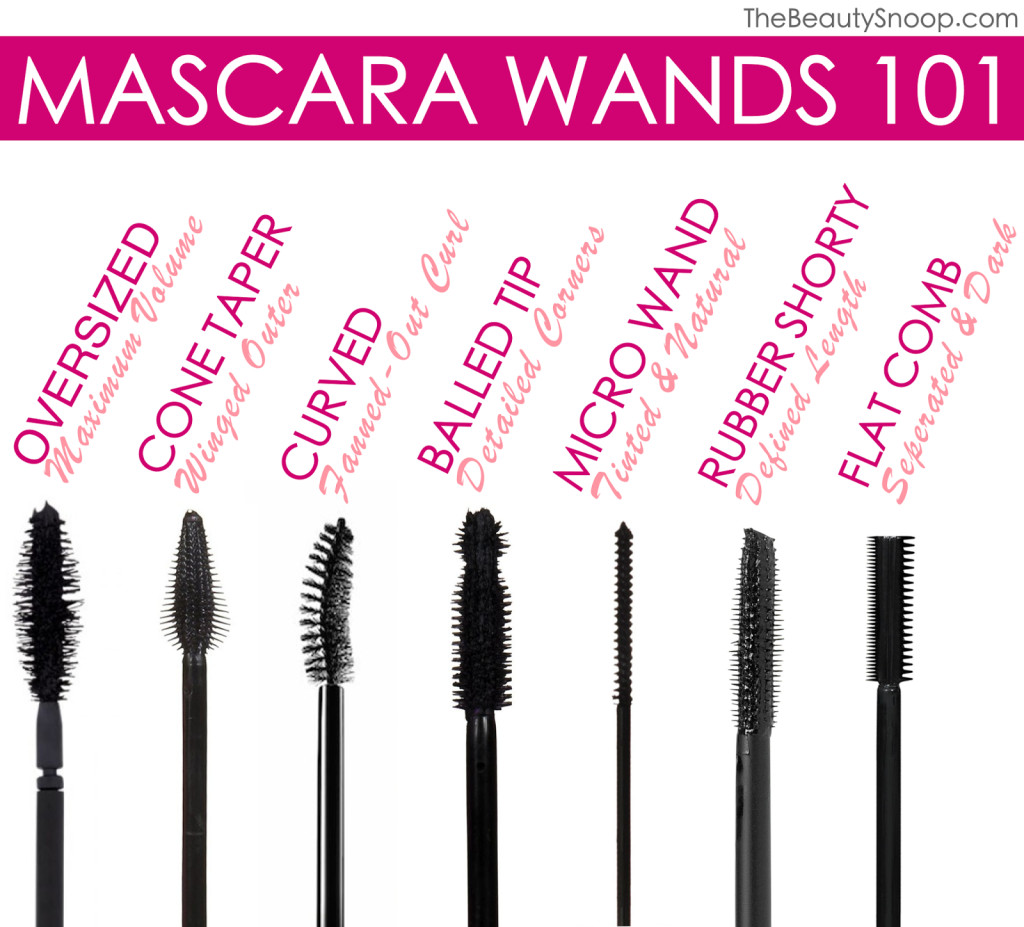
Different Mascara Wands

Great mascara aplicators

mascara-brushes


Mascara 101aplicators

Big Eye and Brush 121396087 (1)

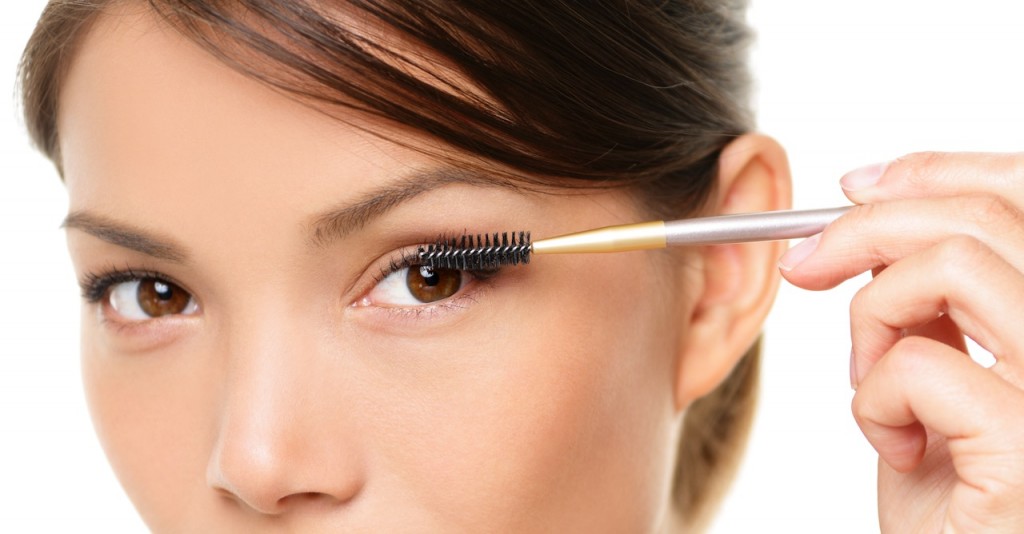
Asian Girl mascara 147670433 (1)


TIP:  I only use waterproof mascara in a special situation I don’t regularly do, because it tends to dry the lashes, it coats them and doesn’t let them breath, aside it is hard to remove and promotes rubbing the delicate skin of the eyes and under the eyes, and irritates the skin by  that, is best to give a place for that kind of mascara when is an absolute must.


Color:  Black mascara defines the eyes like nothing else and works with almost any look, but electric blues and deep purples can also be stunning, so don’t be afraid to experiment.  Dark brown mascara is generally softer and more flattering for mature faces, keep in mind that a reddish mascara can make you look tired and the eyes look irritated like you have an allergy or have been crying.


Application:  Whatever formula you choose, here is a foolproof guide to applying mascara:


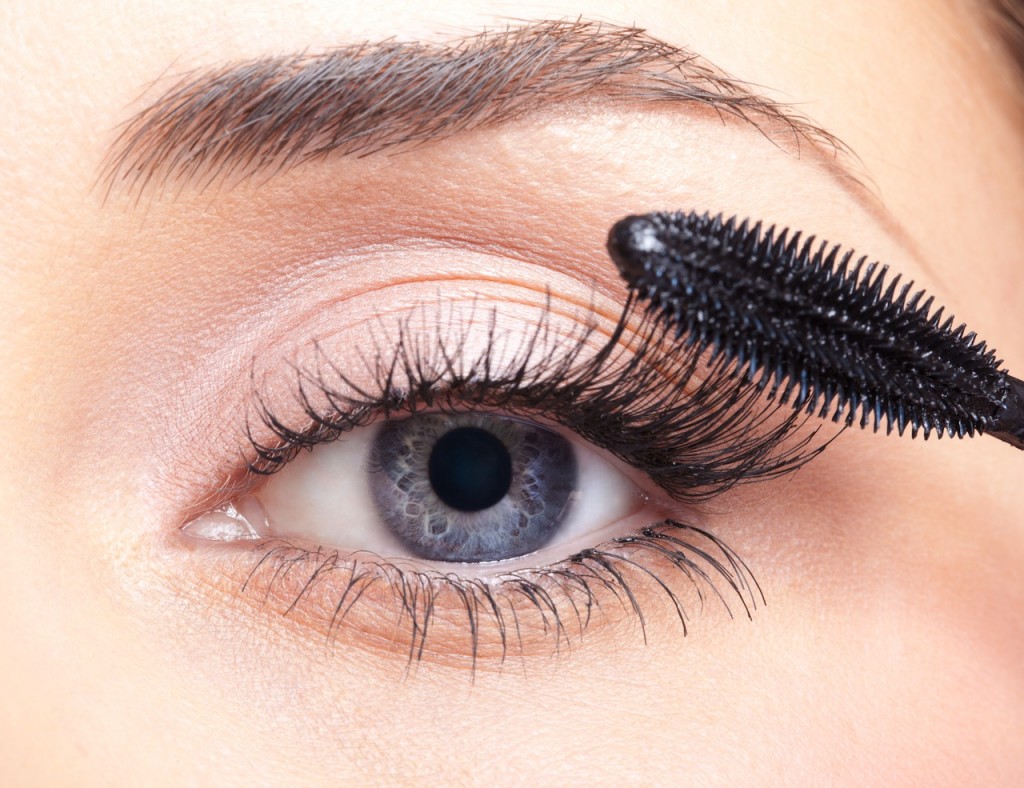
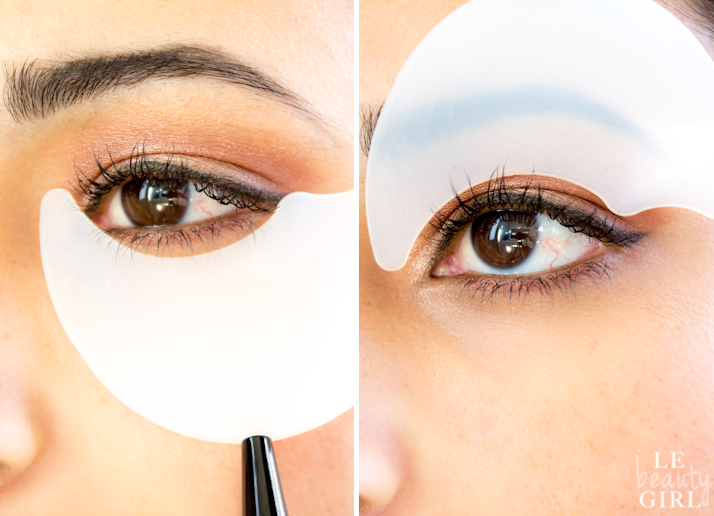
1. Make sure the mascara wand is not overloaded so that the product is less likely to come into contact with the skin and you get a stain if you have concerns due to hooded lids is wonderful shields in the market to prevent mascara to stain the skin.  Look down and stroke the wand over the top of the upper lashes from roots to tips you can hold the lid gently upward that helps you reach the roots without getting it on the lid.  Move along from one corner of the eye to the other until every lash is coated I usually move my eyeball to the opposite corner so I can get in closer also is a large assortment of brushes that can aid you with the process always be conscious of not harming your eyes I have seen and experienced my self, eye injuries from misuse of the mascara wand.

2. With the eyes wide open, stroke the wand up the upper lashes from underneath, starting at the roots and sweeping up to the tips.  Move along as before from one corner to the other until every lash is coated.  Repeat, but this time move the wand up the lashes in a zigzag motion to coat the sides of each lash.

3. To add more volume to the roots of the upper lashes, hold the wand vertically and push it directly up into the roots, working your way along from corner to corner I prefer the outer longer lashes with a thicker amount of mascara due to the fact that if  I place thick amount in the inner corners I give my self a crosseyed look.

4. To coat the lower lashes, hold the wand vertically and sweep it from side to side over the lashes, being careful not to let the wand touch your skin, it helps to open your mouth and pull your lower jaw down that way you stretch the skin naturally without pulling it too hard.


TIP:  I like to use an eyeliner brush to coat the roots, that way I prevent my self from touching the skin and at the same time I clean any eyeshadow that got in the lashes which will show the mascara as fake and not so natural.


TIP: You can purchase or make your own Mascara shield with rice paper and stick it to the skin with your foundation or a little bit of moisturizer so it doesn’t move, it will help you prevent getting it on the skin.


TIP:  I personally don’t use mascara on the lower lashes on every person, only on certain eye shapes, it can create the effect of a droopy eye everyone is different use your discretion.


DO Wipe the brush clean before you first apply a brand new mascara you can do this on the edge of the tube when you are pulling the brush out make sure you don’t get it at the outer rim or it can prevent your top from closing properly and it will cause your mascara to dry. That way you get a feel for the brush and how much to load up for maximum effect minimum flick back, that way is no clumps that can transfer to your skin. Clumpy lashes are the result of applying too much product or having moisturizer or any oil on your lashes or that your mascara needs to retire because or reach the end.

Using a light touch and an eyelash comb or brush used before mascara has dried will help fluff the lashes and remove excess product, you can use a mascara spun to do the trick.

DON’T Rely on one mascara to do it all! Consider mascara wardrobing like you do with your clothes – using more than one mascara – you create your desired look to suit your lash needs and overall look. For instance, if you have short, sparse lashes and crave length and volume begin with a lengthening formula and slim brush design to extend lashes followed by a curved or bigger brush combined with a thickening formula to add volume to upper lashes just customize it to your needs.

DO  I like to moisten lashes with a clean, wet brush or Qtip prior to applying mascara. I learned that by doing this it allows the mascara to go on more smoothly and evenly. Remember to apply the product starting at the lash base and working outward to the ends of the lashes.

DON’T Pump  Don’t pump the wand in and out of the tube. This action does not coat the wand with more mascara any better and only causes the mascara to dry out faster by introducing air into the container and most likely messing up the brush and coating the entrance of the tube with product, which will prevent closing the tube airtight.

DO  You can Layer it, usually people apply just one or two coats of mascara to lashes; however, in many cases, you may actually need three or four layers to get the desired look again that depends on your judgment. In the case of short, thin lashes, try mixing mascaras. You can first start by applying a layer of mascara that is made to lengthen lashes. Then add a layer of mascara made for thickening the lash. Try what works for you. It is good to do a bit of research and collect pictures of looks you like and then practice.


Don’t, the answer is a big NO  Add any other products to your mascara in the tub. Somebody once asked me if adding water or moisturizer to extend and thin out the mascara was okay the answers a big NO!!! it will ruin the product and it may not be safe for the eyes.


Duration of a mascara to be safe  Is best to discard the  mascara after 2 or at most 3 months perhaps sooner and this depends on how much usage the mascara is put through, I personally keep it to one month be the judge if you notice that the mascara is losing its shine that means is getting dry and it would not give you the results that you spect and it has turned. Our lashes are designed to catch bacteria, dirt, and anything that pose a danger to your eyes so usually, the mascara brush brings a few of those invaders into the tube of mascara. The environment inside the tube it is wet and dark Hmmm! great grounds for bacteria and other invaders to proliferate and we talking your eyes here. Using a new mascara is a lot cheaper than an eye infection not to mention the risk and pain and the danger of having permanent damage to your eyes.

For safety and hygiene purposes, NEVER test mascaras at the cosmetics counter even with the throwaway mascara wands, you don’t know if people introduce the wand a few times when trying the product before you I personally had a very bad experience by doing this.

For more tips, this is a great site

http://www.paulaschoice.com/expert-advice/eyes/_/makeup-tips-tricks-mascara#dos 


 Mascara Shields

Elf-Mascara-and-Eyeliner-Shield-3


DO  Hold your brush like a pro and go vertical as well as horizontal strokes. when you use the tapered end of the brush it allows you to push lashes up for a wide-eyed look now days is so much selection of brushes that are specially designed for this purpose.

DON’T  Is best not to load up to much mascara to lash tips as that makes them heavy and result in the dreaded droopy look Place your focus on the roots and pulling the wand through to tips.


Recipes to make your own Vegan mascara:


Vegan homemade mascara

1tsp Candelilla Wax

1.5 tsp Jojoba Oil or Argan Oil

1 tsp Black Iron Oxide

1/4 tsp Zinc Oxide

This will make 5 to 6 pots

Here please make sure that all the utensils that are used to make the mascara are sanitized and the same with the container that you will use to keep the final product is no worth a risk to hurt your eyes otherwise.

How to make it:


Begin by mixing the black iron oxide and zinc oxide until well blended.

Place a small glass or metal bowl over a pot with water over low heat on the stove, add the wax to it and the oil and let it sit until completely melted do not boil the mixture when it starts to melt mix well.

Add the mixture to your sanitized pots and press down with a piece of cloth like gauze or cheesecloth, you can press it with the back of a spoon. Let the mixture set and dry before using.

A great way to transfer your finished mixture to the pot is to use a large syringe or a small pastry bag,  you can also make a cone by cutting the end of a strong plastic bag, it is a bit messy this way.

Cake mascara is well applied with a spoolie brush or a brow brush.

If for some reason your mixture is runny, add a bit more Iron Oxide until desired consistency, I always like to add more color for certain recipes so you get a fuller and luscious look.


Creamy Mascara Recipe


Ingredients 

1/2 tsp Carnauba Wax

1/2 tsp Candelilla Wav

1/4 tsp Cocoa Butter

1  tsp  Jojoba oil

2 drops of preservative Sodium Benzoate or Potassium Sorbate

1 1/2 tsp pigment color use 2 tsp for pigment with Mica

This mixture makes 6 tubes or more


Colors 


Black  use 1 1/2 tsp black Iron Oxide

Brown use 1 1/2 tsp brown Iron Oxide

Black Brown use 1 1/2 tsp black Iron Oxide and 1 tsp brown Iron Oxide

Blue use 1/2 tsp black Iron Oxide and 1 1/2 tsp deep blue mica, you can apply different color micas for desired look.


How to make it:

Mix your color pigments together using a coffee grinder or a mortar ( like you are making guacamole) or a Ziploc bag.

Place a glass bowl over a pot of water on a low heat on your stove.

Add the waxes, butter, and oil to the bowl and let it sit until melted, do not boil and mix well.

Add the pigments slowly so you don’t create lumps, mix well until is a smooth paste, little whisk works really well.

Add your preservative and mix well

A safe preservative to use that are safe for eyes

is Potassium Sorbate

According to  https://blog.honest.com/what-is-potassium-sorbate/#


Ingredient: Potassium Sorbate


What it is: Potassium sorbate is a salt of a sorbic acid which is naturally found in some fruits (like the berries of mountain ash).  The commercial ingredient is synthetically produced creating what is termed a “nature identical” chemical (chemically equivalent to the molecule found in nature).

What it does: Fights bacteria. Most personal care products are made with a lot of water and a variety of nutrients which makes an incredibly hospitable breeding ground for microorganisms. What’s worse – the product might smell and look just fine, but be swarming with bacteria or fungi  Effective preservatives are vital for ensuring safety!

Transfer the mixture to the mascara tubes.


Vegan Eyelash Conditioner Recipes


from: http://www.fashionwithaconscience.org/2012/11/16/how-to-grow-long-eyelashes-naturally/
Most of us crave full and natural lashes. Though we can’t change the lashes we have from the inside, we can use topical treatments to help them grow healthier and longer. There are a number of different eyelash serums and growth conditioners you can purchase from the store or have prescribed from your dermatologist. They have their benefits and risks so be sure to do your research or talk with your dermatologist to see which product would suit you best. There are a number of different natural remedies to create your own homemade eyelash conditioners. Results will not come overnight but over a period of weeks–possibly months–so be prepared for a slow process. Take a break from mascara and curling your lashes once in a while to give them a break from all the lash stress. Give these natural eyelash conditioners recipes a try to achieve longer, thicker, and fuller lashes!


Coconut Oil Eyelash Conditioner

Ingredients:
– Coconut Oil
– Extra Virgin Olive Oil
– Vitamin E Oil or capsules
– Small clean container
– Disposable mascara wands or cotton swabs

Pour equal parts of each oil into a small container. Note that coconut oil is solid at room temperature but melts when warmed or mixed with other oils. Dip your mascara wand or cotton swab into the mixture, remove the excess and apply it to the root of your lashes twice a day. Make sure to use the conditioner on clean lashes.
Avoid using your fingers to apply the conditioner to your lashes because they can transfer bacteria into the mixture and also absorb the oils. Mascara wands and cotton swabs are precise and ensure that every one of your lashes benefits from the goodness of your homemade eyelash conditioners.
Try one of these recipes and let me know how you are liking them. Also, if you have your own recipes please share them with us so we can all grow beautiful, long, voluminous lashes.


Vitamin E Eyelash Conditioner

from: http://www.beautylish.com/a/vmyvn/diy-lash-conditioner


Ingredients:
1 Vitamin E oil or capsules
2 Small container or plate
3 Cotton Swabs
You can use vitamin E capsules or vials of oil to use as an eyelash conditioner. Squeeze or add a few drops of vitamin E oil into your clean container or plate, making sure not to touch the oil with your fingertips. Dab the cotton swab in the oil and sweep the swab across clean eyelashes from root to tip on both sides of lashes, twice a day (typically in the morning before makeup application and before you go to bed).


Longer Lash Conditioning Serum

from: http://hellonatural.co/eyelash-conditioning-serum


Ingredients:
• 2 tablespoons castor oil
• 2 tablespoons 100 percent aloe vera gel
• Jar with a lid
• Q-tips or clean mascara wand

Instructions
1 Combine castor oil and aloe vera in a small container with a lid.
2 Shake to combine before each use.
3 Apply nightly to lashes with Q-tip or mascara wand.
4 Do not rinse.


For more information watch the videos below:


https://youtu.be/xJ0Ig6qx-JU


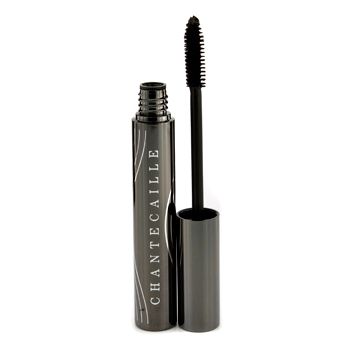
Faux Cils Longest Lash Mascara

the-mascara

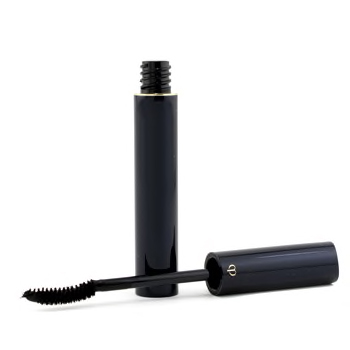
CLE DE PEAU  The Mascara

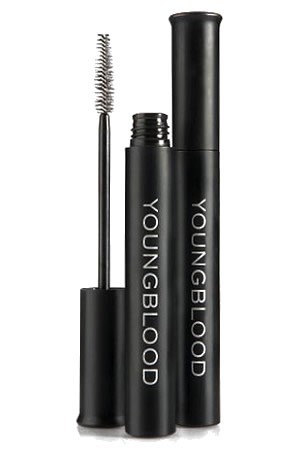
youngblood-outrageous-lashes_1_

Youngblood Outrageous Lashes Mineral Lengthening Mascara

Youngblood Outrageous Lashes Mineral Lengthening Mascara nourishes and volumes the lashes while increasing length and definition to get you noticeably gorgeous lashes. The long-wearing, non-flaky, smudge-proof formula is everything you want in a mascara.


Eyebrows tips, tricks, everyday wear, and tattooing


Eyebrows tips and tricks everyday wear and tattooing85406370

This is the week 273 and here we are sharing a post on Eyebrows. In the many years of my makeup career, one of my passions it’s been eyebrows. My point of view is that you can build and change a character with a few strokes, eyebrows not only frame the eyes, they have the ability to create moods of expressions. Here we offer tips and bits of experience and research of years of collective work. We are sharing answers to questions regarding what to look for in cosmetic tattooing work also. Enjoy and please feel free to write us an email at isabelsbeautyblog@gmail.com if you have further questions. It is a lot of information that we edit so we can keep the attention of all walks of readers. We wish to thank you once again for all your support, please remember to share and like It is an important part of our blog.


 Eyebrow Drawing Guidelines


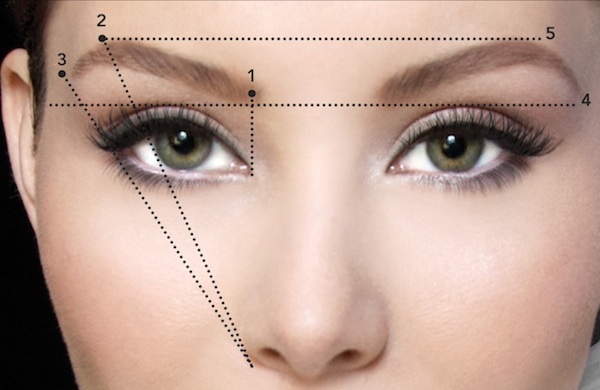
Beginning Of The Brow

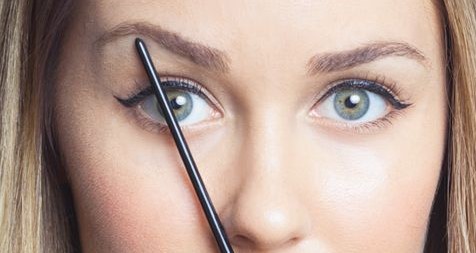
Expert advice teaches that eyebrows should start above the inner corner of the eye.  Sometimes the brow is pulled out or in a little depending on how close or wide set the eyes are. This is of importance due to the fact that that proportion can either make the person look cross-eyed if the bridge of the nose is smaller and if the face is round, and the eyebrows are to separate it makes the face look rounder and the eyes smaller . Pulling the brows abnormally close together for the purpose of slimming the nose starts working against you and will make the nose look more prominent or look angry. Some beauty tips say to put a pencil straight up from the outer edge of the nose, but may not be so accurate  because there are too many variations in nose width.  A little more precision is needed if it will be a permanent eyebrow because it is there to stay, is a good rule of thumb to have the technician draw the eyebrows in first to give you the look that will be final, because once is there  is not much to take the power of desition in your hands, cut pictures from a magazine or bring references to the actual day so you have what you want everyone has their own taste of what a good look is but it may not be for you just take a look at how many “Beauty” procedures go wrong it may look good in their eyes but not on you , better safe than sorry,. I mark the center and measure distance from this point to the start of each brow. This works most of the time. However, nothing can be taken as ever, never or always and  you can make adjustments before you draw it ll the way, is some great stencils that you can use to try different looks.


put-your-tweezers-down-read-these-brow-tips-first_di_600c390-600x390

Stencil work

You can always use stencils to shape the eyebrows if the proportions are too much to handle on an everyday basis, you can get them on Amazon or Ebay for very little money and some like the ones below in the picture are adhesive so it give you more flexibility , be gentle when you remove them so you don’t pull the delicate skin of the eyelid, these stencils are good to use for plucking  hair also.


Arch Of The Brow

diagonal-arch-eyebrows

The break of the eyebrow arch should be in the area above the outer edge of the iris while focusing straight ahead. This will be a little short of two-thirds. You can move the arch out a tad to widen that side of the face, or for other preferences, keep in mind a balance. Beauty tips often say 2/3, or to line a pencil from the outer edge of the nose going up along the outside of the iris and breaking where the pencil hits. The two-thirds is one-fourth inch too far out for the average face. The pencil or a long brush from the nose puts the arch even farther than 2/3 unless you are making an extra long wrap around the temple brow. Again, there are variations in nose width that would fan the pencil in or out. Other variations include length of the eyes and how close or wide set they are.


The shape of the brow and the entire arch should be seen from the front of the face. The head should not have to be rotated to see the whole brow. The last half inch may start disappearing from the frontal view, but not an inch or more. Too many faces have the arch out too far. It looks like that part of the head was stretched out horizontally, or the brows are too big for their face. It also makes the eye length look shorter. We don’t want to return to the 50’s center arch and look surprised. The best look for the arch is almost two-thirds. Factors that affect the need to move it in or out a little bit include brow size and shape, sharp or smooth arch, face size, and face shape.

Bold-brows

Ending Of The Brow


end-of-eyebrow

The tail end of the brow is marked by placing a pencil or a brush from the center of the lip traveling up along the edge of the outer eye. The mark is made on the inside of the pencil. Variations in face length, face width, eye length, and how close or wide set the eyes are may require moving this mark in or out . Most Beauty tips say to go from the outer edge of the nose, but noses have different widths that would cause this line to fan in or out. The center of the lip stays the same.Is many different looks that can be accomplished by lifting or lowering the outside tip of the brow you can rather lift or drooped the look of the eye and the face for that matter.


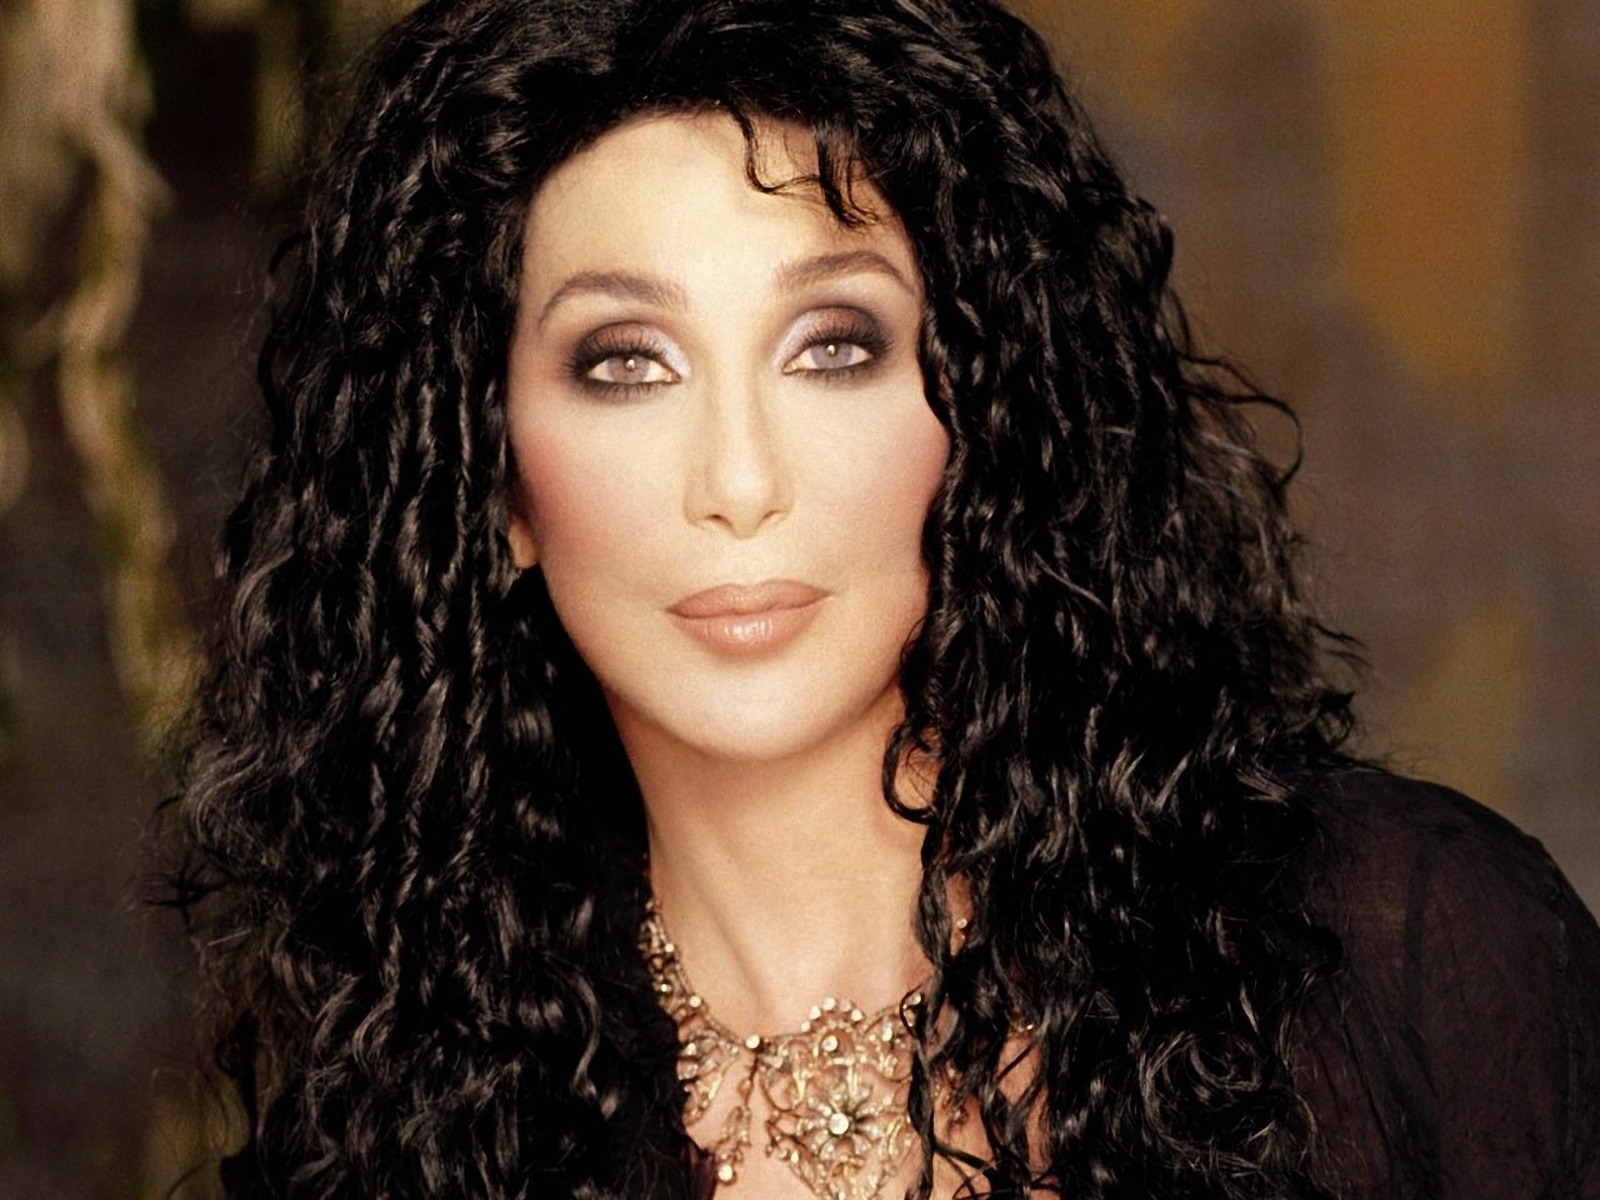
According to most eyebrow experts, the ending tip of the eyebrow should be at the same level as the beginning, this can vary depending on the effect you wish to accomplish. A small difference is not noticeable, and the contours of the skeletal structure and fat pads may dictate some modifications. An example is, tails ending lower than a small amount below the beginning look sad or aged. my dear friend Leonard Engelman once told me that he likes to end the tail of the brows a bit higher than the inside if the brow that made the eyes more a life I fully trust him with any tips he is an amazingly talented makeup artist that has many stars under his belt Cher for one Anne Margaret, Meg Ryan and so many more he is very tasteful and incredibly skilled artist.

cher


Eyebrow Styles


Basic Eyebrow Shape Guidelines

Eyebrow measurement guidelines are meant to assist in optimizing an individual’s brow shape, there are many companies that offer stencils to aid with shape if you have any doubts. For maintaining brow hair growth in the designed shape when considering  permanent eyebrow tattoo, working with the hair growth pattern is preferred to shaving and redrawing most likely you will be happier. The eyebrows do not have to be shaved to apply permanent cosmetics Tattoo needles go around and between the hairs when it is done correctly. The eyebrow shape can be enhanced toward the shape desired by coloring high in the hairs at the arch, in the middle or as needed in other parts. If a part of the eyebrow, such as the outer portion, does not allow the shape you want, then you can tweeze . The outer brow hair is usually sparse and not an issue for many people. Hair in the inner portion is usually plentiful, and at least part of the hair growth should be incorporated into the design. Eyebrows are drawn on first. When you are happy with the drawn on design, permanent makeup is applied on top of it, using it as a pattern or guide. You may draw them yourself, or let the tattoo artist help you. If there is a particular shape and thickness you want, bring pictures from a magazine to your appointment. This will save time and eliminate any miscommunication about your preferences.

diferent-shapesobf-browsface-shapes1

Drawing Eyebrows For Face Shapes And Facial Features

Uneven eyebrows may affect the shape you wish to attain. We are all born with one eyebrow shaped differently than the other, like one side of the face is different than the other or one brow higher than the other. Uneven eyebrow height usually occurs later in life as a result of the aging process. One side of the face will be lower than the other, and it is almost always the side you sleep on. The pressure on the skin decreases circulation for hours while sleeping, plus the skin gets pulled and slid around when I work on faces, I can always tell the side they sleep on. They usually have a crease and definitely sags more, as a well-known dermatologist that I visited told me that was my weak side! Ah didn’t like that. Women often appear to have uneven eyebrows because of the habitual raising of the forehead muscles – one side higher than the other –  Interestingly, the brow that women raise higher is actually the brow that is lower in the relaxed position . The muscle gets stronger and stronger, able to raise the brow higher and higher. Remember what Mom said is that if you keep making faces your face will freeze that way?  Some of the brow-raising women cannot relax their forehead muscles when they try and not only affects the brows it also affects the creases we make. Sometimes, older women are raising eyebrows to open the eyes more to see better that is one of the trades that plastic surgeons look for when assessing the eyes for a lift, and by the way, Insurance covers the upper blepharoplasty lid surgery the reason being off site obstruction !!. Sagging upper eyelids weigh down the eye and decrease, a visual field a test will show that lateral  peripheral and superior upper vision is affected. If the eyebrow is sagging below the brow bone orbital rim, insurance may pay for a direct brow lift (incision above the brow – not an entire forehead lift).

If one eyebrow is lower than the other or shaped a little differently, you have three choices:

1) Leave them uneven because you want all your real hairs to be growing in the permanent makeup area

2) Make small modifications to improve symmetry (color high on the low side and color low on the high side) – a compromise that would reduce but not eliminate eyebrow hairs in the cosmetic tattoo area, and may still be a little asymmetric

3)Remember we are not Robots similar eyebrows is good exactly the same no so good, it looks weird


Many women have not noticed that their eyebrows are not the same, and are less likely to notice it on other people. On the other hand, there are some eyebrow obsessed fanatics that are as upset over a one hair difference as an anorexic is with a one-ounce weight gain. We want to get the two eyebrows as similar as possible, but each side of the face is different – which is why it is of importance to keep it in mind  and it can be time-consuming to draw the eyebrows the same every morning. The shape of the skull differs from one side to the other in the curvature of the frontal to temporal bone, the prominence of the brow ridge, and the indentation above it each side of the body is different for a reason,masculine, and feminine, left and right has a different use and development. The contour of fat tissue is also different on each side. Each side of the face has its own set of muscles, nerves, and blood supply. Often, one side will be the dominant, stronger side. A person will typically raise the same brow to vary degrees all day long without realizing it. This adds to the challenge of drawing eyebrows evenly each day. Women tend to raise a brow when focusing in on something – like themselves in the mirror. One side of the forehead muscles tenses unnoticeably as you concentrate and become irritated by multiple attempts to complete the task. When you finally reach a satisfactory result, you go finish the morning routine. One last glance in the mirror and AYYYY ! they are uneven after you relaxed the muscles. The eyebrows are going to be in varying positions all day as you work and interact with others, especially if you have a tendency to be very expressive.

A note of caution: When drawing your eyebrows in preparation for cosmetic tattooing, this same thing can happen. The brows can be drawn on; look even, tattooed, and then later looks uneven. One of two scenarios can occur. 1) The muscles were tense and raising the skin unevenly at the time the eyebrows were drawn. They were thought to be even and were even – in the tensed muscle state. Once relaxed, they are uneven. 2) The muscles were relaxed at the time the eyebrows were drawn. They were thought to be even and were even – in the relaxed muscle state. Once you return to your normal raised brow position, they are uneven, so is a very good measure to pay attention to the process so you don’t want to erase your artist from the face of the earth, a well trained professional will be swear off this habits.

If a person raises a brow briefly or occasionally, the brows should be drawn evenly in the relaxed position. If a person keeps the same brow raised almost all the time, the raised side can be drawn slightly lower and flatter to compensate. If you are drawing the eyebrows yourself, do it hours before your appointment so you will have plenty of time to recheck them. If you are letting the permanent makeup artist draw your brows, your forehead will be most relaxed while gazing downward at the floor (but keep the head up straight). Don’t close your eyes because the lack of visual stimuli makes you more sensitive to touch and forehead muscles will tense when you have nothing better to do than wonder what is going on with your eyebrow shaping. Looking at the artist or straight ahead may cause the muscle to tense and raise a brow.

face exercises

BOTOX VS FACIAL EXERCISING

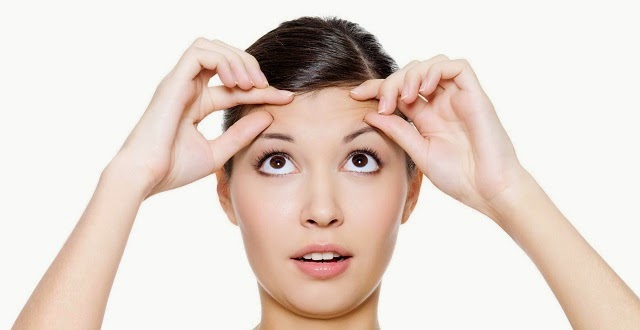
Repeated facial expressions leave wrinkles in the skin. The forehead over the raised brow will have more wrinkles and/or a different pattern of wrinkles. A person could try to break the brow raising habit by training not to react with the forehead. Placing a strip of tape( brownies)  upward from the brows can serve as a reminder every time you contract the muscles. Botox shots paralyze the muscle to prevent contraction and give the skin a chance to smooth out. It also helps the muscle forget what it was constantly doing (raising) and helps weaken the too strong hyperactive forehead muscles. It wears off in about four months for most people are different. After many repeated injections, it begins lasting longer and the muscle may become permanently paralyzed Mhmm!.  Vendors of facial exercising gadgets like Flex Effect tell us that deteriorating facial muscles cause facial sagging and that exercising these muscles will lift and tone the face, and increase circulation to feed nutrients to the skin.I like Microcurrent to retrain the muscles it really works and very fast. Lack of muscle use leads to atrophy. Daily exercise, which would contribute to strengthening the facial muscles and increase circulation is a great approach. There are electronic muscle stimulators like the Face master from Suzanne Somers that can give maximum muscle contraction with minimal skin disturbance in the contrary it will regenerate the muscles and the overall of the face. My opinion is that occasional Botox injections are beneficial for preventing wrinkles, but the muscles should be given a period of normal activity before repeat injections. How long the time lapse should depend on the severity of the case.


BOTOX AND PERMANENT MAKEUP

Botox is used in various areas for specific effects. Injected into certain locations of the forehead, it can raise the eyebrows. If botox is raising the brows at the time they are drawn for the eyebrow tattoo, the brow placement and shape will be different after the botox wears off. An eyebrow tattoo should be timed before or after the brow raising technique is in effect unless you plan to have repeated injections forever. Worth mentioning is that when the brow is raised by botox, it pulls the arch out in the spot that the botox determines, it can make the arch too far out by the pull and the shape looks a little odd.

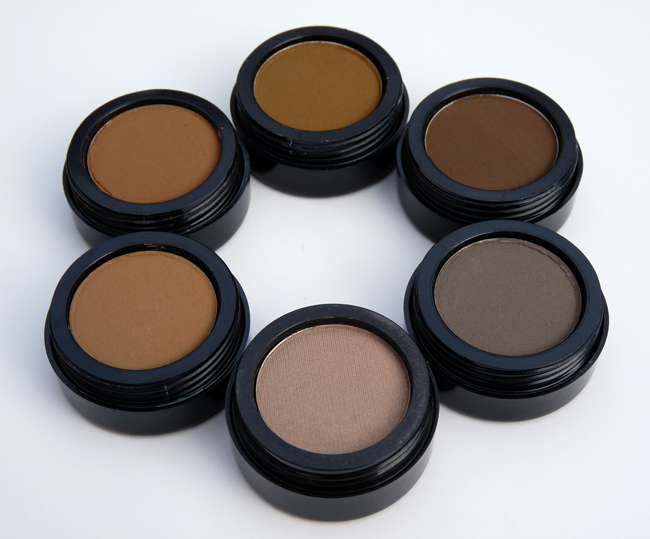
prod-powder-colors

Choosing an eyebrow color

Perhaps you change shades of hair color throughout the year and are concerned about the shade of permanent eyebrow color. The implanted color will coordinate with slight to moderate hair color changes. For more drastic hair color changes (red to brown,etc), all it takes is an appointment with your cosmetic tattoo artist after the appointment with your hairdresser, keep in mind the hair color changes so you keep up with the initial choice. You can change your eyebrow color in the same amount of time it took to color your hair. If you expect a drastic color change to be temporary, you might want to apply  temporary eyebrow color on top of the eyebrow tattoo during this time.

The guideline is to choose eyebrow color 1 – 2 shades lighter than head hair, unless you are blonde or gray, in which case you would choose a couple shades darker. You are not matching the color of your eyebrow hairs, merely creating a shadow behind it.I prefer their shades so they look more natural like real hair shades.

For women with little or no eyebrow hairs, the best technique will be to use at least two to three shades of color drawing Hairstrokes.!!! ideally not a plank of solid color it looks very unnatural and heavy. Multiple colors prevent the ‘blackened in’ look, and hairs are not just one color – they have many shades. The planned eyebrow shape should not be outlined, then filled in — this produces a “coloring book” look (the way children outline & fill in). Using the brushstroke technique for eyebrow cosmetic tattooing results in a very natural appearance. The edges will be more feathery instead of a sharp painted on look. The most natural looking brows are made by using 2-3 tonnes of brushstrokes on a soft powdery base shape.


“Layering” describes subsequent touch-up visits for a few additional strokes of same (monochromatic) or similar (analogous) color to produce varied depth and dimension. The monochromatic look is variations of lightness and saturation of a single color. The analogous look is one color being used as the dominant color and similar colors are used to enrich the look. The analogous scheme is similar to the monochromatic but provides more contrast. Recent strokes blending with older strokes which are fading off produces an awesome dimensional look. When this maintenance is performed on a regular basis (2-3yrs light blondes, 4-5yrs medium browns, 6-7yrs dark browns & black), you only pay a touch up layering price which is half. If you wait until the brow color is all or almost all faded off, the work is the same as a new job. If you want to reshape the brow, let it fade off as much as possible and do the different color strokes with temporary eyebrow colors. Don’t forget the fact that in three or four years the brows may have changed their shape or amount of hair.

Eyebrows are so important in the expressions and shaping of the eyes and face ,they play a dominant role. Eyebrows not only suggest a variety of moods but can also show your stages of age, emotional reactions and state of mind. If they are too thick, too thin, or arched incorrectly, you can look tired, depressed, angry, or surprised. Cartoon artists and theater makeup artists rely heavily on the eyebrows and mouth to not only convey feelings but also to help create the illusion of the character to be portrayed. Certain eyebrows and mouths are associated with certain personalities: smart, dumb, strong, weak, evil/mean/scary, nice, glamorous, young, older, and on and on. For instance, a skinny brow highly placed and highly arched would be more suitable for a damsel in distress than a woman of power – which would need a stronger brow placed low to medium with less arch. The villain usually has angry eyebrows. To make someone look like an alien from another planet, they usually upswing the tail or remove the brows altogether.

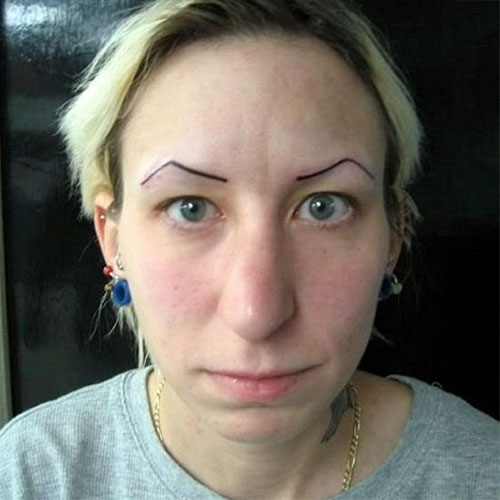
eyebrow needs help 64586218

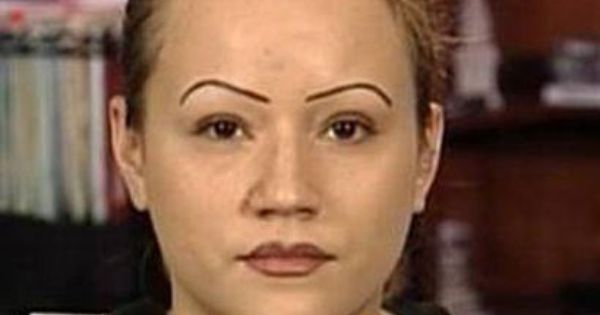
 Not so good brows


eyebrow-fail


wow-what-happenedThe surprised or startled look is avoided by placing the peak of the arch closer to two-thirds out instead of in the center of the eyebrow, and not over exaggerating it. A highly arched rounded half-moon arches have vein used for clowns for an example. Eyebrows that end higher than the beginning can look angry, devious, or alien-like Spock on Star Trek. Eyebrow tails that end too low have a whiny, sad or depressed  giving up look. You want your brows to represent you well. If the tail is too short, the brows look unfinished or like part of it was wiped off accidentally and don’t support your eyes. The tail should not be too long either – some people extend them way out through the temples like in the 1930’s. Brows should be a little thicker at the beginning and taper in thinner towards the arch. The tail continues tapering into the end. The beginning of the eyebrow should be above the inner corner of the eye, and should not have a downward hook that makes the brow look like you are frowning . That look closes  the eye and makes it look smaller.

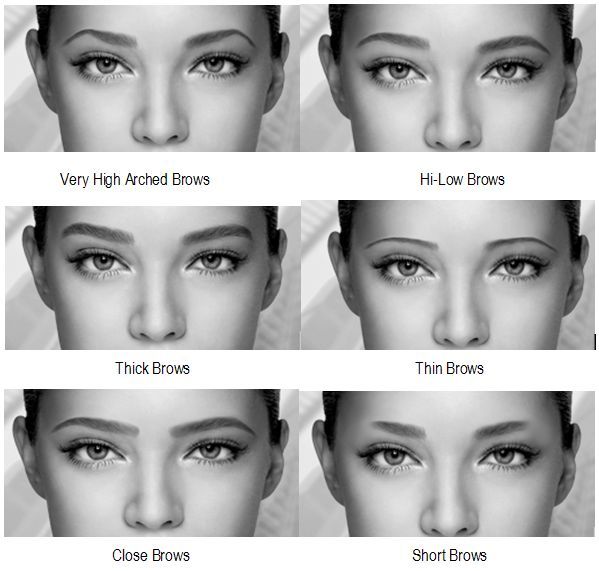
Have you ever noticed the many different eyebrow shapes? Do you know what you do or don’t like? How much curve or arch do you like? How smooth or sharp do you like the arch? Do you like your eyebrow styles thin, medium, or thick? The eyebrow pictures will provide comparisons. It is a good idea to collect photos of different eyebrows and match it to your style of face and the expressions that you are habitual with so at the end of your decision they go with your persona  instead of obviously not belonging on your face, it will be too late and they should be a complement.

Beauty tips are only suggestions, and it is wise to follow your choices with the help of a well trained professional. I recommend a couple of opinions at least in the case of permanent and nonpermanent eyebrow shaping. Don’t forget that in many cases when tweezing hair may not GROW BACK !They are not laws that the fashion police will enforce is your face and your confidence at taking here. If the beauty book says this face shape needs a sharper arch, and that face shape needs a rounded arch, but the eyebrow hairs don’t grow that way,use discretion and don’t make the fast decisions hat you can regret. We all have our favorite type of brow, and cannot insist everyone else wear their eyebrows the way we would like to see them. The goal is to get the basics right and make it look natural.

I get a lot of clients that want eyebrows that are not possible to create or look just very very wrong, so I show them the difference and for the most part they change their minds once they see it.


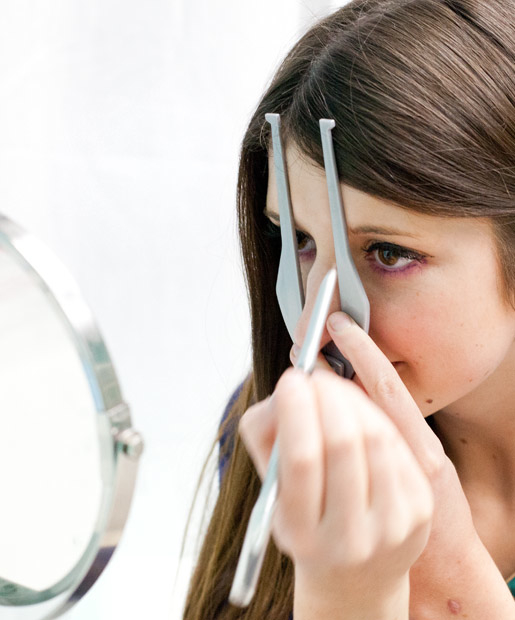
Eye brow Buddy

The Brow Buddy 


Tools and tips that we suggest


The space between

The eyes determine if they are average, close set, or wide set. The distance between the eyes is normally the width of one eye. When the eyes are close set, the brows can be groomed further apart so the space between is the width of one eye to create the appearance of more widely spaced eyes. When the eyes are wide set, the eyebrows can be groomed closer together so the space between is the width of one eye to create the appearance of more closely spaced eyes.

Typically, the eyebrow begins above the inner corner of the eye. A tad shorter or longer is ok as long as it isn’t too much. The differences between the two sides of the face can affect the look of symmetry on this also. Women can carefully place each eyebrow to begin above the inner corner of each eye, and then spend a lot of time trying to figure out why it doesn’t look right. Women will zero in on the center spot above the nose and view length of distance to the right for the beginning of that eyebrow, and length of distance to the left for the beginning of that eyebrow. One brow will look like it comes in closer to the center than the other, but both are at the same point above the inner corner of the eye. The challenge here is that one side of the face has a greater distance between the center of the nose bridge and the inner corner of the eye – more so on some than others so here you can use a stencil to me sure it isotherm tools in the market that can aid with this desition.

Mark the center spot above the center of the nose bridge. Don’t look down the nose for a straight line because many noses lean off to one side or the other. With a flexible measuring tape, measure millimeters to the left to a general starting point above the inner corner of that eye, then mark the same millimeters to the other eye. Depending on how much difference in length there is to each eye, compromise a couple of millimeters the direction needed on both sides so that they are both about the same distance from the center starting point try to draw it in and then make a decision and changes keeping in mind the asymmetry of the face. It has been my experience that women are happier with a symmetrical distance from the center point than symmetrically placed above the inner corner of the eye.

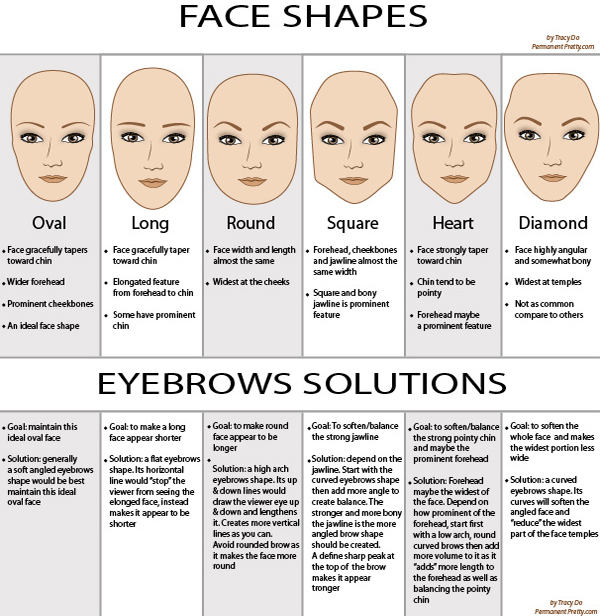
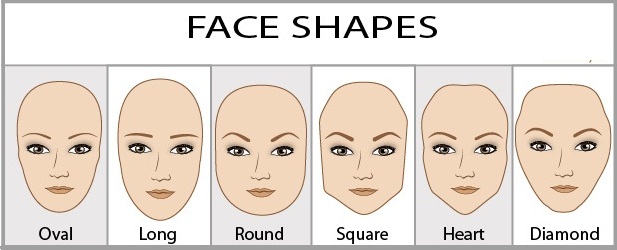
Eyebrows-for-Your-Face-Shape

Eyebrows for different face shapes

The principles behind particular eyebrow shapes for different face shapes are really quite simple. To achieve harmony, we incorporate five principles of art and design: 1) Proportion – the appreciation of line and scale to give the illusion of better proportions of facial shape and features. 2) Balance – the observance of equilibrium to balance the face. 3) Emphasis – making the brow a focal point to detract attention from other features. 4) Rhythm – the flow and movement of brow lines to create harmony in relation to facial structure. 5) Unity – the coordination of smooth lines and sharp angles to unite all aspects for a total look as a whole.


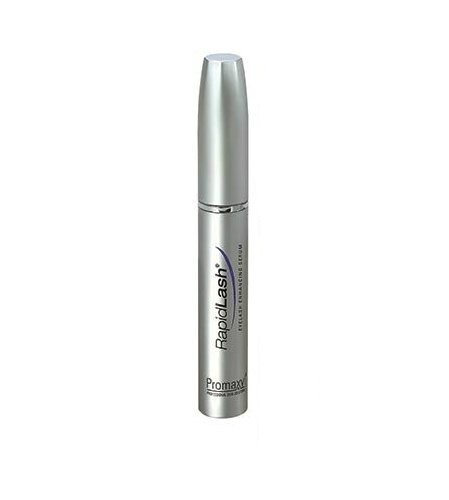
rapid-lash-lash-enhancer


RapidLash Eyelash & Eyebrow Enhancing Serum

RapidLash is an groud breaking paraben-free eyelash renewal serum that helps promote healthy, natural lashes and borws and improve the overall appearance and condition of your lashes and brows.


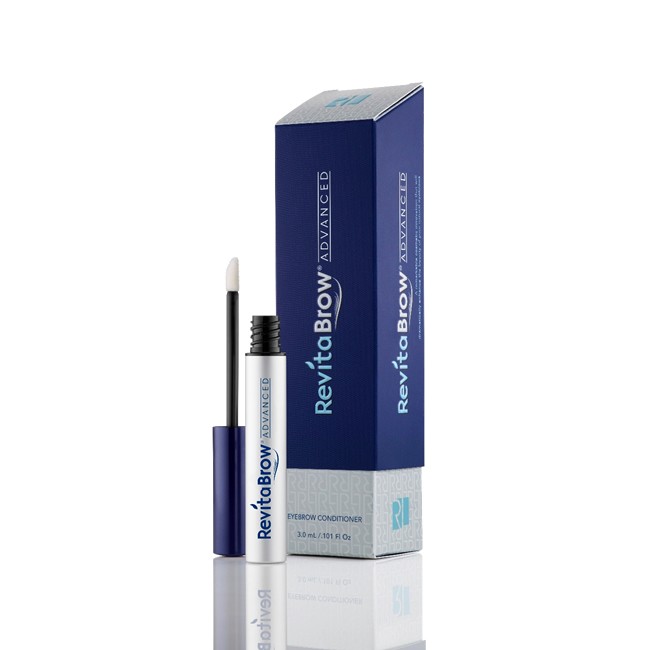
revitalash-revitabrow-advanced


Revitalash RevitaBrow Eyebrow Conditioner

Winner of THE BEST Treatment For Perfect Brows in the 2015 New Beauty Awards!
Get beautifully shaped eyebrows quickly and easily. RevitaBrow® Advanced uses the power of peptides and botanicals for strengthening and conditioning. Revitalash RevitaBrow Eyebrow Conditioner is a breakthrough, category leading eyebrow conditioner featuring a high impact, proprietary technology for iconic-looking eyebrows.


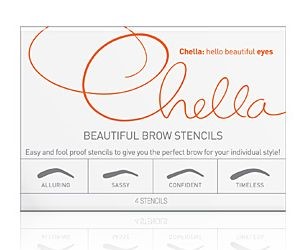
file1-pic9_2


Chella Beautiful Eyebrow Stencils

To guide you in creating the perfect brow, Chella has developed four templates to help you fashion a beautiful brow that is just right for you. Pick from Alluring, Sassy, Confident or Timeless Chella Stencils.


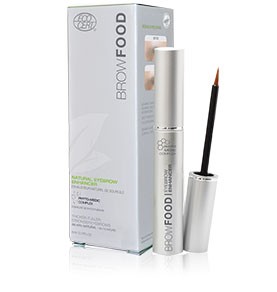
pnb2


LASHFOOD BROWFOOD Phyto-Medic Natural Eyebrow Enhancer

Formulated for those experiencing brow loss or thinning due to aging or overly plucked brows.


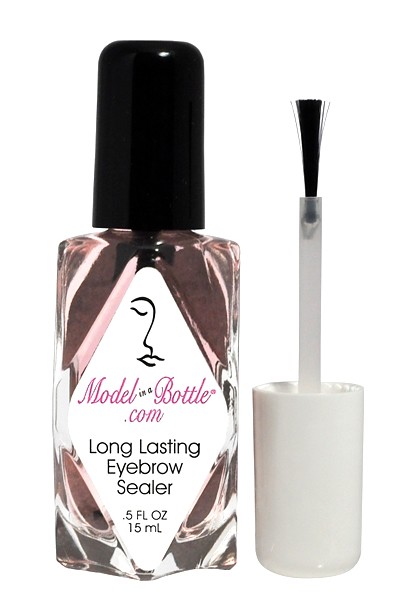
modelinabottlelonglastingeyebrowsealer


Model in a Bottle Eyebrow Sealer

Eyebrows give expression to your eyes and frame your face. Now with Model in a Bottle? Long Lasting Eyebrow Sealer, you can be confident that your brows will stay in place all day.


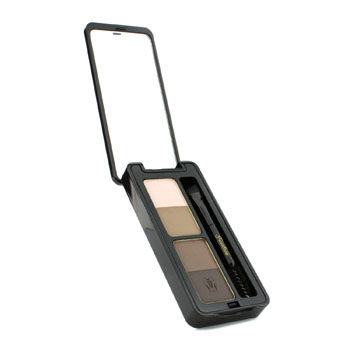
16758580714


Guerlain Eyebrow Kit

Eyebrow Kit (3x Powder, 1x Highlighter, 1x applicator) – # 00 Universel

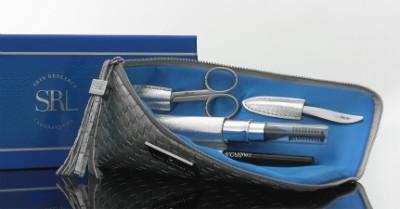
brilliant_brow_kit_sm_100614_grande

neuLASH Brilliant Brows Set

Perfect your face framers with our limited edition Brilliant Browsset.  An essential set for precision brow shaping and defining in a beautiful zippered bag. Perfect for at home and on the go!


The difference between Nontouring, Strobing, and Contouring.


The difference between Nontouring, Strobing, and Contouring


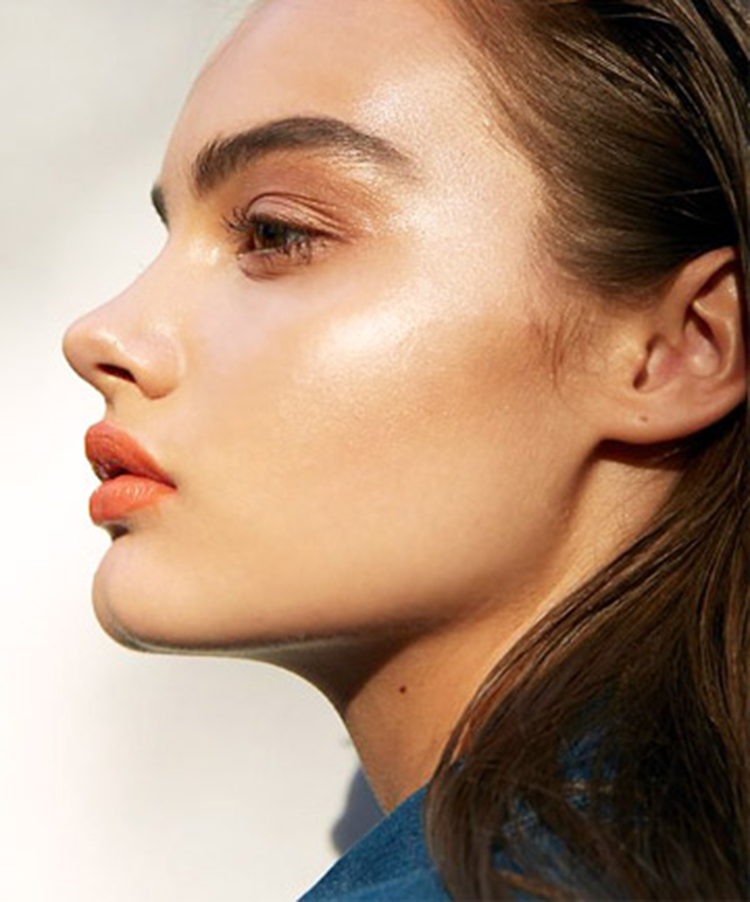
intro-totalbeauty-logo-highlighters-for-next-level-glow


WOW!  the support this past week has been tremendous. We are so thankful for your help, it means so much to us, it is what keeps us going. The fact that you engage with our writings gives us such  valuable feedback is of tremendous  value to us. On week 269, this post is about the difference between highlighting  shading, strobing and now the new trend of “Nontouring”, a whole new way of accomplishing the highlight and shading in a more “NATURAL” way, to me if you are wearing make up right, there is a little bit or a lot, you are already out of the true term natural, so here we may say light and very well blended make up techniques,won’t you agree? Here we are sharing a few different perceptions and techniques and different videos from contributors that are very gifted. Enjoy and share with others and don’t forget to click like.

We wish this post finds you heathy, happy and in ideal abundance from all of us at isabelsbeautyblog.com


Nontouring


By now, non-touring is the next big makeup trend, according to HelloGiggles. And it’s the easiest and most practical one of them all, at least for now.

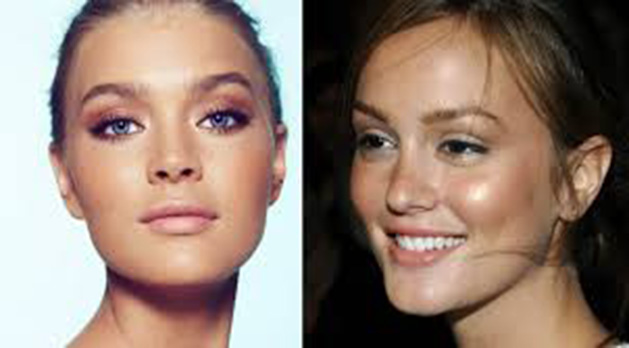
What is this “non-touring” procedure? Well, it’s basically a super hip way of saying “natural-looking, dewy skin.” Yes, that’s it. It’s all about keeping makeup light (especially the foundation and primer portions) and using a great Luminizer to give your face a radiant glow ( like a wet look). So, fear not! You can still put those strobing products to good use to get your cheekbones sparkling and less you think that you may want to try what is just out in the market “for the only purpose of non-touring” really we can use are common sense also and make the older products work!!.

This makeup trend is coming around just in time for summer to have something new for the cosmetic industry to have the opportunity to launch new products for us to play with, and the timing couldn’t be more perfect. Because this lightweight approach to makeup is just what your skin needs for a day out in the scorching heat no need for bloating or powdering so we don’t have to be overly conscious about shine.

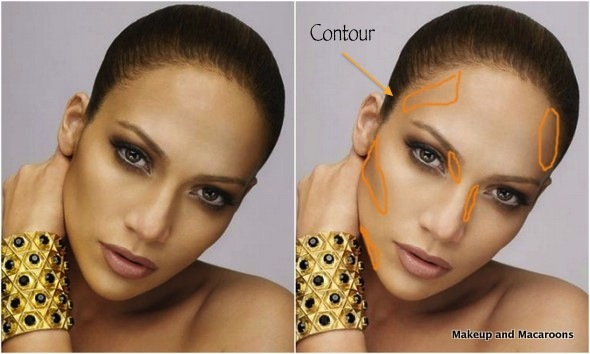
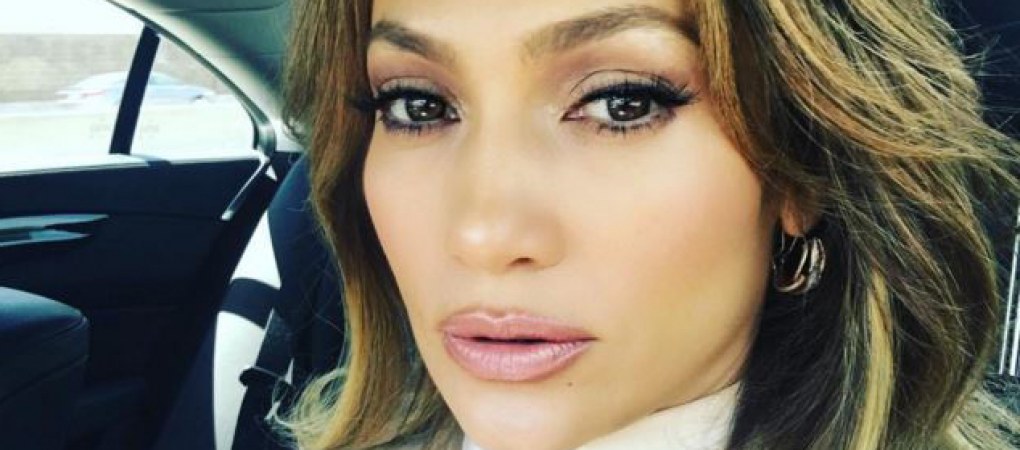
To get the ideal nontour look, start with a light coat of  primer to create a smooth base. Then, even out your complexion with a tinted moisturizer or a very light concealer, only on the places that need it not all over the face or you will defeat the purpose of the look. The last step is all about strategically placed highlighter. Make sure to hit your face’s natural high points, like along the browbone, on the tops of the cheeks, and the center of the nose, here Jennifer Lopez is wearing avery well done Nontour, to me she is the one with Scott Barnes that started this trend many years ago and I love and have used his amazing products to produce these effects. I usually mix luminizer with either the foundation, moisturizer or the cream blush which I usually apply under the foundation to create the appearance of being under the skin and not the blush sitting on top and obviously blush look.

According to Renee Sanganoo:


1. “Start with a primer that’s right for your skin type I prefer the sheer creepy kinds. If you’re oily, don’t use something that’s super matte. Look for one that’s dewy or has a luminous shimmer, make sure you use an astringent on old skin so the coverage once you apply the luminous shimmer goes on evenly and not spotty.

2. Since this is a more natural look, a tinted moisturizer or a BB cream should be used instead of using a heavy, full coverage foundation, I like colored moisturizer. If you have problematic skin or blemishes, use a concealer as a spot treatment, and if it is really severed don’t do this procedure at all do to the fact that it will emphasize the blemishes in a very big way.

3. “The last step is highlighting the now non-touring, which is obviously a big trend right now. There are a lot of different highlighters, so it’s all about choosing what flatters your skin tone. If your skin is lighter, look for one with frosty pink undertones so it doesn’t make your skin look orange. If your skin is warm or darker, pick a golden bronze highlight. Brush  the powder kind or apply with sponger a brush the creamy kind on the highlight on the planes of the face where light would hit naturally-above the cheekbones, under the brow bone, down the bridge of the nose, and on the cupid’s bow.

JLO touring

The difference from contouring to nontouring

contouring and nontouring

If you’re still confused about how non-touring is different than strobing  well, so are we, the only thing. like strobing, non-touring is essentially using highlighter on your face to create more dimension. Lets please keep in mind that when the light hits it everything looks larger and every little blemish shows. But regardless of what name this trend is given, we dig the luminous look.


Strobing

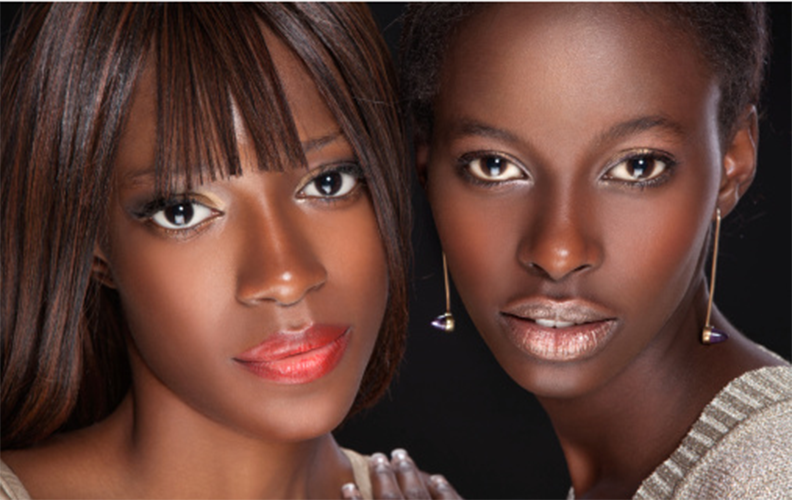
Black girls strobing


WHAT IS STROBE MAKEUP? Difference between Contouring and Strobing?

According to http://vanitynoapologies.com/how-to-diy-strobing-highlighter-makeup-tutorial-on-indian-skin/

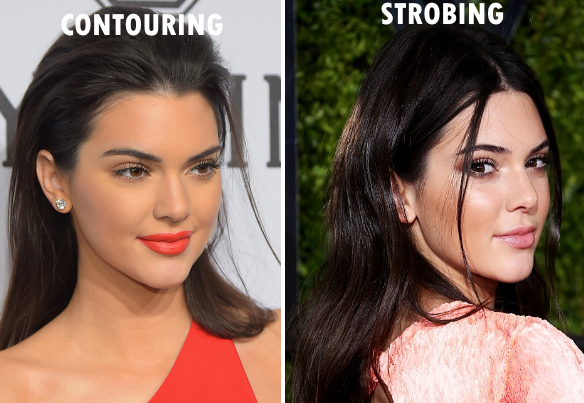
Strobe means a flash, like the flash of a camera or a strobe light in nightclubs. Now imagine standing under a strobe..all the high points of your face shall reflect light or in simpler terms, glow! That’s it! That is what we try to achieve in this technique. So basically strobing is HIGHLIGHTING. Highlighting but without a touch of contouring which is accentuating the hallows of our face with a darker color to make the effect of residing the area (so your cheekbones, brow bones, the center of your forehead, down your nose, cupid bow and on your chin basically anything you wish to protrude);welcome natural looking dewy face. To make it even more easier, refer to the picture below and see the difference between contouring & highlighting and strobing.

While strobing isn’t exactly new to the beauty game it’s certainly one of the buzz words to capture our attention.

If you’re not into following trends or aren’t into a sculpted, highlighting and shading, completely contoured full face of make-up, take note because maybe strobing is for you is what you want to try.

So, let’s begin with the basics. While contouring is about creating a defined look by shading and highlighting the face strobing places a much heavier focus on highlighting and politely suggests getting rid of  shading all together.

Think of strobing as basic highlighting’s older sister or best friend– there’s a lot more impact and if you’re one who prefers a dewy, fresh-faced look then this technique is perfect to add to your repertoire and to have lots of fun with now that summer is almost here, great time to practice.

When Strobing you can use cream or liquid products an finally grounded powders and thanks to the beauty industry – who are always ready to fill a beauty gap – specialised strobing products do exist but using your regular highlighter will work just the same, play practice makes perfect always aim for a natural look.

So how do we actually conquer strobing? Always start off with prepped and primed skin make sure you use light moisturizing products, so ensure that you’ve moisturised before applying any product let it sit a bit and blot excess so you have the shimmer look in the designated places. One of the most important things to remember when it comes to strobing is that your product of choice shouldn’t have any physical large visible chunks of glitter in it that will obviously scream bad job or cabaret look; the product should bring more of a sheen than a disco ball to your face – plus visible glitter will only accentuate problem skin or pores little lines and all the details that we girls are not so friends with.

After you’ve applied your base ( moisturizer, primer and foundation highlight the areas of the face, as mentioned earlier, that the light naturally hits. Avoid applying the products to any areas that may be suffering from a break out (we don’t want to highlight blemishes) and then if you’re keen to finish the look off with a hint of bronzer or blush be sure to use a matte product. These will complement your looks without detracting from the glow by adding tonnes more glitter and or shine to the face, since blush goes on cheek bone also I like to mix it  with a tinny bit of the Luminizer so they blend better .

Fair skin tones should look for champagne highlighters or strobing products while light – medium tones can also use pink tones. Olive skin or those with yellow undertones should opt for golden hues products while deep skin tones can use terracotta or bronzed pigments.

 We’re not covering up with tons of matte powders here, instead it’s actually the opposite. Try mixing a luminzer into your moisturizer for a brighter look all over use a concealer on any blemishes that you wish to cover.Yes, it’s really that easy.

big diference

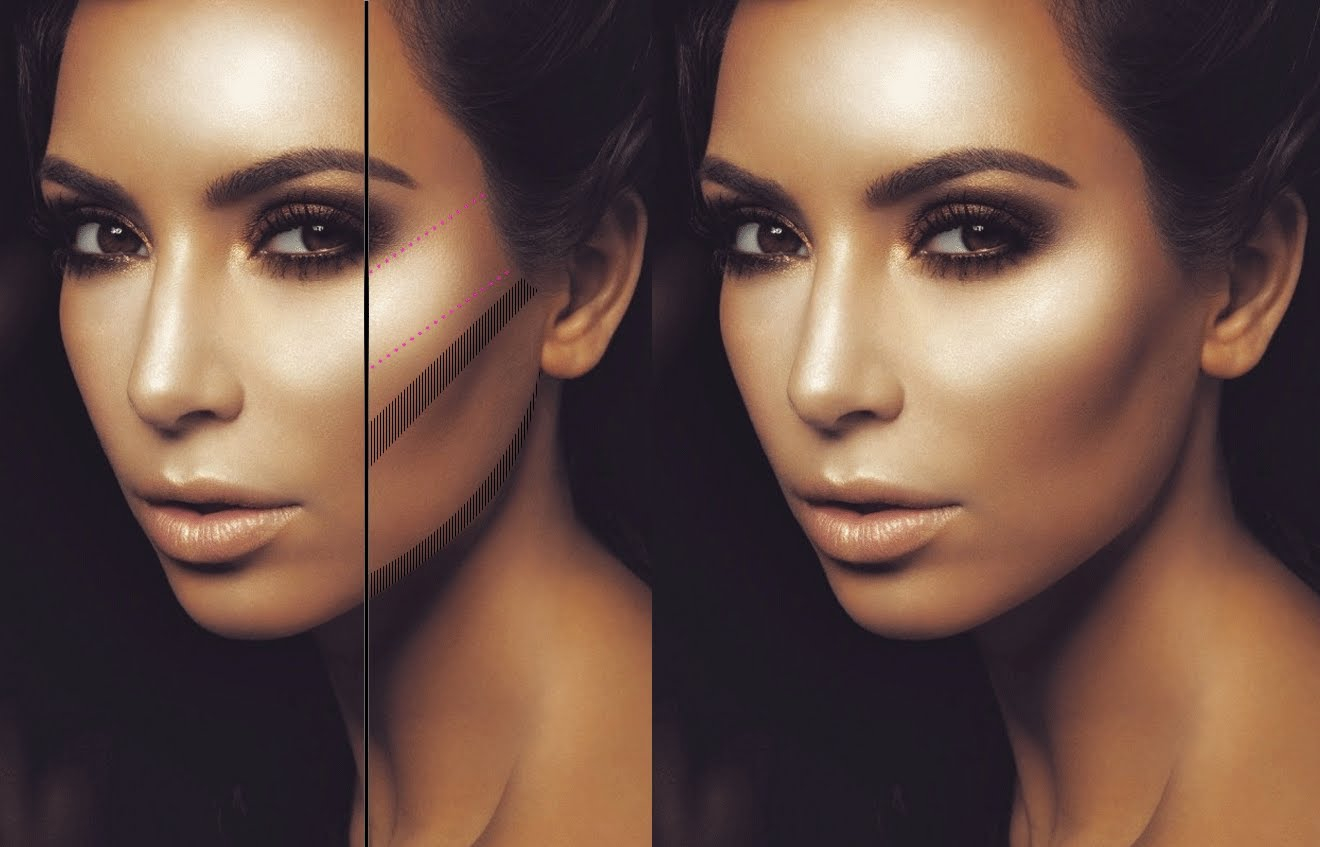
What is strobing, you may ask yourself? It’s a fun term for highlighting, basically is using a dewy looking product in the high points of your face and also your body, how about that, J Lo and Scott Barnes have used this technique for years now with great results, lets be cautious not to over do it. Extra highlighting will give you a dewy, shimmery,But because “dewy” can turn into “sweaty” super-quick, here are a few tips to keep you on the right track.

MARIO DeDIVANOVIC shows Strobing on Kim Kardhasian genius work

https://youtu.be/34u4GlAH_Ng


Highlight

how-to-contour-and-highlight

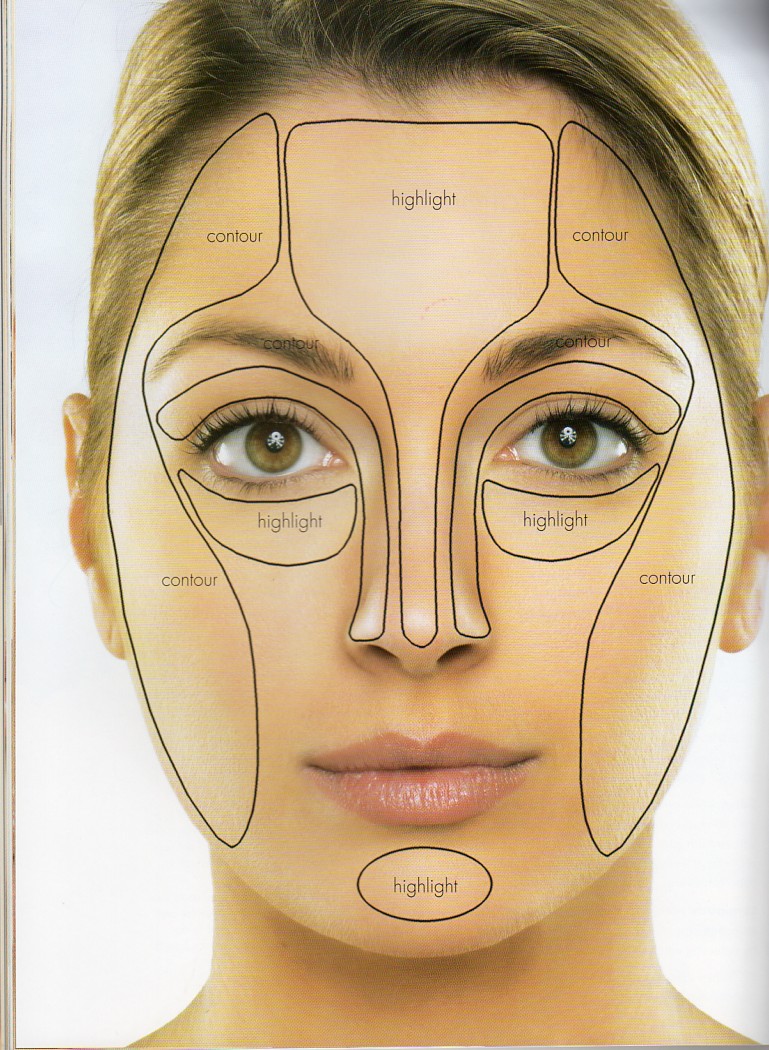
Is the opposite of contour. Highlighting is the process of enhancing; visually enlarging, drawing attention to a specific area, a feature highlight shade is usually a lighter shade.


Contour

highlight-contour-illust056

Contour is the opposite of Highlight.
Everything that we contour we push away from the eye to make it appear less visible, in other words to minimize or give the illusion that is smaller.
A contour shade is usually a darker shade that give your features more depth and definition by contrasting against the lighter shades used on your Skin.


cosmo-infographic-contouring-v2


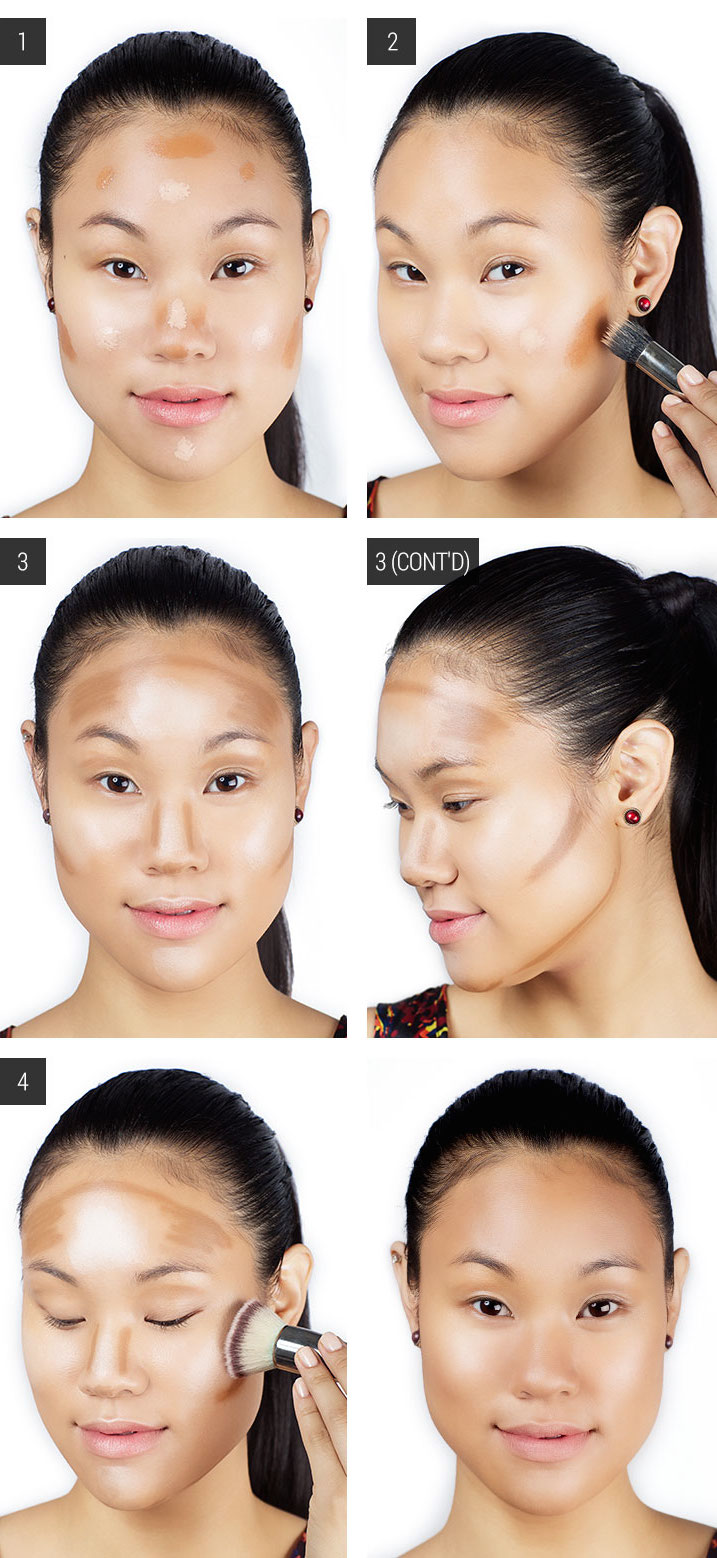
1. Prep your face with two shades of base. “Dot on a foundation that’s one shade lighter than your skin tone in the center of your face, and another that’s one shade darker than your complexion around the perimeter,” . Our model Jess used IT Cosmetics Bye-Bye Under Eye Concealer in “Natural Medium” (as the light base) and “Deep” (as the dark).
2. Blend the two shades. “Using a blending brush, blend the two shades on your face to create the subtle illusion of depth and dimension.”
3. Map the contours and highlights of your face. “Mark the areas you want to contour — the hollows under your cheekbones, your temples, along your hairline, jawline, the sides of your nose, the tip of the nose, and the crease of your eyes — with a brow or a concealer pencil,” . Brow gel pencils are really concentrated, yet very smudgeable and it’s easy to control the placement of their dark pigment, making it perfect for contouring. “Next, use an all-over cream highlighter on the tops of your cheekbones, on the center of your forehead, the bridge of your nose, the center of your chin, and on your cupids bow.” Here is used IT Cosmetics Brow Power Perfector Gel Pencil in “Auburn” and Mac Cosmetics Cream Colour Base in “Luna.”
4. Blend the two for a flawless finish. “Create that sculpted airbrushed effect using a flat top dense brush to buff out the two shades to perfection,” . Here,is used IT Cosmetics Heavenly Luxe Flat Top Buffing Foundation Brush.
Lastly, bump up the contours and highlights with MAC Sculpt and Shape Powders and consider yourself contoured!,here is used “Definitive” to enhance the contoured areas on your face and “Emphasize” to illuminate the highlighted spots.


Contouring By Scott Barnes


JLo contour


Kim Kardasian


Highlighting and contouring according to rookie rookie

Highlighting and contouring are two crafty li’l tricks that you can use to enhance your bone structure and make it look like you’re constantly under the most flattering movie lighting possible. Even if you’re not going to an event, it’s fun to experiment with elements of ~drama~ in your makeup. This tutorial will show you how to use foundation, concealer, and powder to put a spotlight on your natural gorgeousness. Let’s get to it!

What you’ll need:

A note on picking your contour and highlight colors: Don’t choose shades that are drastically lighter or darker than your natural skin tone. If you have fair skin, use a very light shade to highlight and a fair to medium color to contour. If you have darker skin, use a medium-toned highlight and a contour slightly deeper than your skin color. If you have very dark skin and can’t find a deeper shade of foundation to contour with, a dark eye shadow will do the trick!


Step 1

step 1

After cleaning and moisturizing your skin, apply your foundation all over your face using a foundation brush or your fingers.


Step 2

step 2

Blend your foundation to about midway down your neck. Since my skin is naturally darker there, this step makes the difference between my face and neck less stark.


Step 3

step 3

Mix your lighter concealer or foundation with your regular foundation using a brush or your fingers.


Step 4

step 4

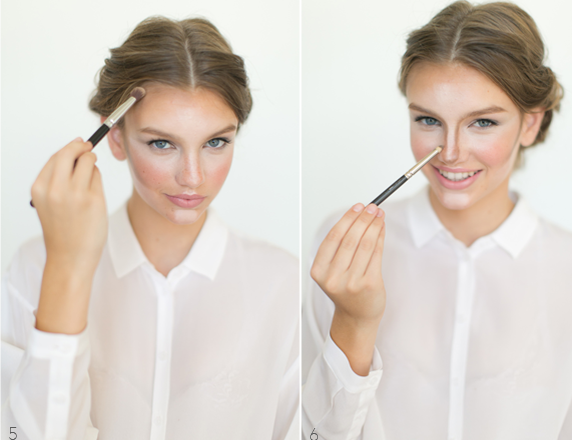
Using a concealer brush or your fingers, apply the lighter makeup mixture to your T-zone (the area right above your eyebrows and the spot between them, if you have one; down the center of your nose; the middle of your upper lip; and the middle of your chin), your under-eye area, and right above your cheekbones.


Step 5

step 5

Paint a thin line with this highlighting mixture right above your jawline.

step 6

step 6

Use a brush, sponge, or your fingers to blend your makeup until there is no visible line of demarcation between the highlighter and your foundation. You want this to look seamless.


Step 7

step 7

The “contour,” or darker makeup, goes on the sides of your nose, right under your cheekbones, and around your hairline (the darkest areas on the diagram above).


Step 8

step 8

Blend in your contour just like you did your highlight. Easy, right?

Step 9

step 9

Apply finishing powder to your whole face to get rid of any excess shine and set your makeup.


Step 10

step 10

Add blush to your cheeks, moving upward from the apples to your temples. This will add dimension to your face and give you a pretty glow.

step 10 b

Wow! You’re all set. Now go astound the world with your flawless skillz!


Bronzed Contoured & Highlighted Makeup Tutorial


Why & How I Contour & Highlight


How To Cream Highlight & Contour


How I Contour My Face With Anastasia Beverly Hills

Contour Kit


How To Contour and Highlight


HOW TO: CONTOUR AND HIGHLIGHT YOUR FACE!


61tiEeqijTL._SX522_

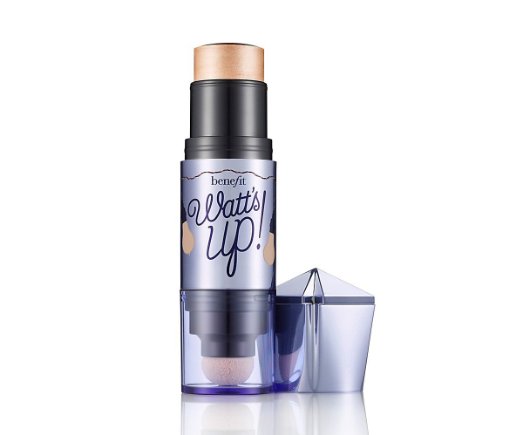
Benefit Cosmetics Watt’S Up! Soft Focus Highlighter for Face


10685431002

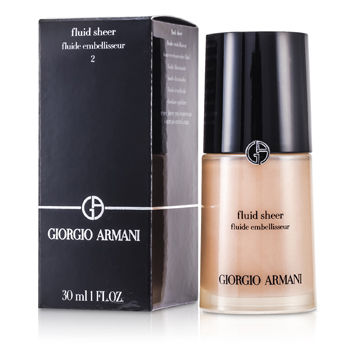
GIORGIO ARMANI Fluid Sheer

  • This fluid sculpts & fine tunes your complexion
  • Ultra light & provides seamless coverage
  • Available with a range of versatile shades
  • Wear alone as a makeup base
  • Can be mixed with foundation to increase radiance & color
  • Or used over foundation for highlighting & contouring
  • Suitable for all skin types


11403931002

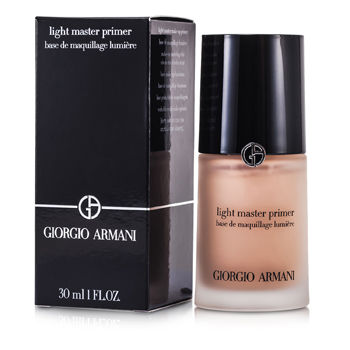
GIORGIO ARMANI Light Master Make Up Primer

  • Helps form a mirror-like veil that intensifies cheekbones & arches of face
  • Formulated with a Micro-fil pearl that transforms colors when reflecting light
  • Optically sculpts facial contours by brightening
  • Relieves & comforts dry, tight skin
  • Ensures a long-lasting foundation
  • Creates a fresh, radiant & evenly-toned complexion

18316802602

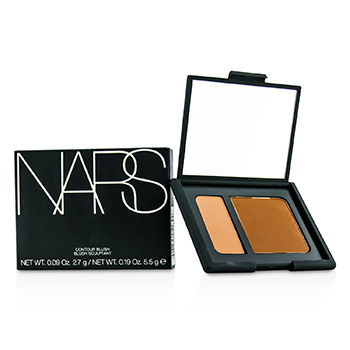
NARS Contour Blush

  • This blush provides two contouring shades
  • Deeper shade gives a strong definition to sculpt cheeks
  • While lighter shade imparts a sheer luster on the high points of the face
  • Renders a natural look with 3D effect for the face
  • Lightweight & adheres well on skin for long lasting wear

09662002602

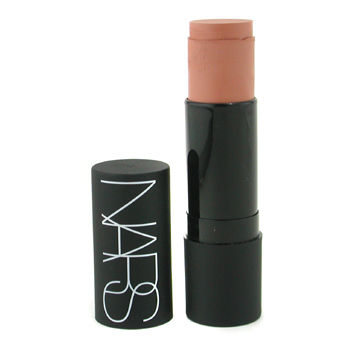
NARS Multiple Bronzer

  • Multi-purpose bronzing stick for eyes, cheeks, lips & body
  • Imparts a sun-kissed glow & contour for face
  • Rich in anti-oxidant that helps strengthen, support & repair skin
  • Oil free, cream to powder texture for easy application
  • Renders you a healthy, natural complexions


History, Uses, and Tips of Lipstick


History Of Lipstick


Hello and welcome to our blog we are grateful for your visit and the likes without we wouldn’t be here, on week 265 we are sharing a post on lipstick we get a lot of requests and we put together a bit of history and some tips on lipstick application, I like to dedicate the post to our friend Oriah Mirza she is fabulous all the way around and the other day when we met for lunch in Malibu we went to Sephora to play and she asked me about lipsticks and I realized at that moment how much fun it was to travel through the amazing selections of colors textures liners and glosses so I decided to dedicate the post to Oriah Mirza and her beautiful lips.  Enjoy the post and please share and like if you do, see you guys in two weeks and thanks again for your time and loyalty, is well appreciated, from Isabel’s Beauty Blog team.

http://www.lipstickhistory.com

The dawn of prehistoric times, humans always had the need to distinguish themselves from others. Clothes, shoes, tools, jewelry and cosmetics were first of the ways we managed to do that, but lipsticks and facial paints were one of the most noticeable ways to change our appearance. Hunters painted their skin to better blend in with their surroundings, priests and acolytes decorated themselves to honor their gods and beliefs, and young people used every way imaginable to make them more pretty and presentable to the opposite sex.

However, in the long prehistoric periods, lipsticks were made only from readily available natural sources – fruit and plant juices. As early civilizations started appearing in the Middle East, North Africa and India, advanced manufacturing processes enabled mankind to finally start producing new kinds of lipsticks. First ones to do so were Mesopotamian women, who ground out precious gems and used their dust to decorate their lips with glimmer and riches. Women from Indus Valley Civilization used lipstick regularly, but it was Egypt where the manufacture of lipstick received many advancements. There, royal members, clergy, and high class used several types of lipsticks, some of them with recipes that contained poisonous ingredients that could cause serious illnesses. It was there that carmine color became popular, extracted from the bodies of cochineal insects, technique that is widely used even today

Lipsticks and other cosmetic products had a very important impact on our development. Here you can find facts about their journey through the ages, from the ancient kingdoms in the Middle East to the phenomenon of global fashion.

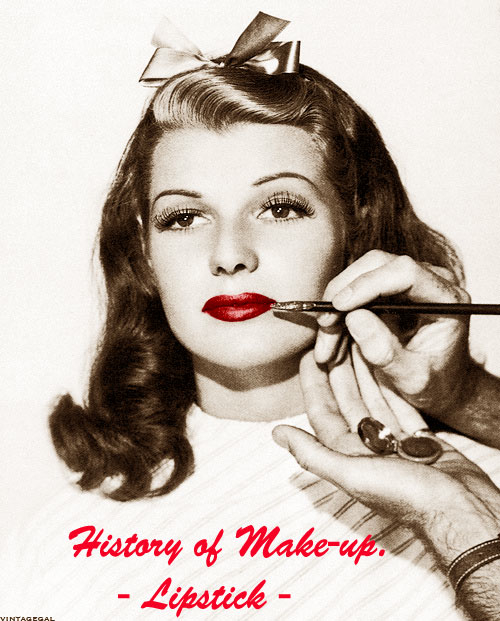
History-of-makeup-Lipstick great vintage poster

History of Lipstick spans the entire modern history of mankind. Here you can find out more about its incredible journey from the Ancient Egypt, harsh times in medieval Europe, to the worldwide popularity that it enjoys today.


Who Invented Lipstick?


Determining who invented first lipstick is not an easy task because they were present in our fashion from the earliest moments of our history. Here you can witness how that journey went, and how lipsticks became what they are today.

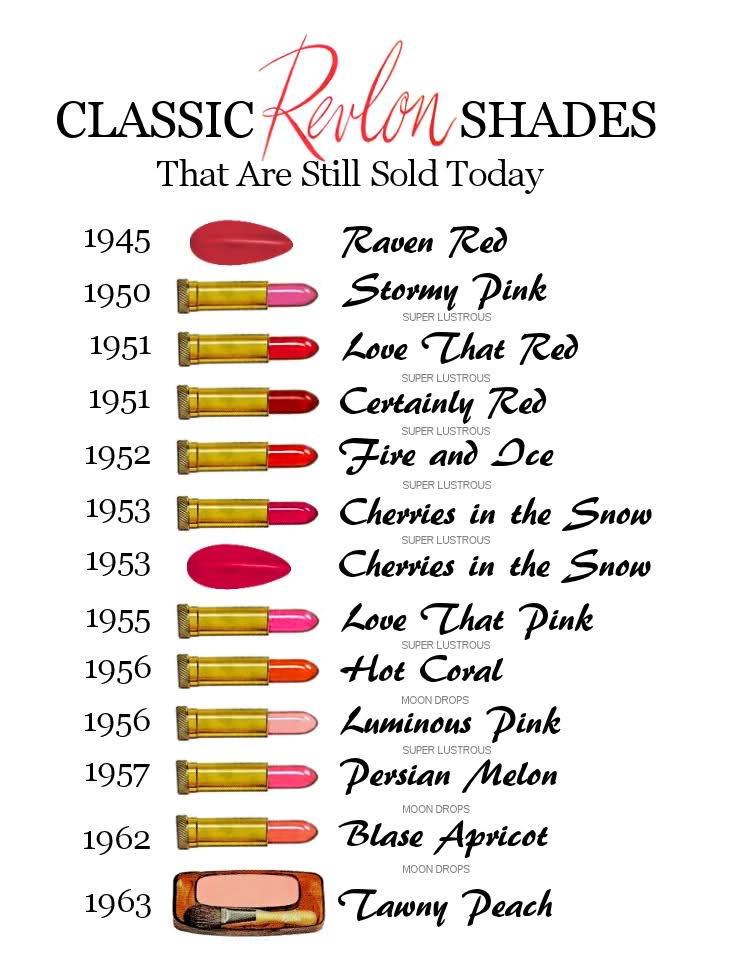
classicrevlonshades

Lipstick Timeline

Lipstick timeline through our history is full of interesting events and moments when it had the significant impact on our culture and fashion. Here you can find out when those important moments happened on the lipstick’s journey to worldwide popularity.

Lip Gloss History


Even though opaque lipstick can be found everywhere today, its popularity is heavily threatened by lip gloss, transparent substance that showcases our lips in more natural and subdued colors. Also, the rise in its popularity can be found in its beneficiary medical properties.


Max Factor History


History of cosmetics is full of influential companies that had a great impact on worldwide fashion, but Max Factor managed to distinguish itself by very significant innovation in the field of lipsticks by introducing to the public Lip Gloss.

Cosmetic product always fascinated human race with their ability to make us distinct, pretty and more confident. No matter how large fashion changes swings occurred during last few thousand years, some cosmetic products always managed to remain popular and in widespread use. Soaps, shampoos, eyeliners, nail polishes, make up paints, and various medicinal and protective balms survived trough the rise and fall of many civilizations, but one cosmetic item managed to survive for a long time without widespread popularity, only to become one of the most important cosmetic items of a modern woman – Lipstick.

There is no way for us to determine who discovered lipstick first. It was with us from the prehistoric times when women and men used various potent fruit and plant juices to mark their faces in religious ceremonies or to make themselves more pretty for the opposite sex. Of course, a very large reason for lipstick use was also for medicinal purposes, to protect our lips from natural elements such as dry wind, moisture, and the sun (lip tissue does not have melanin that protects us from UV rays).

As modern civilizations started to make rapid advances in technology and chemistry, first manmade lipstick appeared as a cosmetic tool for the wealthy women and men of ancient Mesopotamia, Indus Valley Region and Egypt. Egypt especially managed to advance the art of lipstick making, managing to produce bright red carmine lipstick that is made from cochineal insect pigments, which is a timeless technique that is in use even today. Those lipsticks were made from powdered and processed bodies of cochineal insects or purple extracts of seaweed, mixed with various oils and waxes. History book will forever remember various important Egyptian figures that were depicted in their hydrographic images with various cosmetic enhancements – Nefertiti’s black eyeliner or Cleopatra’s bright red lips.

History of the lipsticks tells us that European dark Middle Ages almost totally removed lipstick from the fashion. Harsh living conditions, constant wars, poor medicine, plagues, lack of food and many other factions led to the period of around 1000 years where very little or no advancements were made in arts, sciences and many areas of knowledge. In such environment, Church was the only constant presence in the mind of the Europeans, and the church was responsible for maintaining fashion and common laws. Sadly, it was them who actively discouraged lipstick use, linking it to the Satan worshipers and cults. Because of that, only the female population of the lowest status (prostitutes) continued to use lipstick on regular basis, with actors occasionally painting themselves in facial colors.

One of the most important moments in the lipstick history happened during the Islamic Golden Age when famous cosmetologist and chemist Abu al-Qasim al-Zahrawi managed to perfect his formula for solid lipsticks. These perfumed sticks represent the basis for all the modern lipstick that can be found in any fashion shop.

Several centuries later, lipstick returned to the popular fashion during the reign of English Queen Elizabeth I (1558 – 1603), but only for a short while. It was only in late 19th century when industrial advancements enabled French cosmetologist to start producing lipsticks for commercial sales. From that point, lipsticks slowly become more and more popular. New inventions enabled their packaging to get the form we know today (swivel-up tube), new types (sparkle, gloss), the introduction of lip gloss, no smear formulas, new colors, and last but not least, very famous introduction of flavored “Lip Smackers” in 1973.

Today lipsticks are considered to be one of the most popular and cheapest ways for females to showcase their femininity and beauty.

Lady aplaying lipstick 3-16-15

The variety of lipstick forms


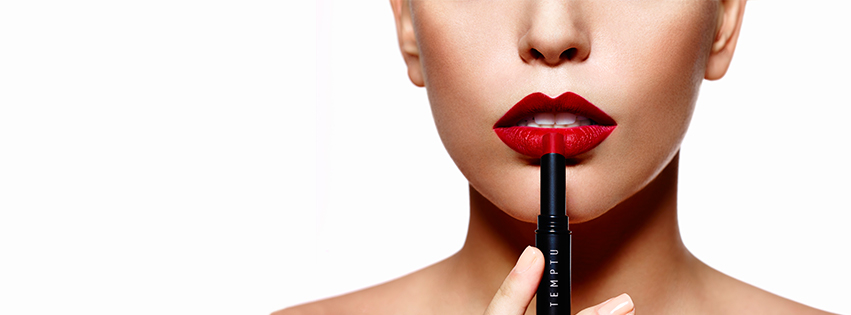
Matte Lipstick:

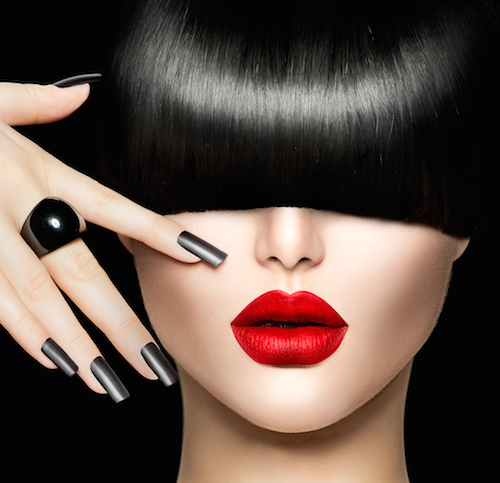
Delivers sophisticated and a full intense coverage color that contains absolutely no shine. The reason being is its formulation is designed to stay longer, the reality is that it can be quite drying to the lips and it may give your lips the feeling and appearance of being dehydrated. The dark intense shades are beautiful and stay put so it won’t move and smear, It does not give that illusion of a fuller lip or a moist yummy lip at all.

Bangs ans Red Lips 170951198 (1)

Creme Lipstick:

This particular formula contains more emollients than the matte lipstick and still provides you with a full coverage of moist color, not a shiny coat. The cosmetic lines offer the largest selection of this formula due to the fact that it is the most versatile and popular. It wears very well and it doesn’t look dry.

Black and white glazed girl 8-25-14

Frosted Lipstick:

This product gives you a pale sheen, and metallic in appearance. Being that the single color of sheen the formula contains in the ingredients, I personally don’t use it on me due to the fact that it shows every little crease, and it looks a bit dry too. I don’t recommend it on mature lips.

FrostedLipskgb_promos_2008_02

Sheer Lipstick:


This product is actually of sheer glossy color that allows your natural texture and coloration to show through. Its formulation is designed to opaquely cover. It is very similar to a gel blush if you will, due that it is simply pigments mixed with a gel. It does last longer than a gloss but not longer than a cream Lipstick.

Due to its sheerness, it is great for a quick fix and it doesn’t require precision when applied.

Facewith bangs and green eyes125835053

Gloss Lipstick:


This product contains extreme shine and moisture.

When applied, it delivers a layer of sheer color that requires frequent application. Even though it doesn’t last long, gloss gives the appearance of freshness and moisture that is recommended for all age groups. When used correctly it makes lips look fuller.

This product comes in tube, pot or wand.

Glased woman 8-25-14

Last but not least let’s talk about:


Lip Liner:


This product comes as a pencil and is used to define and basically frame and shape the lips. If well used it helps to correct lip shapes as well as prevent lip color from bleeding outside of the lip line or into any little lines. I also use it to cover the entire lip. The lip is topped with a color of the same shade or lighter to give volume, you can use just gloss over it as well, make sure to blend so it doesn’t look harsh unless you like that finish. Using a lip liner greatly improves the staying power of any lip color.

full-lips-tutorial great lip liner

Facts:


According to Sloane. (1933). Teach your clients the correct use of lipstick. The Hairdresser and Beauty Trade. December, 12.

When carefully observing the lips we will disclose a number of rather surprising points. We can notice, for instance, that while the actual shape and size of the mouth varies considerably with each individual, when the mouth is reposed ( resting)  mouth will have the same factors in common. This is the actual shape of the upper lip in relation to the lower. You will notice that the upper part of the upper lip drops slightly and fits into a corresponding groove on the upper part of the lower lip. There are also two tiny grooves in the upper lip, into which two corresponding protuberances fit closely when the mouth is closed. A small remark that is a common denominator.

Another important point to notice is that the lower lip is always slightly deeper in colour than the upper lip. This means that in applying lip colour you must make the color a little deeper on the lower lip.Interesting balance and it works.


The History of Red Lipstick


Picking the Perfect Lipstick from TMI Weekly


Click on the image to learn more about any of the products below


Lipstick Queen Big Bang Illusion Gloss - # Energy (Shimmery Bright Red) 11g/0.37oz


Lipstick Queen Big Bang Illusion Gloss


Lipstick Queen Endless Summer Lipstick - # Stoked (Sheer/Bright Coral) 3.5g/0.12oz

Lipstick Queen Endless Summer Lipstick


Lipstick Queen Lip Liner - # Rose 1.2g/0.04oz

Lipstick Queen Lip Liner


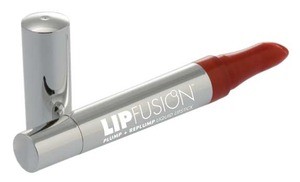
fusionbeautyplump_replumpliquidlipstickrunway_2


Fusion Beauty Plump + RePlump Liquid Lipstick – RUNWAY


Kevyn Aucoin The Lipstick - # Cherry Blossom 3.5g/0.12oz

Kevyn Aucoin The Lipstick


Lipstick Queen Vesuvius Liquid Lips - # Vesuvian Coral (Bright Fiery Coral) 2.4ml/0.08oz

Lipstick Queen Vesuvius Liquid Lips


Lipstick Queen Oxymoron Matte Gloss (Lip & Cheek) - # Free Ride 5g/0.18oz


Lipstick Queen Oxymoron Matte Gloss


Cle De Peau Lipliner Pencil (With Holder) - # 101 (Unboxed) 0.3g/0.01oz

Cle De Peau Lipliner Pencil