The difference between Nontouring, Strobing, and Contouring.
The difference between Nontouring, Strobing, and Contouring
![]()
WOW! the support this past week has been tremendous. We are so thankful for your help, it means so much to us, it is what keeps us going. The fact that you engage with our writings gives us such valuable feedback is of tremendous value to us. On week 269, this post is about the difference between highlighting shading, strobing and now the new trend of “Nontouring”, a whole new way of accomplishing the highlight and shading in a more “NATURAL” way, to me if you are wearing make up right, there is a little bit or a lot, you are already out of the true term natural, so here we may say light and very well blended make up techniques,won’t you agree? Here we are sharing a few different perceptions and techniques and different videos from contributors that are very gifted. Enjoy and share with others and don’t forget to click like.
We wish this post finds you heathy, happy and in ideal abundance from all of us at isabelsbeautyblog.com
Nontouring
By now, non-touring is the next big makeup trend, according to HelloGiggles. And it’s the easiest and most practical one of them all, at least for now.
What is this “non-touring” procedure? Well, it’s basically a super hip way of saying “natural-looking, dewy skin.” Yes, that’s it. It’s all about keeping makeup light (especially the foundation and primer portions) and using a great Luminizer to give your face a radiant glow ( like a wet look). So, fear not! You can still put those strobing products to good use to get your cheekbones sparkling and less you think that you may want to try what is just out in the market “for the only purpose of non-touring” really we can use are common sense also and make the older products work!!.
This makeup trend is coming around just in time for summer to have something new for the cosmetic industry to have the opportunity to launch new products for us to play with, and the timing couldn’t be more perfect. Because this lightweight approach to makeup is just what your skin needs for a day out in the scorching heat no need for bloating or powdering so we don’t have to be overly conscious about shine.
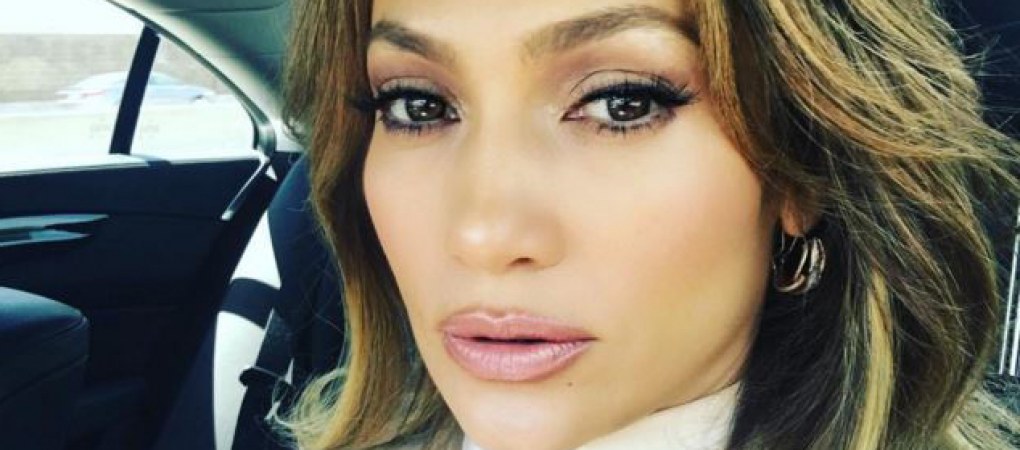
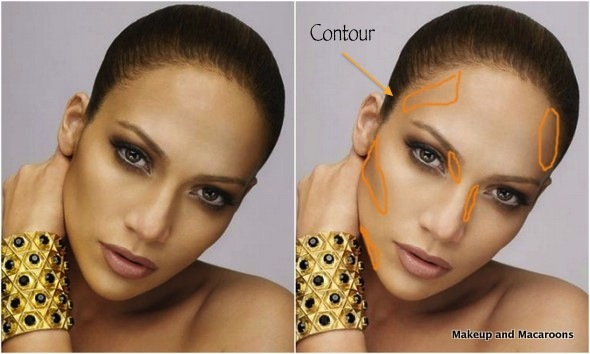
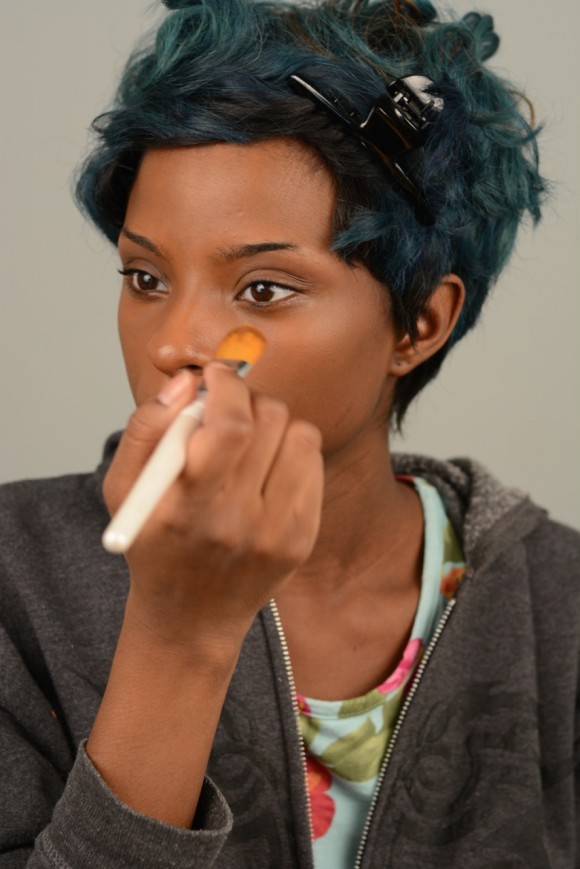
To get the ideal nontour look, start with a light coat of primer to create a smooth base. Then, even out your complexion with a tinted moisturizer or a very light concealer, only on the places that need it not all over the face or you will defeat the purpose of the look. The last step is all about strategically placed highlighter. Make sure to hit your face’s natural high points, like along the browbone, on the tops of the cheeks, and the center of the nose, here Jennifer Lopez is wearing avery well done Nontour, to me she is the one with Scott Barnes that started this trend many years ago and I love and have used his amazing products to produce these effects. I usually mix luminizer with either the foundation, moisturizer or the cream blush which I usually apply under the foundation to create the appearance of being under the skin and not the blush sitting on top and obviously blush look.
According to Renee Sanganoo:
1. “Start with a primer that’s right for your skin type I prefer the sheer creepy kinds. If you’re oily, don’t use something that’s super matte. Look for one that’s dewy or has a luminous shimmer, make sure you use an astringent on old skin so the coverage once you apply the luminous shimmer goes on evenly and not spotty.
2. Since this is a more natural look, a tinted moisturizer or a BB cream should be used instead of using a heavy, full coverage foundation, I like colored moisturizer. If you have problematic skin or blemishes, use a concealer as a spot treatment, and if it is really severed don’t do this procedure at all do to the fact that it will emphasize the blemishes in a very big way.
3. “The last step is highlighting the now non-touring, which is obviously a big trend right now. There are a lot of different highlighters, so it’s all about choosing what flatters your skin tone. If your skin is lighter, look for one with frosty pink undertones so it doesn’t make your skin look orange. If your skin is warm or darker, pick a golden bronze highlight. Brush the powder kind or apply with sponger a brush the creamy kind on the highlight on the planes of the face where light would hit naturally-above the cheekbones, under the brow bone, down the bridge of the nose, and on the cupid’s bow.
The difference from contouring to nontouring
If you’re still confused about how non-touring is different than strobing well, so are we, the only thing. like strobing, non-touring is essentially using highlighter on your face to create more dimension. Lets please keep in mind that when the light hits it everything looks larger and every little blemish shows. But regardless of what name this trend is given, we dig the luminous look.
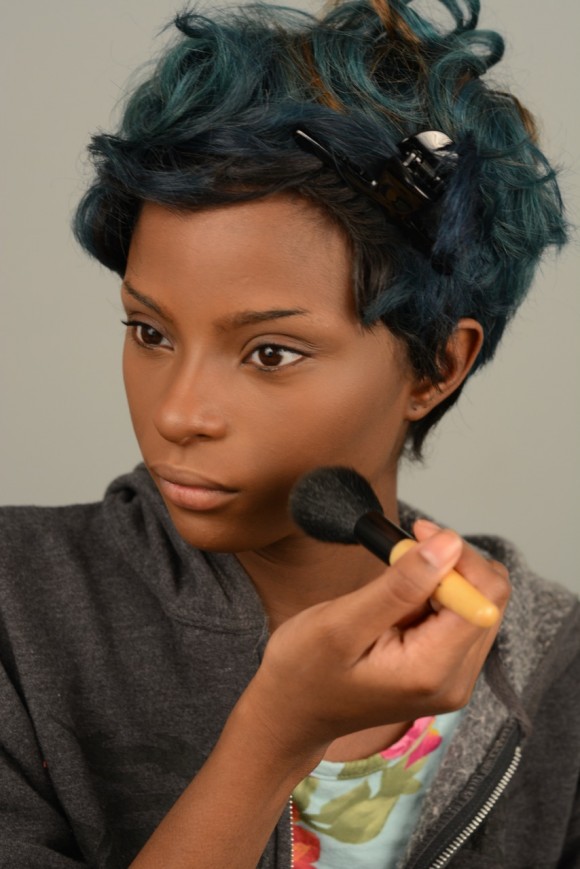
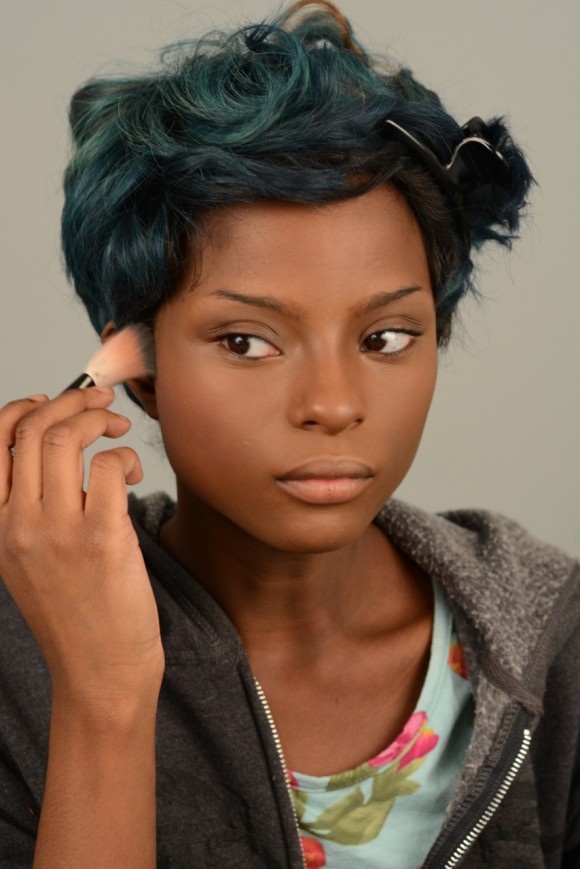
Strobing

WHAT IS STROBE MAKEUP? Difference between Contouring and Strobing?
According to http://vanitynoapologies.com/how-to-diy-strobing-highlighter-makeup-tutorial-on-indian-skin/
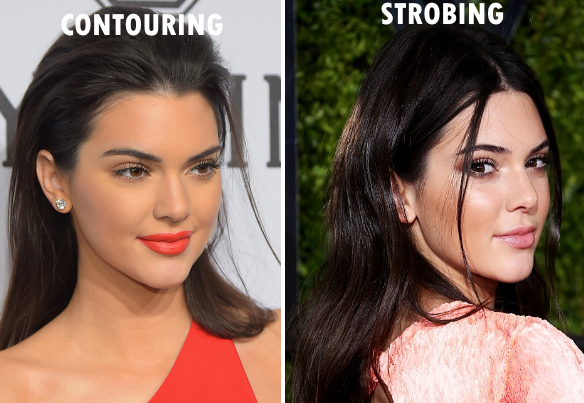
Strobe means a flash, like the flash of a camera or a strobe light in nightclubs. Now imagine standing under a strobe..all the high points of your face shall reflect light or in simpler terms, glow! That’s it! That is what we try to achieve in this technique. So basically strobing is HIGHLIGHTING. Highlighting but without a touch of contouring which is accentuating the hallows of our face with a darker color to make the effect of residing the area (so your cheekbones, brow bones, the center of your forehead, down your nose, cupid bow and on your chin basically anything you wish to protrude);welcome natural looking dewy face. To make it even more easier, refer to the picture below and see the difference between contouring & highlighting and strobing.
While strobing isn’t exactly new to the beauty game it’s certainly one of the buzz words to capture our attention.
If you’re not into following trends or aren’t into a sculpted, highlighting and shading, completely contoured full face of make-up, take note because maybe strobing is for you is what you want to try.
So, let’s begin with the basics. While contouring is about creating a defined look by shading and highlighting the face strobing places a much heavier focus on highlighting and politely suggests getting rid of shading all together.
Think of strobing as basic highlighting’s older sister or best friend– there’s a lot more impact and if you’re one who prefers a dewy, fresh-faced look then this technique is perfect to add to your repertoire and to have lots of fun with now that summer is almost here, great time to practice.
When Strobing you can use cream or liquid products an finally grounded powders and thanks to the beauty industry – who are always ready to fill a beauty gap – specialised strobing products do exist but using your regular highlighter will work just the same, play practice makes perfect always aim for a natural look.
So how do we actually conquer strobing? Always start off with prepped and primed skin make sure you use light moisturizing products, so ensure that you’ve moisturised before applying any product let it sit a bit and blot excess so you have the shimmer look in the designated places. One of the most important things to remember when it comes to strobing is that your product of choice shouldn’t have any physical large visible chunks of glitter in it that will obviously scream bad job or cabaret look; the product should bring more of a sheen than a disco ball to your face – plus visible glitter will only accentuate problem skin or pores little lines and all the details that we girls are not so friends with.
After you’ve applied your base ( moisturizer, primer and foundation highlight the areas of the face, as mentioned earlier, that the light naturally hits. Avoid applying the products to any areas that may be suffering from a break out (we don’t want to highlight blemishes) and then if you’re keen to finish the look off with a hint of bronzer or blush be sure to use a matte product. These will complement your looks without detracting from the glow by adding tonnes more glitter and or shine to the face, since blush goes on cheek bone also I like to mix it with a tinny bit of the Luminizer so they blend better .
Fair skin tones should look for champagne highlighters or strobing products while light – medium tones can also use pink tones. Olive skin or those with yellow undertones should opt for golden hues products while deep skin tones can use terracotta or bronzed pigments.
We’re not covering up with tons of matte powders here, instead it’s actually the opposite. Try mixing a luminzer into your moisturizer for a brighter look all over use a concealer on any blemishes that you wish to cover.Yes, it’s really that easy.
What is strobing, you may ask yourself? It’s a fun term for highlighting, basically is using a dewy looking product in the high points of your face and also your body, how about that, J Lo and Scott Barnes have used this technique for years now with great results, lets be cautious not to over do it. Extra highlighting will give you a dewy, shimmery,But because “dewy” can turn into “sweaty” super-quick, here are a few tips to keep you on the right track.
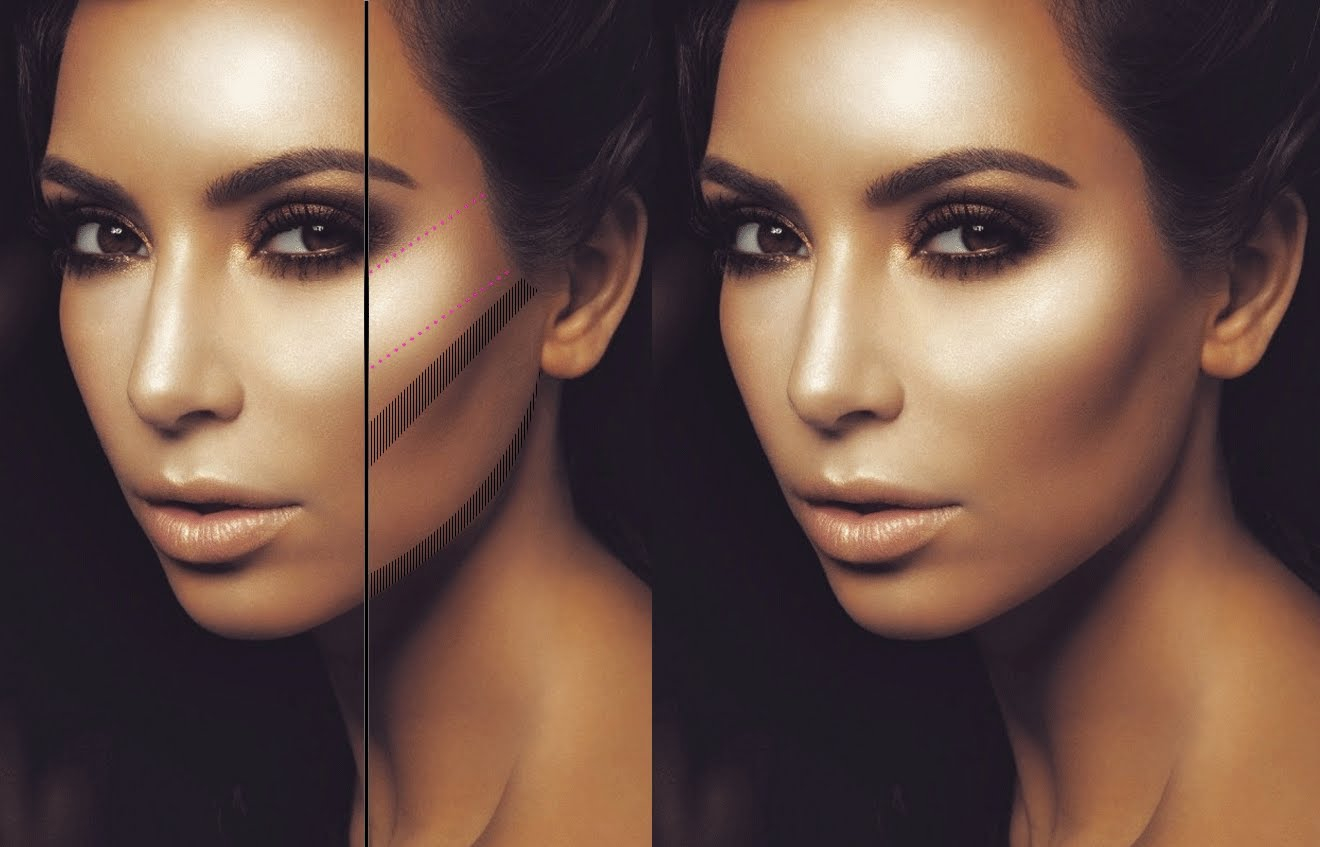
MARIO DeDIVANOVIC shows Strobing on Kim Kardhasian genius work
https://youtu.be/34u4GlAH_Ng
Highlight
Is the opposite of contour. Highlighting is the process of enhancing; visually enlarging, drawing attention to a specific area, a feature highlight shade is usually a lighter shade.
Contour
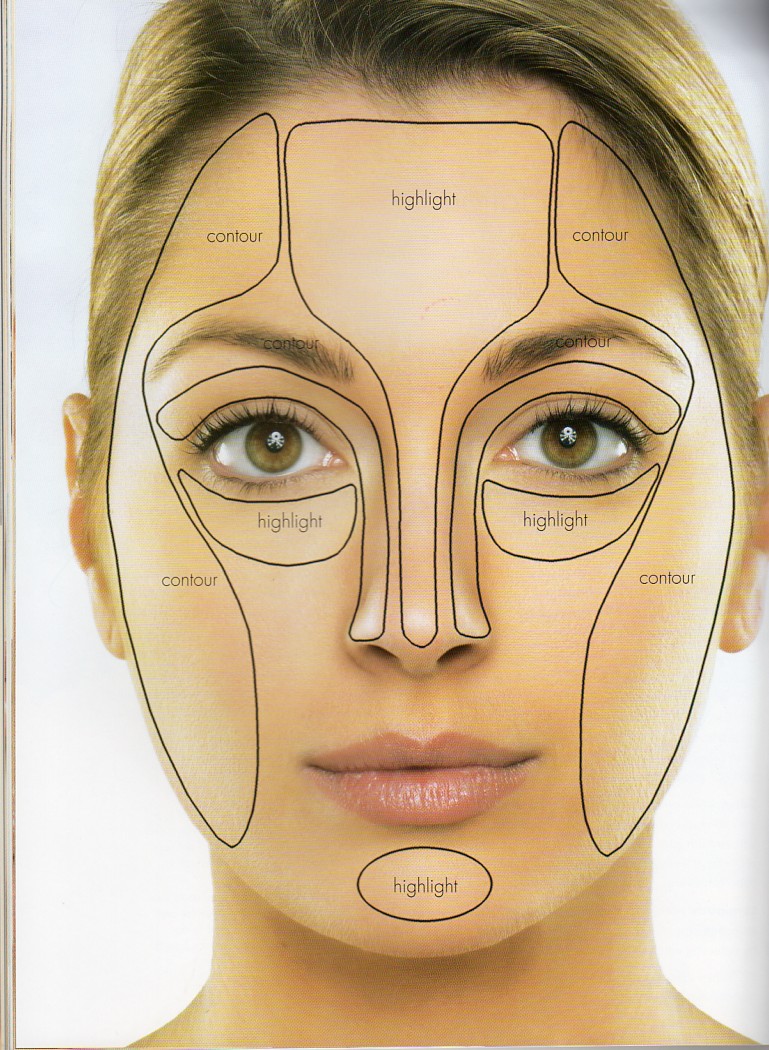
Contour is the opposite of Highlight.
Everything that we contour we push away from the eye to make it appear less visible, in other words to minimize or give the illusion that is smaller.
A contour shade is usually a darker shade that give your features more depth and definition by contrasting against the lighter shades used on your Skin.
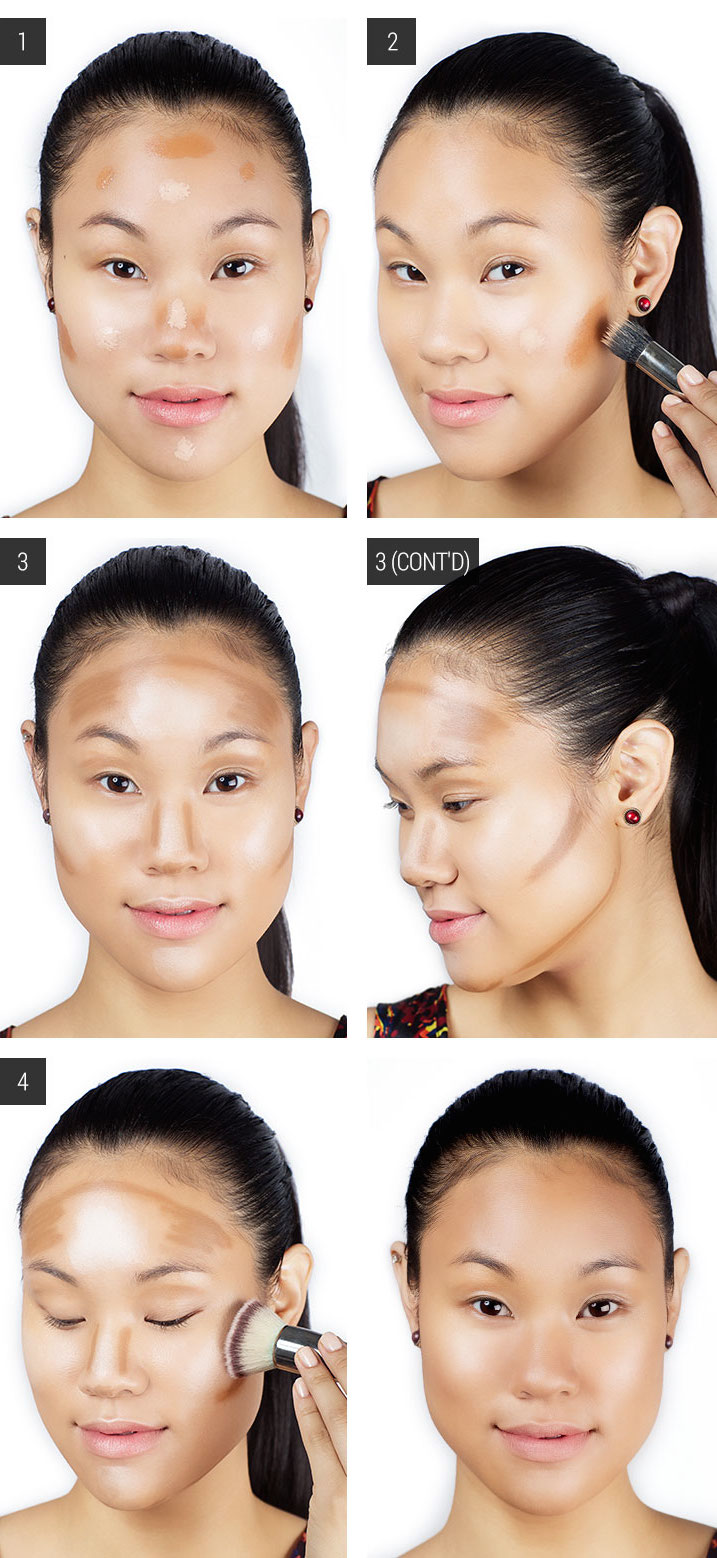
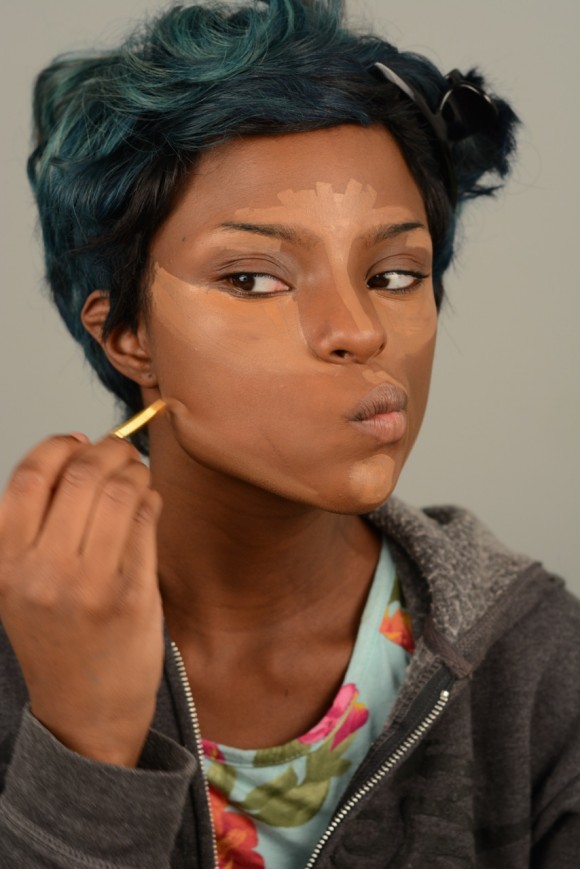
1. Prep your face with two shades of base. “Dot on a foundation that’s one shade lighter than your skin tone in the center of your face, and another that’s one shade darker than your complexion around the perimeter,” . Our model Jess used IT Cosmetics Bye-Bye Under Eye Concealer in “Natural Medium” (as the light base) and “Deep” (as the dark).
2. Blend the two shades. “Using a blending brush, blend the two shades on your face to create the subtle illusion of depth and dimension.”
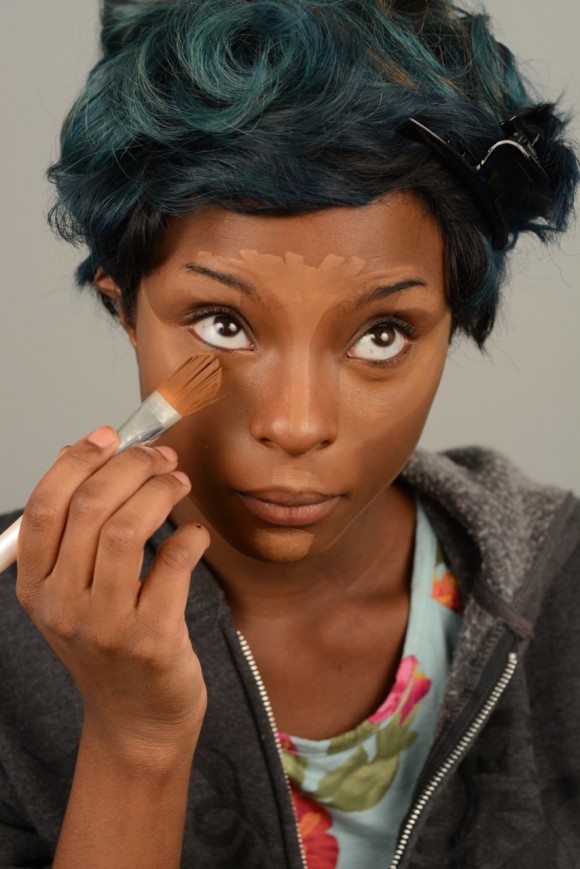
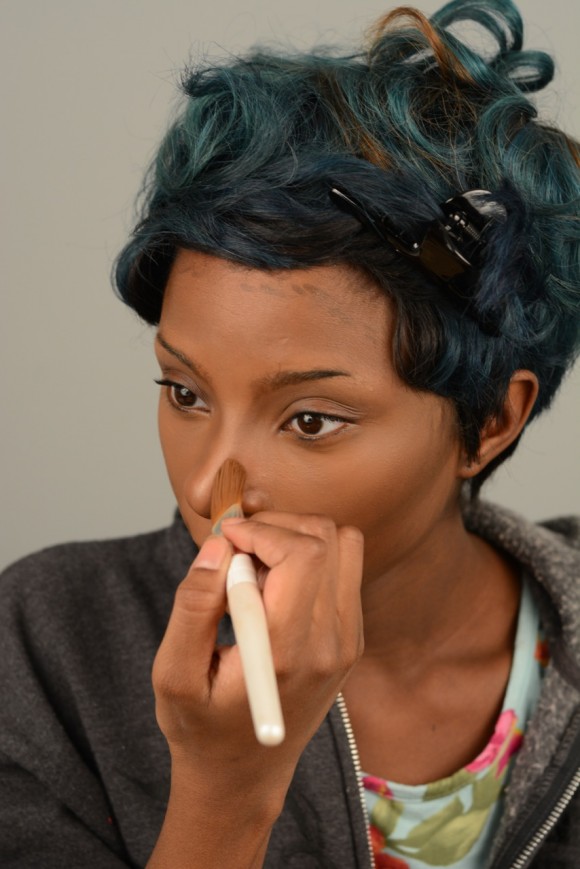
3. Map the contours and highlights of your face. “Mark the areas you want to contour — the hollows under your cheekbones, your temples, along your hairline, jawline, the sides of your nose, the tip of the nose, and the crease of your eyes — with a brow or a concealer pencil,” . Brow gel pencils are really concentrated, yet very smudgeable and it’s easy to control the placement of their dark pigment, making it perfect for contouring. “Next, use an all-over cream highlighter on the tops of your cheekbones, on the center of your forehead, the bridge of your nose, the center of your chin, and on your cupids bow.” Here is used IT Cosmetics Brow Power Perfector Gel Pencil in “Auburn” and Mac Cosmetics Cream Colour Base in “Luna.”
4. Blend the two for a flawless finish. “Create that sculpted airbrushed effect using a flat top dense brush to buff out the two shades to perfection,” . Here,is used IT Cosmetics Heavenly Luxe Flat Top Buffing Foundation Brush.
Lastly, bump up the contours and highlights with MAC Sculpt and Shape Powders and consider yourself contoured!,here is used “Definitive” to enhance the contoured areas on your face and “Emphasize” to illuminate the highlighted spots.
Contouring By Scott Barnes
Highlighting and contouring according to rookie rookie
Highlighting and contouring are two crafty li’l tricks that you can use to enhance your bone structure and make it look like you’re constantly under the most flattering movie lighting possible. Even if you’re not going to an event, it’s fun to experiment with elements of ~drama~ in your makeup. This tutorial will show you how to use foundation, concealer, and powder to put a spotlight on your natural gorgeousness. Let’s get to it!
What you’ll need:
- Liquid foundation in your normal shade. (I used Revlon ColorStay Foundation in Cappuccino.)
- Liquid concealer or foundation in a slightly lighter color than your skin. (Mine’s L.A. Girl Pro Conceal in Warm Honey.)
- Concealer, foundation, or powder in a slightly darker color than your skin. (I used M.A.C. Eye Shadow in Embark.)
- Setting powder (Mine: M.A.C. Mineralize Skinfinish Natural powder in Dark.)
- Blush (Mine came from a Kleancolor palette like this one.)
- A powder brush such as this kabuki brush from Claire’s.
- Optional: a foundation brush or sponge like this one from e.l.f.
- Optional: a concealer brush like this one from e.l.f.
A note on picking your contour and highlight colors: Don’t choose shades that are drastically lighter or darker than your natural skin tone. If you have fair skin, use a very light shade to highlight and a fair to medium color to contour. If you have darker skin, use a medium-toned highlight and a contour slightly deeper than your skin color. If you have very dark skin and can’t find a deeper shade of foundation to contour with, a dark eye shadow will do the trick!
Step 1
After cleaning and moisturizing your skin, apply your foundation all over your face using a foundation brush or your fingers.
Step 2
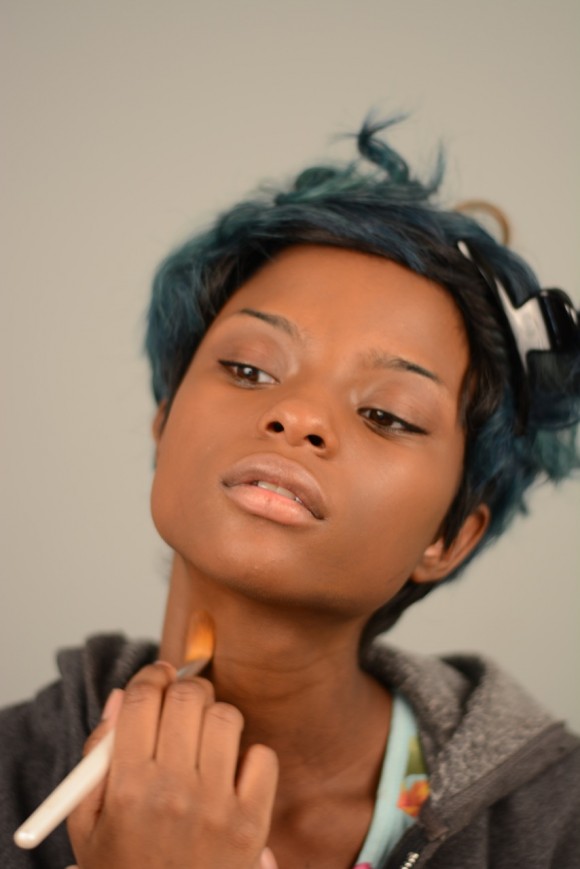
Blend your foundation to about midway down your neck. Since my skin is naturally darker there, this step makes the difference between my face and neck less stark.
Step 3
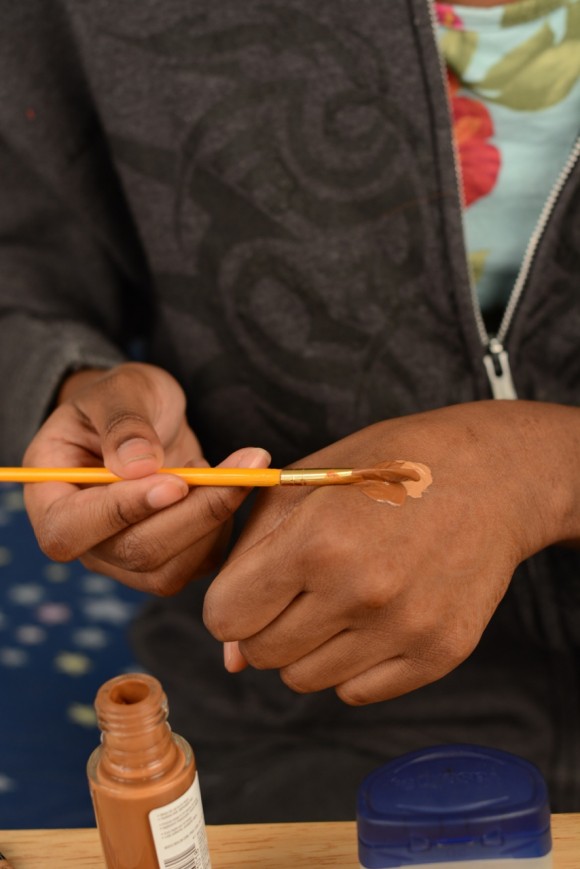
Mix your lighter concealer or foundation with your regular foundation using a brush or your fingers.
Step 4
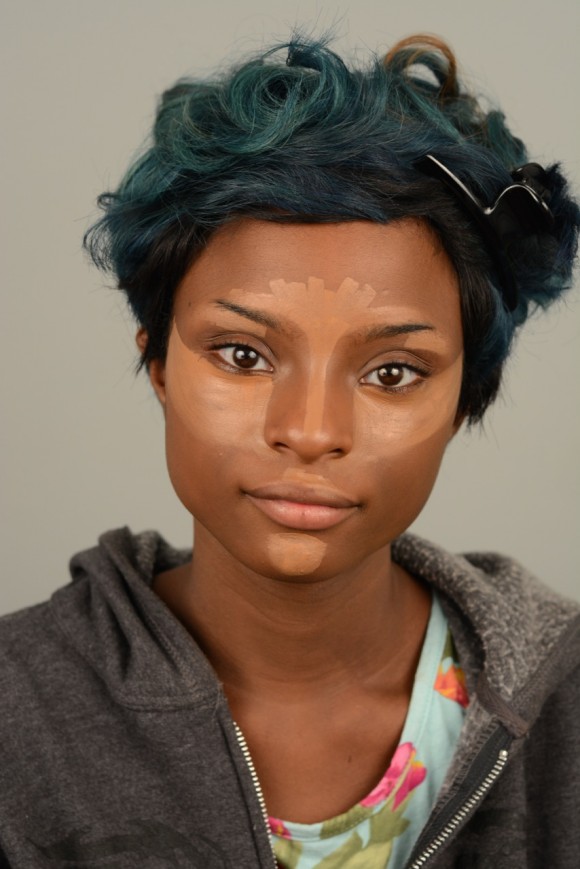
Using a concealer brush or your fingers, apply the lighter makeup mixture to your T-zone (the area right above your eyebrows and the spot between them, if you have one; down the center of your nose; the middle of your upper lip; and the middle of your chin), your under-eye area, and right above your cheekbones.
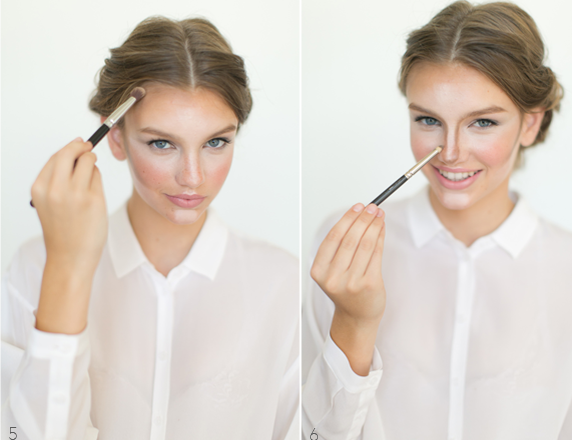
Step 5
Paint a thin line with this highlighting mixture right above your jawline.
step 6
Use a brush, sponge, or your fingers to blend your makeup until there is no visible line of demarcation between the highlighter and your foundation. You want this to look seamless.
Step 7
The “contour,” or darker makeup, goes on the sides of your nose, right under your cheekbones, and around your hairline (the darkest areas on the diagram above).
Step 8
Blend in your contour just like you did your highlight. Easy, right?
Step 9
Apply finishing powder to your whole face to get rid of any excess shine and set your makeup.
Step 10
Add blush to your cheeks, moving upward from the apples to your temples. This will add dimension to your face and give you a pretty glow.
Wow! You’re all set. Now go astound the world with your flawless skillz!
Bronzed Contoured & Highlighted Makeup Tutorial
Why & How I Contour & Highlight
How To Cream Highlight & Contour
How I Contour My Face With Anastasia Beverly Hills
Contour Kit
How To Contour and Highlight
HOW TO: CONTOUR AND HIGHLIGHT YOUR FACE!
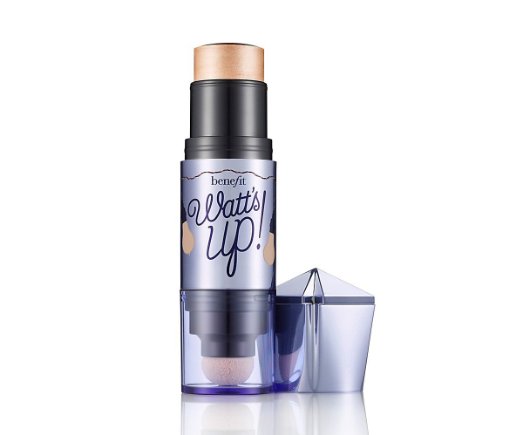
Benefit Cosmetics Watt’S Up! Soft Focus Highlighter for Face
GIORGIO ARMANI Fluid Sheer
- This fluid sculpts & fine tunes your complexion
- Ultra light & provides seamless coverage
- Available with a range of versatile shades
- Wear alone as a makeup base
- Can be mixed with foundation to increase radiance & color
- Or used over foundation for highlighting & contouring
- Suitable for all skin types

GIORGIO ARMANI Light Master Make Up Primer
- Helps form a mirror-like veil that intensifies cheekbones & arches of face
- Formulated with a Micro-fil pearl that transforms colors when reflecting light
- Optically sculpts facial contours by brightening
- Relieves & comforts dry, tight skin
- Ensures a long-lasting foundation
- Creates a fresh, radiant & evenly-toned complexion
NARS Contour Blush
- This blush provides two contouring shades
- Deeper shade gives a strong definition to sculpt cheeks
- While lighter shade imparts a sheer luster on the high points of the face
- Renders a natural look with 3D effect for the face
- Lightweight & adheres well on skin for long lasting wear

NARS Multiple Bronzer
- Multi-purpose bronzing stick for eyes, cheeks, lips & body
- Imparts a sun-kissed glow & contour for face
- Rich in anti-oxidant that helps strengthen, support & repair skin
- Oil free, cream to powder texture for easy application
- Renders you a healthy, natural complexions