Is Rosacea affecting your beauty?


 About Rosacea
rosacea 5

Hello and welcome to our post, we are very grateful for your visit, with great gratitude we thank you for all the appreciation and great compliments we learn a lot when you interact with our content without you there is no site. Please share and like is the way to make blogs work, with that said let’s move to the post.

On week  238 we are sharing authority information on Rosacea, this condition affects millions of people throughout the world. In some places, they never heard of it and I guaranty you it has to do with diet and stress management. My experience as a makeup artist for over four decades is that stressed out actors and people in general in stress mode eventually they are presented with different kinds of skin challenges mainly related to inflammation, inflamed nervous system and inflamed  digestive system will create heat and acidity and it will exit the body in majority through the skin, alleluia otherwise we probably get really sick, so these facts lead us to share with you what we have seen to work managing Rosacea. I personally don’t believe in incurables since I am a Cancer survivor and dedicated over 50 years to research and learning about the connection between body mind and spirit. I decided to make a difference and access information that can help others. We are not saying here that if you have a crisis not to consult your health provider ( that is a funny title since the only one that can provide health to you is yourself ) in any case we are not claiming to cure. We are sharing the well-founded information that these authorities that are plenty qualified and the information they wish to give you, we are sharing from a different perspective and different content but they all lead to the same destination.

Thank you for your time from all of us at Isabel’s Beauty Blog


According to Andrew Weil MD

Andrew Weil


from: http://www.drweil.com/drw/u/ART03163/Rosacea.html
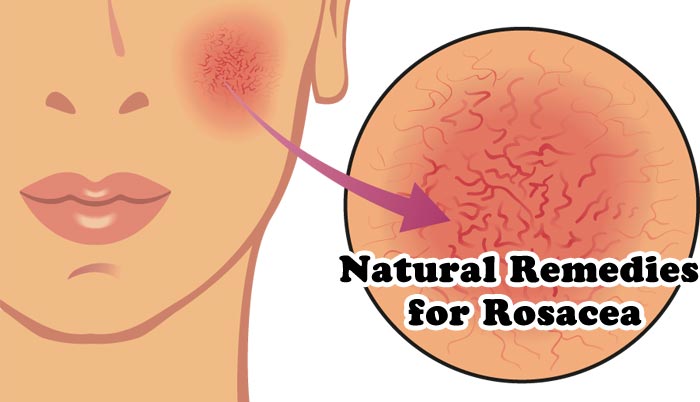
 

What is rosacea?

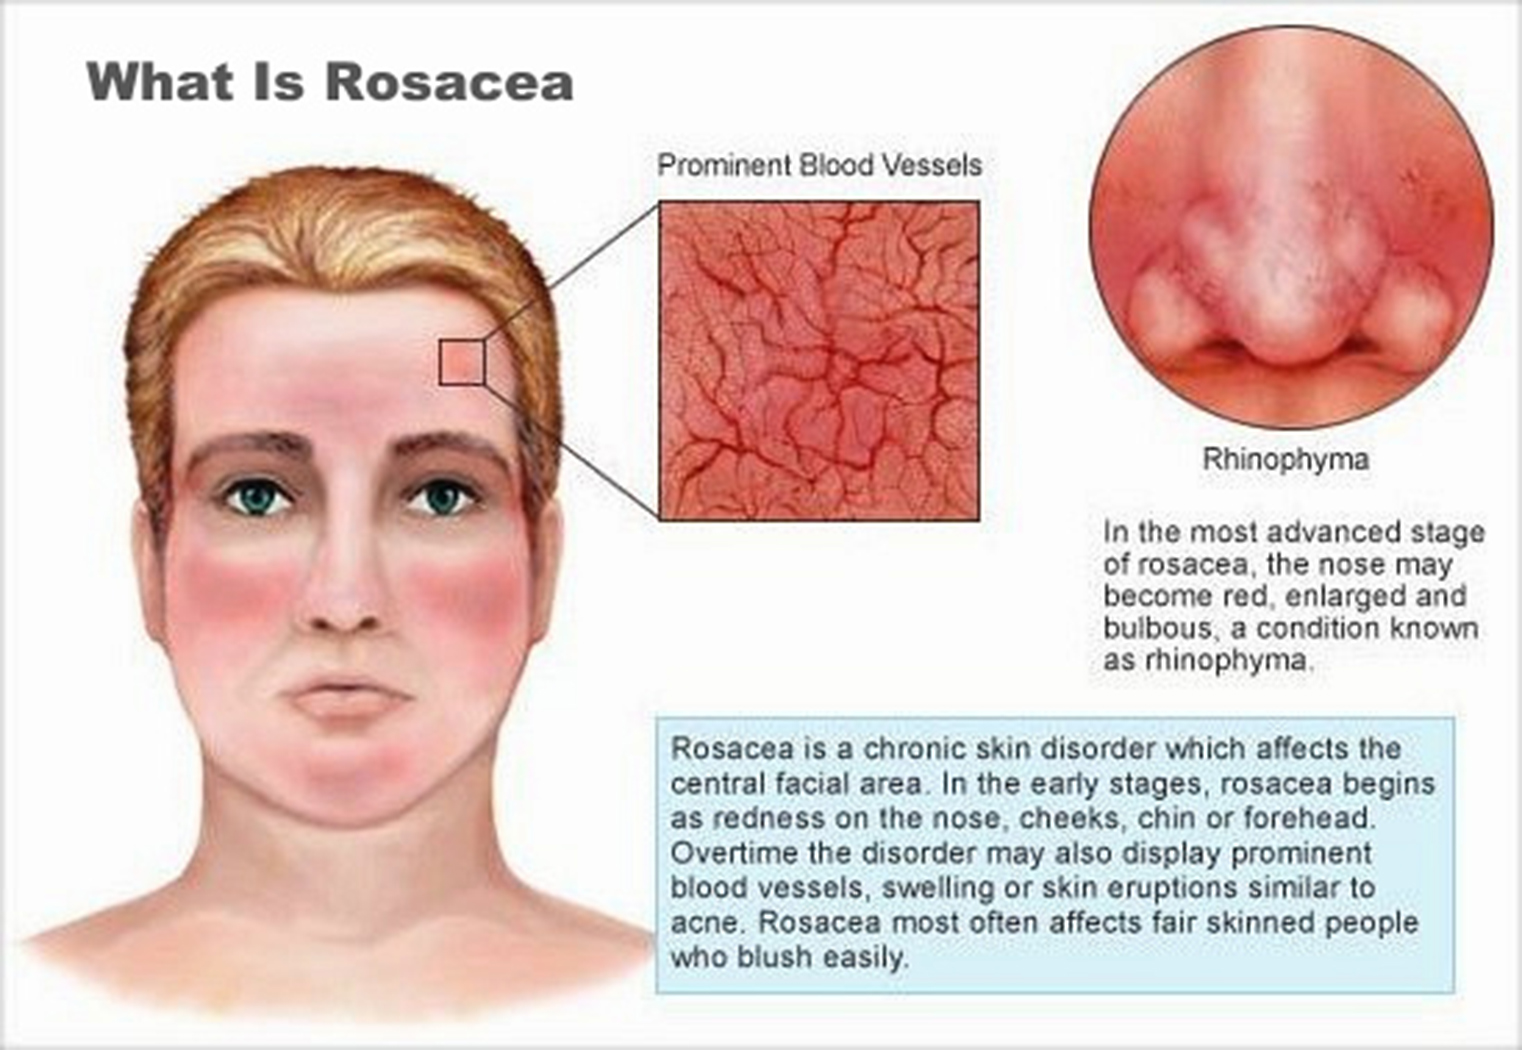
Rosacea is a chronic and persistent condition in which the skin on a person’s cheeks, nose, chin, eyelids, or forehead becomes inflamed and red, often producing small pimples and noticeable blood vessels. While there is no cure for rosacea, it can be controlled with lifestyle approaches and, occasionally, medication.


What are the symptoms?

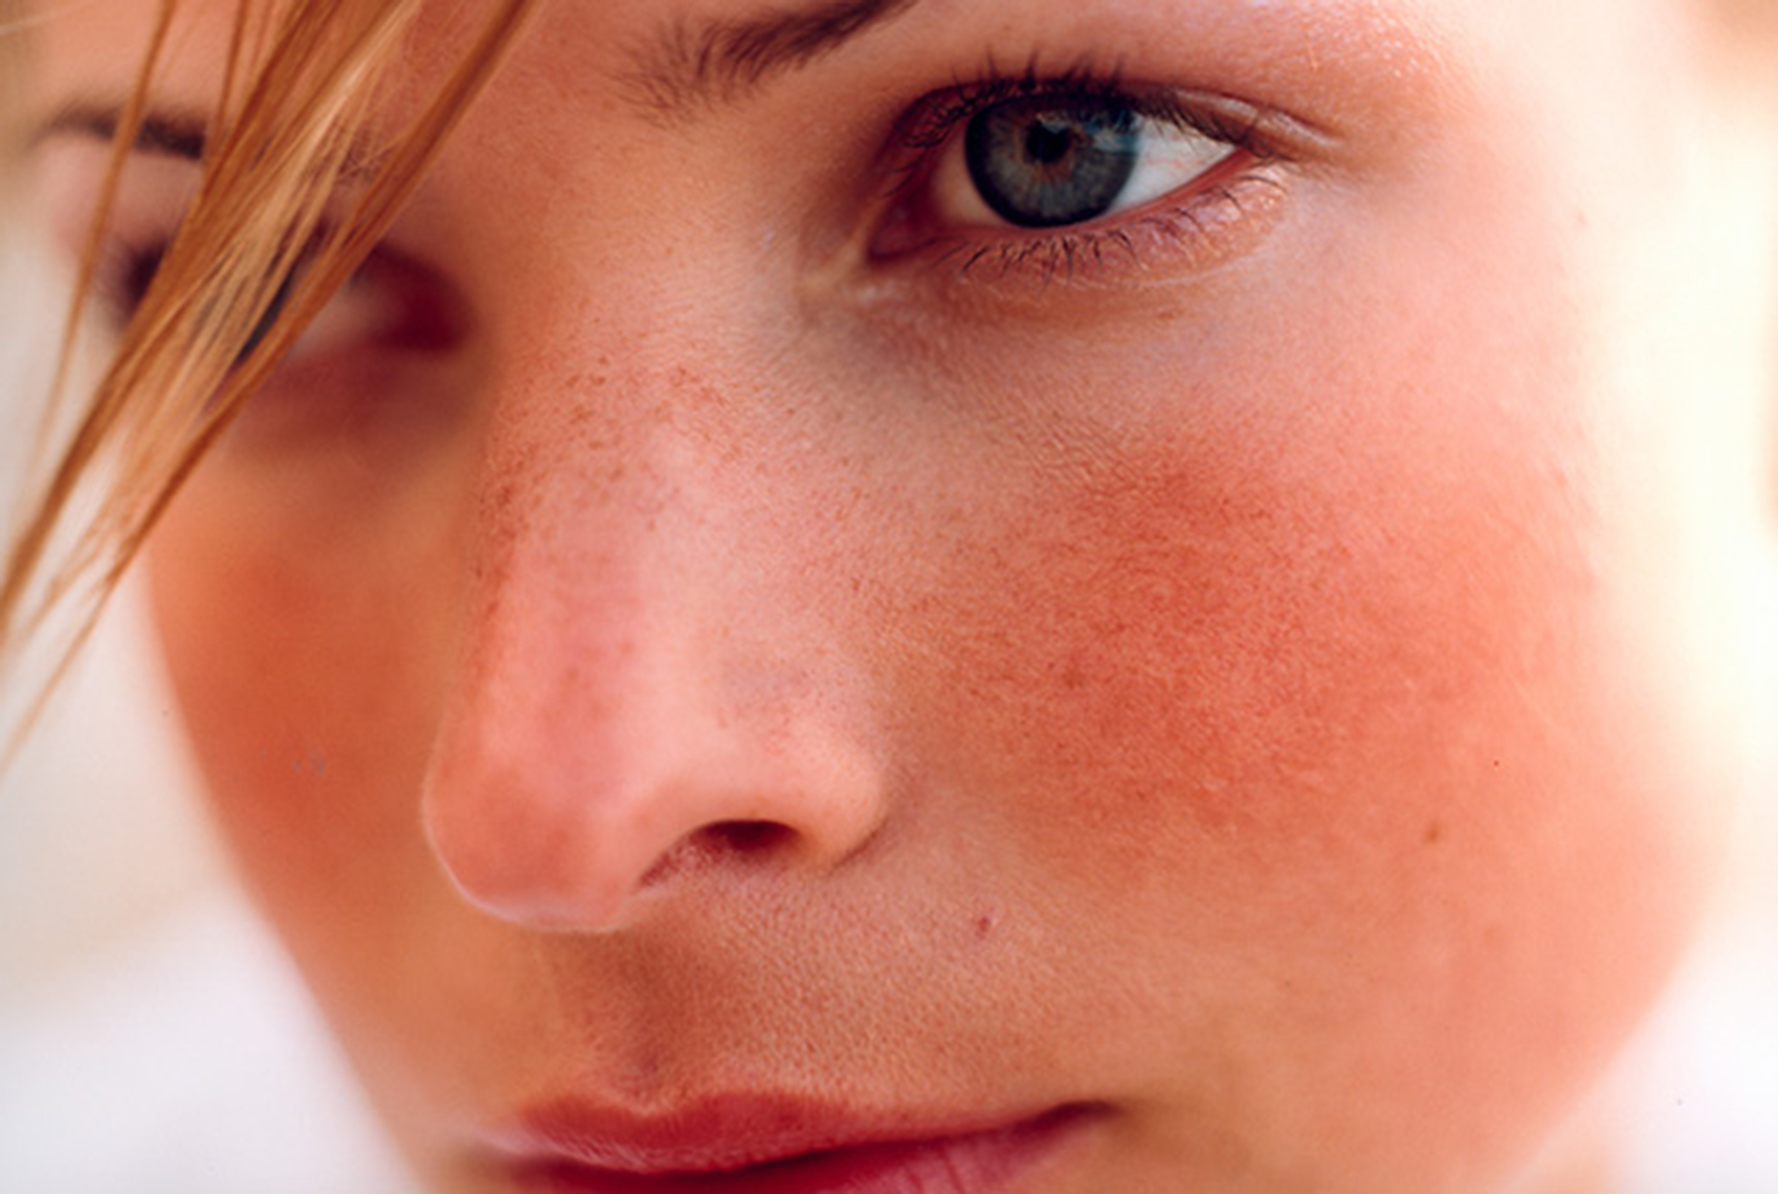
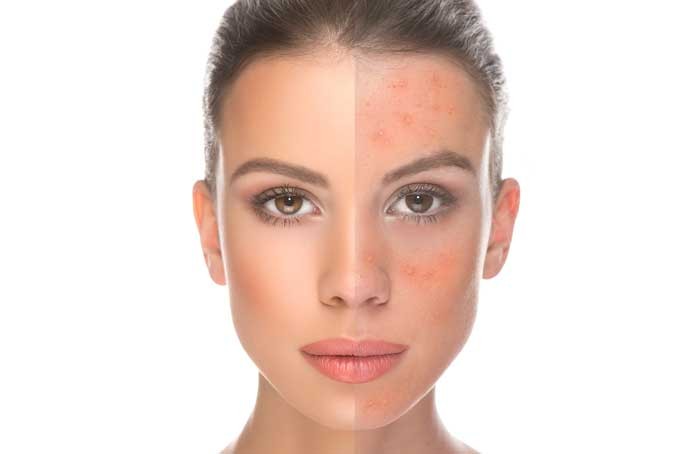
The main symptom of rosacea is red skin on the face. Specifically, rosacea can cause:

  • Small red bumps or pustules (but not acne) on the cheeks, nose, forehead, and chin
  • Small, spider-like blood vessels on the face
  • A red, bulbous nose
  • A tendency to blush or flush easily
  • A burning or stinging feeling in the face

About half of people with rosacea develop ocular rosacea – burning, irritated, or bloodshot eyes – which can lead to conjunctivitis, an inflammation of the inner eyelids.


What are the causes?

The exact cause of rosacea is still unknown, but it appears to run in families. The disorder is more commonly seen in descendants of Celtic cultures or Northern Europe, especially in those with fair complexions. A number of factors appear to contribute to blood vessels in the skin dilating, and worsen the symptoms of rosacea, including:

  • Alcohol
  • Spicy foods
  • Coffee and caffeinated beverages
  • Hot foods and beverages
  • Strenuous exercise
  • Extreme temperatures
  • Chronic stress
  • Sunlight or a history of sunburns
  • Certain drugs, such as corticosteroids and some blood pressure medications


Who is likely to develop rosacea?

Rosacea is more common in women, people with fair skin, people between the ages of 30 and 50, and people who tend to blush easily.


How is rosacea diagnosed?

There is no one test for rosacea. Physicians usually diagnose it with a physical examination and by asking the patient about his or her symptoms and medical history.


What is the conventional treatment?

Conventional physicians typically recommend lifestyle approaches to minimize flares of rosacea. These include:

  • Avoiding triggers that worsen rosacea
  • Using sunscreen
  • Protecting the face from winter weather with a scarf or ski mask
  • Using only cleansers, moisturizers, cosmetics, and other products that are hypoallergenic and won’t clog pores or otherwise irritate skin
  • Managing stress

In addition, physicians may prescribe certain medications to control rosacea. These include topical creams and gels that contain antibiotics (such as metronidazole); oral antibiotics (such as tetracycline, minocycline, and doxycycline), and the acne drug Accutane (Isotretinoin). Laser surgery may also help reduce redness in severe cases.


What therapies does Dr. Weil recommend for rosacea?

In addition to the lifestyle measures mentioned above, Dr. Weil recommends the following therapies.

  • Diet: Follow the anti-inflammatory diet.
  • Stress reduction: Chronic stress often first manifests in the form of various skin conditions. Stress relief techniques such as the Relaxing Breath can be helpful.
  • Supplements: Supplement with gamma-linolenic acid, which improves the health of the skin. Good sources include evening primrose oil and black currant oil. Take 500 mg twice a day of either, and expect to wait at least six to eight weeks to notice results. Anti-inflammatory herbs such as ginger and turmeric may also be effective; these can be added to foods and/or taken as supplements.
  • Consider topical preparations that utilize natural anti-inflammatory constituents, such as medicinal mushrooms.


Dr Mercola contribution to Rosacea


dr mercola in the office
Rosacea is a chronic, progressive disorder which is often distinguished by flare-ups followed by remissions. The condition isn’t life-threatening, but it can certainly be life altering due to its effect on your personal appearance. According to the National Rosacea Society, over 75 percent of people with rosacea feel the condition has affected their self-esteem. Many rosacea sufferers are uncomfortable in public settings and avoid social activities.

Among those with the most severe symptoms, a majority feel rosacea has adversely impacted their professional careers, and almost half of that group has missed work due to their condition is a huge contributor to a lack of self-esteem.


Who Has it and Who is Most Likely to Get it?

The disorder is more common among women, but more severe cases are seen in men. That could be because men don’t seek help for the condition as readily as women do.

Over 14 million Americans have rosacea, and as Baby Boomers enter the target age to develop the condition (ages 30 to 60), the number of sufferers will continue to grow. You know it’s a widespread condition when major cosmetic companies are marketing prod­ucts specifically designed to conceal redness.

Even though the number of rosacea sufferers is on the rise, less than a quarter of Americans– including many with the disorder — have any knowledge of the condition.


How to Recognize Rosacea
Frequently, rosacea begins as redness on your cheeks, nose, chin or forehead. Occa­sionally, you might see it on your neck, ears, scalp or even your chest. This early stage redness often comes and goes, and can be confused with simple flushing.

If the condition progresses unchecked, the redness will become deeper in color and more constant. Blood vessels may appear on your face. You might notice pimples or other bumps on your facial skin. If your condition is severe, your nose may appear swollen and bumpy with excess tissue, a condition called rhinophyma.

Your eyes may also feel irritated, water frequently, and appear bloodshot.

Other warning signs to look for include:

  • Burning, stinging, itching or a feeling of tightness in your face
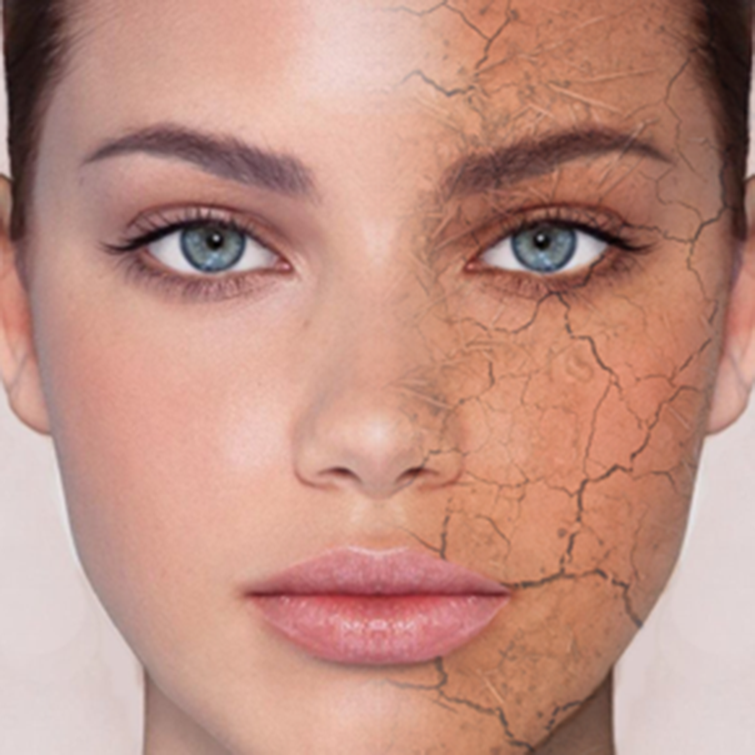
  • Rough, dry appearance
  • Raised red patches
  • Facial edema (swelling)


Possible Causes of the Disorder
The underlying cause of rosacea has remained a mystery within the mainstream medi­cal community, however, theories abound.

  • One theory suggests the condition may be the result of oversensitive blood ves­sels in your face.
  • Another theory attributes the disorder to mites (Demodex folliculorum) which natu­rally live on your skin. Rosacea sufferers have more of these mites than people without the condition.
  • Genetics (family history) may play a role.
  • There may even be a connection between rosacea and a stomach infection caused by the H. pylori bacteria.


Is Rosacea the Result of a Malfunction of Your Immune System?


Recent studies conducted by Dr. Richard Gallo of the University of California, San Diego, and an international team of researchers show promise in uncovering, in my judgment, the most likely source for developing rosacea — a dysfunction of your immune system.

Dr. Gallo’s research has found that specific immune system proteins might bring on the condition of rosacea. These proteins may trigger rosacea symptoms while they are in the process of protecting your body.

Your immune system generates natural antibiotic proteins to fight disease and help you stay healthy. These proteins go after harmful bacteria and set in motion other protective immune system responses within your body. These defending agents can be stimulated into action by either irritation or infection.

Researchers are looking into whether the action of a specific immune system protein called a cathelicidin, which has both antimicrobial and proinflammatory properties, might cause the development of rosacea in certain individuals. Some of the symptoms of rosacea, like skin inflammation and enlarged blood vessels, are associated with cathelicidins. Cathelicidins are made active by a specific enzyme, SCTE (stratum corneum tryptic enzyme).

Studies have revealed rosacea sufferers have an unusually high amount of cathelicidins in their skin, as well as elevated SCTE. For these patients, it appears the chronic pro­duction and activation of cathelicidins does not inhibit bacterial growth, but instead may trigger the symptoms of rosacea.


Treatment for Rosacea
While traditional medicine has been writing prescriptions for antibiotic pills, topical oint­ments and worse to help alleviate the symptoms of rosacea, I’ve been successfully treat­ing the underlying cause of the condition for years.

In addition to the doling out of potentially dangerous medications, entirely too much mainstream emphasis has been placed on eliminating the triggers for rosacea symp­toms, rather than investigating the fundamental cause of the disease.

Some of these “triggers” include healthy pursuits like exercise and exposure to sun­shine. Others are often unavoidable, like hot weather and shifts in temperature from hot to cold.

I would never recommend a rosacea patient forego all exercise and sunshine in the hopes of not triggering a flare up. The “cure” in this case is ultimately much worse than the disease.


An Effective, Natural Approach
Rosacea can be an easy problem to manage with dietary changes, specifically the elimination of grains and sugars, coupled with emotional stress management. It is rare when the rosacea of patients that visit my clinic doesn’t rapidly resolve when they follow my dietary and other all natural recommendations.


Limit Sugar and Grains. 

You will want to normalize your insulin levels and one of the best ways to do this is make certain your intake of foods that will raise them like, sugar, bread, pasta, rice, corn, and potatoes are kept low. Ideally, it would be best to measure your fasting insulin level to determine if you are eating inappropriate amounts of these foods. Ideally, your fasting insulin level should be 3 or lower.


Exercise Regularly

This will also help to normalize your insulin level and overall improve the performance of your immune system.


Eliminate Trans Fat and Processed Foods

Most people don’t realize that most of the fats in your skin cell membranes are exclusively omega-6 fats. If you consume processed foods that are loaded with damaged omega-6 fats, they will be incorporated into your cell membrane and predispose that skin cell to an increased risk of diseases like rosacea and skin cancers. You should make certain that you have a good source of omega-6 fat from organic pumpkin, sesame, or sunflower seeds, or their cold pressed oils, fermented cod liver oil.


Optimize Your Sun Exposure and Vitamin D Levels

When you have appropriate levels of vitamin D, your body will produce over 200 antimicrobial peptides to fight any infection in your body. If for whatever, reason you are unable to receive regular sun exposure, then you will want to take a high-quality vitamin D supplement and measure your vitamin D level so it is around 50-70 ng/ml.


Eat for Your Nutritional Type

Eating the right foods for your individual needs is your best defense against dis­ease. When you fortify your body with the nutrients it requires, you strengthen your immune system and prepare it to do its job.

Your body was designed to protect and heal itself. Give it the help it needs in the form of the proper fuel for your nutritional type.


Control Emotional Stress

Uncontrolled emotional stress can seriously compromise your immune system. Stress is also a trigger for rosacea flare-ups if you already suffer from the disor­der.

I have found that energy tapping techniques work remarkably well in resolving emotional challenges.

If you suffer from rosacea, or if you’re a Baby Boomer not interested in becoming a sta­tistic of this chronic and incurable condition, I strongly encourage you to consider prevention as well as alter­natives to costly medications that carry the risk of overuse and dangerous side effects.

Think of it this way:

Science is proving rosacea is caused by a malfunction of your immune system.

Your immune system is your key to freedom from disorders and disease.

A strong, well-functioning immune system starts with the nourishment you put into your body and your ability to manage emotional and psychological stress.

RosaceaGraphic


What Causes Rosacea?

From: http://draxe.com/rosacea-treatment

Rosacea is a type of facial skin inflammation. Medical experts still don’t know exactly the series of reactions that causes rosacea to develop, but since it seems to be triggered by heightened inflammation levels and an overactive immune system to some extent, following an anti-inflammatory diet (possibly including an autoimmune-type protocol) helps many people control the severity of their symptoms.

What causes inflammation, the underlying cause of rosacea, in the first place? A number of factors likely contribute to the development of rosacea, including:

  • problems with blood vessels in the skin
  • sun damage
  • inflammation/abnormal inflammatory reactions within the skin’s connective tissue
  • reactions and side effects to certain medications
  • subtypes of rosacea seem to have a genetic factor and might run in families
  • people who have light, sensitive skin and light eyes are more likely to have rosacea (including those with northern or western European descent). In fact, some reports show that only around 4 percent of rosacea patients are of African, Latino or Asian descent, yet in European countries like Sweden around 10 percent of all adults have rosacea
  • it’s also seen more commonly in women than in men (with some reports showing that three times as many women suffer from rosacea than men)

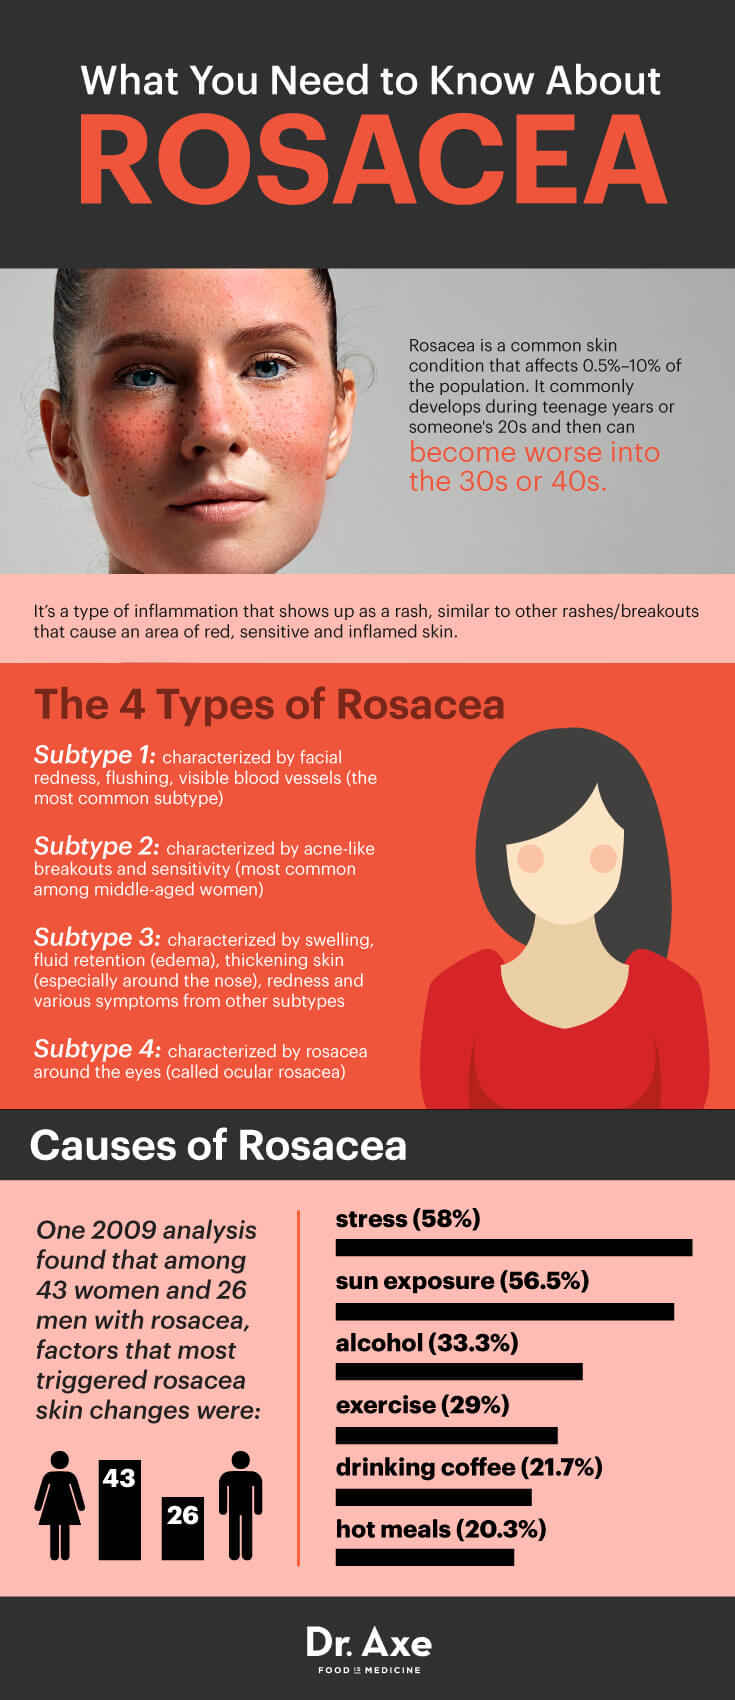
One 2009 analysis done by The Dermatology Outpatient’s Clinic of Jagiellonian University School of Medicine in Cracow found that among 43 women and 26 men with rosacea, factors that most triggered rosacea skin changes were: stress (58 percent), sun exposure (56.5 percent), alcohol (33.3 percent), exercise (29 percent), drinking coffee (21.7 percent) and hot meals (20.3 percent).


6 Natural Rosacea Treatments

rosacea-treatments

1. Identify Any Triggers in Your Diet

Since rosacea already makes skin sensitive, many people find that simply addressing the noticeable symptoms — for example, by using harsh chemical creams, prescriptions, light therapy and various lotions — actually, winds up making skin symptoms even worse. For some people, these rosacea treatments can lower signs and symptoms, at least temporarily, but they don’t address the root cause of the problem.

Many experts recommend thinking of rosacea as a “whole-body problem” as opposed to just one of the skin. Inflammation stemming from gut-related problems seems to be an especially important issue and a root cause of skin disorders. Your skin is ultimately a reflection of your overall health, after all: how well you digest nutrients if you have any sensitivities or allergies, how well-balanced your hormone levels are, if you’re getting enough sleep, etc.

Many studies have found an association between skin disorders — including rosacea, acne, dermatitis and psoriasis — and inflammatory gastrointestinal tract disorders. An overactive immune system that causes autoimmune reactions is likely a major contributor to both skin and digestive disorders, including leaky gut syndrome, ulcerative colitis, SIBO symptoms, Crohn’s disease and celiac disease. People who suffer from these disorders show heightened levels of immunoreactive neurones within their tissues and blood vessels that cause inflammation to progress.  This inflammation has the power to change the structure of microbial (bacteria) populations that normally colonize the skin and protect it from damage, redness, and rashes.

Since inflammation that shows up on your skin can be a clue that you’re experiencing inflammation within your gut, identifying food triggers is an important first step. The best way to tackle rosacea at its root is likely to approach your diet differently; focusing on anti-inflammatory foods and removing common allergens (at least temporarily to track reactions) can make a huge impact on skin disorders by positively affecting gut health and getting rid of yeast and bad bacteria.


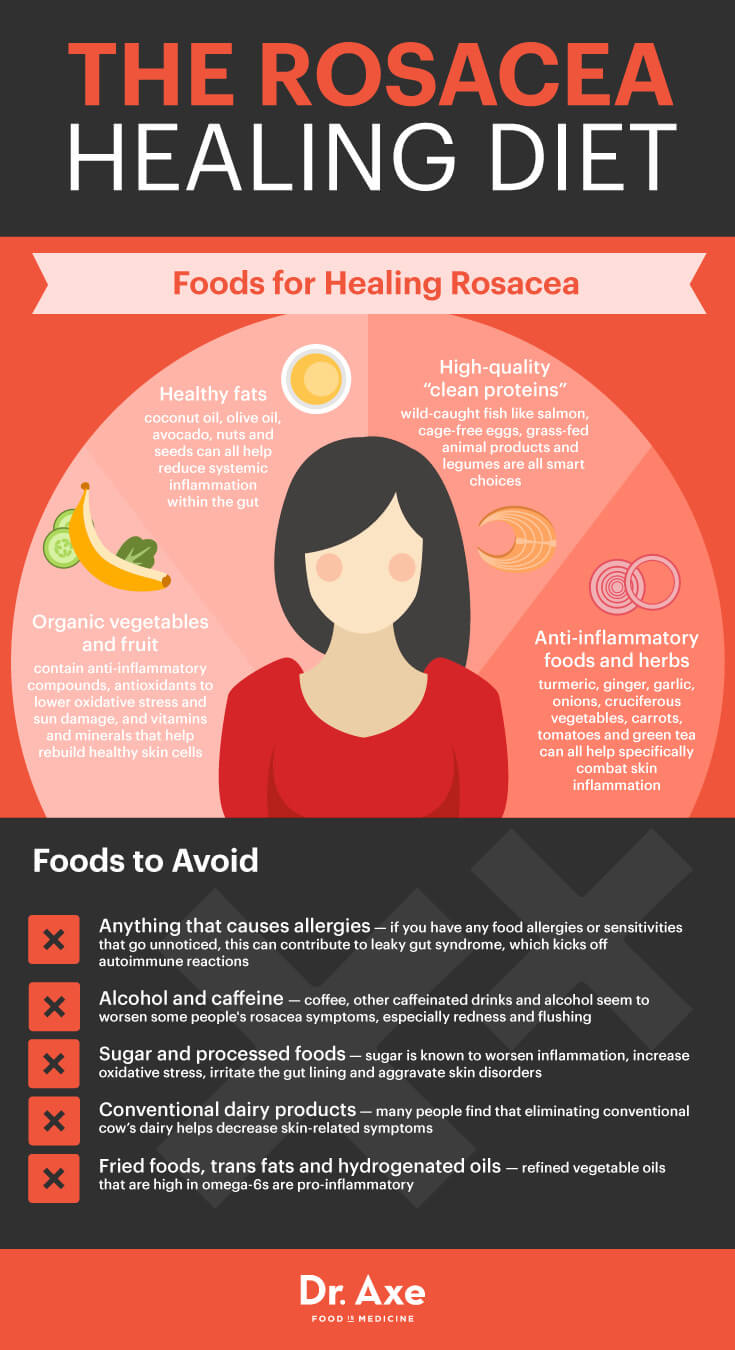
The best foods for healing rosacea include:

  • Organic vegetables and fruit — These contain anti-inflammatory compounds, antioxidants to lower oxidative stress and sun damage, and vitamins and minerals that help rebuild healthy skin cells. Leafy greens and orange/yellow fruits and vegetables are especially beneficial since they provide carotenoids that fight damage from sun exposure. Why is choosing organic important? Whenever you can, reduce your exposure to toxins and chemicals that can trigger skin reactions by buying organic.
  • Healthy fats — Coconut oil, olive oil, avocado, nuts, and seeds (like flax seeds and chia seeds) can all help reduce systemic inflammation within the gut. These are also important for helping with stress management and proper hormone production (plus they help keep you full for longer, so you’re less likely to crave processed foods that can trigger symptoms).
  • High-quality “clean proteins” — The immune system needs enough quality protein to work properly, but some types are most likely to trigger reactions than others. Wild-caught fish like benefit-packed salmon (which provides anti-inflammatory omega-3 fatty acids), cage-free eggs (assuming you don’t have an allergy), grass-fed animal products and legumes are all smart choices.
  • Anti-inflammatory foods and herbs — Turmeric, ginger, garlic, onions, cruciferous vegetables (like broccoli, cabbage, collard greens, etc.), carrots, tomatoes and green tea can all help specifically combat skin inflammation, according to studies.


The foods you want to avoid if you have rosacea include:

  • Anything that causes allergies — If you have any food allergies or sensitivities that are going unnoticed, this can contribute to leaky gut syndrome, which kicks off autoimmune reactions. Allergens can be different from person to person, so doing an elimination diet can help you narrow down what might be causing symptoms for you personally. Some common allergens include: gluten, nuts, shellfish/seafood, dairy or eggs (but allergies can really be caused by any food such as nightshade vegetables, a type of stone fruit, citrus, FODMAPs, etc.).
  • Alcohol and caffeine — Coffee, other caffeinated drinks and alcohol seem to worsen some people’s rosacea symptoms, especially redness and flushing. This differs from person to person, but it’s worth seeing if your symptoms improve when you cut back on both.
  • Sugar and processed foods — Sugar is known to worsen inflammation, increase oxidative stress, irritate the gut lining and aggravate skin disorders. Added sugar is found in a high percentage of processed, packaged foods, along with artificial sweeteners/ingredients, preservatives and texture stabilizers that can kick off allergic reactions.
  • Conventional dairy products — Many people find that eliminating conventional cow’s dairy (including yogurt, cheese, milk, ice cream, etc.) helps decrease skin-related symptoms.
  • Fried foods, trans fats, and hydrogenated oils — Refined vegetable oils that are high in omega-6s are pro-inflammatory. These include corn, soybean, safflower, sunflower and canola oils. Fried foods are also hard on the digestive system and can aggravate gut damage.

RosaceaGraphic2

2. Wear Sunscreen Every Day

Anyone with rosacea-type symptoms, or any form of regular redness on the skin, should be careful about regularly using sunscreen on sensitive areas of the skin (especially the face). UV light seems to aggravate rosacea symptoms and can cause inflammation that is linked to its onset.

Studies show that daily skin-care regimens, including the use of a sunscreen, offers significant benefits against flare-ups. While getting exposure to the sun is important for vitamin D production within your skin, it’s best to keep your face well-protected. The sun is considered one of the most strongly aggravating factors of rosacea, according to some studies. Just be careful about the sunscreen you choose, since studies show many sunscreens are toxic and therefore can make symptoms even worse.

3. Use Natural Moisturizers and Cosmetic Products

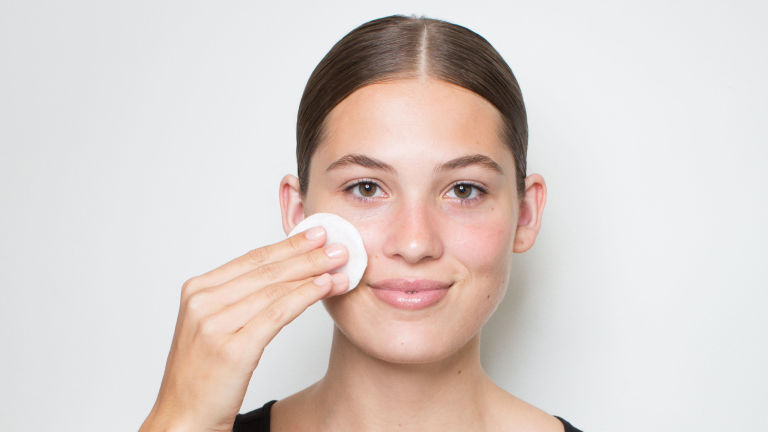
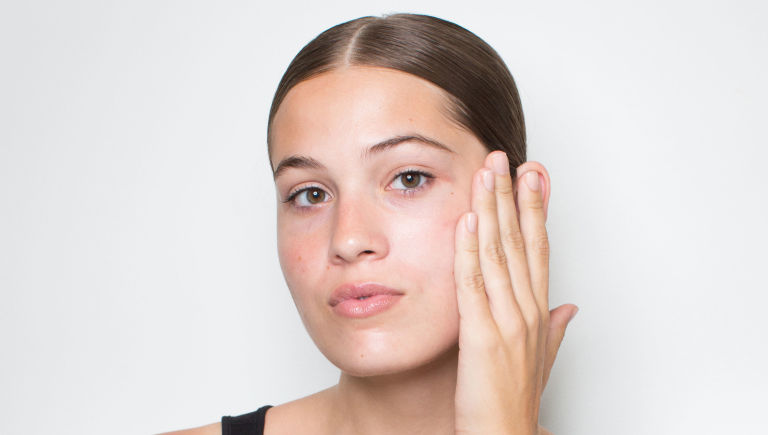
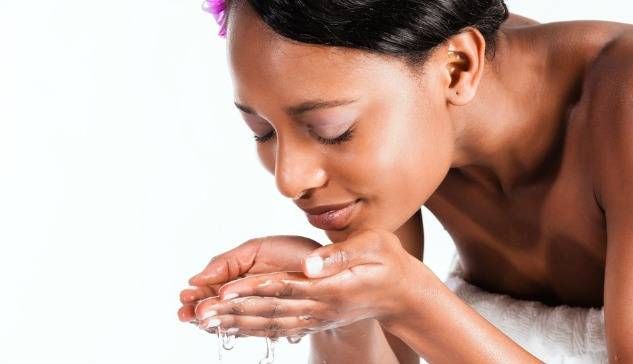
Clinical assessments observing the skin’s barrier and hydration levels indicate that moisturizing rosacea-prone skin can help restore the skin’s barrier. When patients regularly cleaned and moisturized dry, rough, patchy skin, they found that noticeable symptoms, discomfort and overall sensitivity of skin improved.

It might be tempting to avoid using moisturizer on your skin if you have oily, red or sensitive patches and are also prone to acne breakouts, but a non-chemical and naturally antibacterial skin moisturizer like coconut oil can provide essential acids to the skin without causing breakouts or further irritations. Wild plants rich in natural oils (including coconuts, aloe and many that are used to make essential oils) are commonly used to treat skin diseases around the world and have been the go-to methods for treating skin problems for centuries. Natural rosacea treatment products tend to be less irritating and are also cheap, safe and easy to obtain compared to prescriptions.

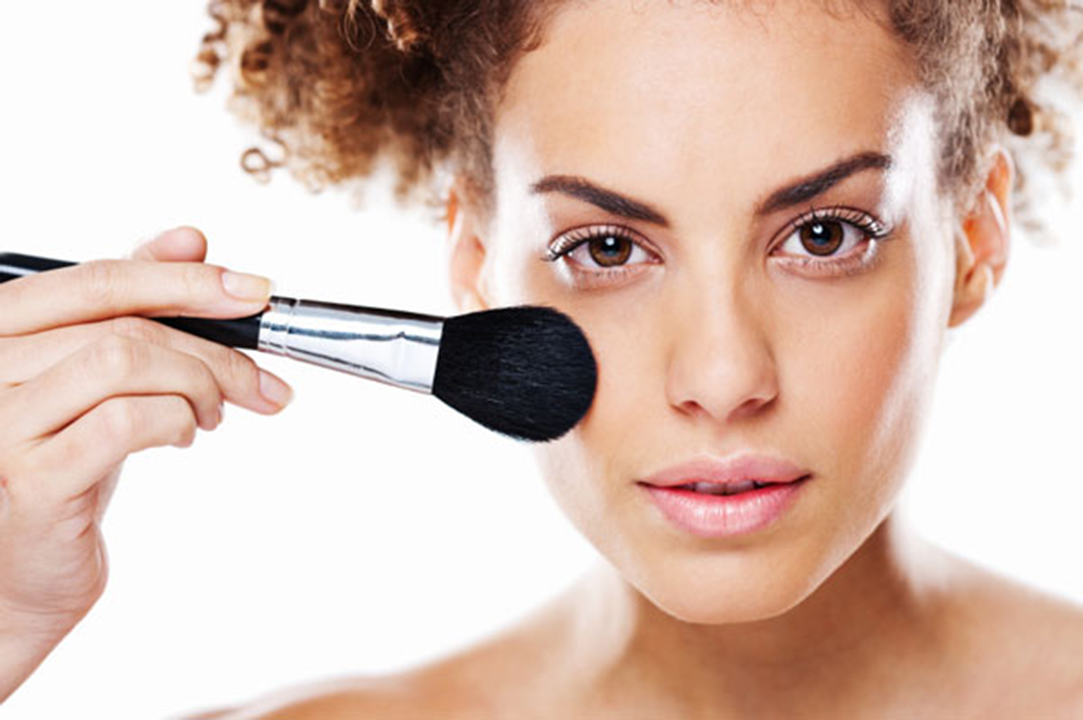
If you do want to try to cover up your rosacea with cosmetics because you feel self-conscious, just be careful since many commercial makeup products can further aggravate rosacea symptoms. Buying gentle and organic cosmetics limits the amount of harsh chemicals you put on your sensitive skin. You can always ask your dermatologist for help choosing gentle cosmetics too.

4. Manage Stress Levels

Aside from all of the physical symptoms that rosacea can cause, many people also feel mentally and emotionally challenged by this skin condition. A high percentage of rosacea sufferers report feeling less confident due to their appearance. Ongoing facial blotchiness, bumps and redness can be really hard to handle emotionally (similarly to suffering from acne), but unfortunately stressing over the condition is only likely to make it worse.

Similarly to acne breakouts, stress is known to be a common trigger of rosacea that can bring on flare-ups. Try your best to control stress in your life for two reasons: first, because stress makes autoimmune reactions and inflammation even worse, and secondly because you’re likely already under enough added stress when dealing with a rosacea flare-up. Remember that you can’t always completely avoid symptoms appearing and shouldn’t feel guilty if flare-ups still occur. At the same time, you’re also not totally helpless and likely have a lot of control over how severe your symptoms get, so try to focus on feeling empowered instead of embarrassed and find ways to bust stress in your life.

Educate yourself about the disorder, learn more about rosacea treatments and be open-minded to trying new approaches in order to help you feel more in control. Use stress-reducing techniques like exercise, meditation, healing prayer and journaling to try to soothe yourself as much as possible. Keep in mind that despite what some people might assume, rosacea has nothing to do with poor hygiene and is caused by internal factors, so being open and honest about your condition can help you feel better and gain support.


5 Side Effects of Rosacea Medications:

If you do decide to use prescription rosacea treatments or antibiotics, it’s usually best to try a topical one used on the skin, as opposed to antibiotics capsules taken internally that can affect gut health in negative ways. Antibiotics work by reducing bacteria that contribute to the problem, but they not only kill “bad bacteria” in your body, they also kill “good bacteria” living in the digestive tract that are needed for proper digestion, nutrient absorption, immune defenses and more.

Because skin damage from rosacea can be progressive, some dermatologists prefer that medications be continued with an antibiotic for more than a year. However, this poses risks considering antibiotics have dangers when used often and long term. Ongoing use increases the likelihood of antibiotic resistance forming, which means the medications can stop working. Pigmentary deposition is another problem, which results when the skin turns abnormal pigments (usually very light) permanently.

6. Try Supplements and Essential Oils that Can Help Rosacea

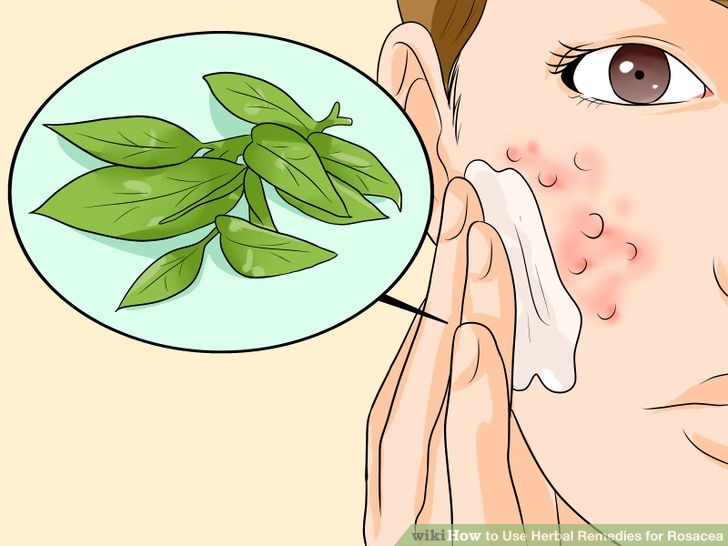
Many supplements and essential oils can help fight inflammation that is the root cause of rosacea. Herbal remedies offer a safe and effective way to cure different kinds of skin diseases, even for sensitive skin, which is why they’ve been used in places like India, Asia, and Australia for thousands of years. Even today, more than 80 percent of people in India depend on traditional health care treatments and use various plant-based products for curing skin-related problems!

Many natural plant extracts, spices, and herbs do more than just lower red, inflamed breakouts; they can also be effective for fighting bacterial growth, yeast, fungus, signs of aging, wrinkles, stretch marks and hyperpigmentation. They seem to help speed up circulation and therefore wound healing by improving blood flow to the affected area, reducing the presence of bacteria that can aggravate the skin thus preventing cell death of healthy cells.

Some of the best essential oils and supplement rosacea treatments for reducing skin inflammation include:

  • Turmeric
  • Ginger
  • Aloe vera gel (used topically on the skin)
  • Raw honey (used topically on the skin)
  • Essential oils: Tea tree, lavender, eucalyptus, geranium, chamomile, rose, rosemary, and thyme essential oils have all been found to fight skin inflammation and help treat sensitive skin. To treat the area, simply rub three drops of oil on three times daily mixed with 1/2 teaspoon of coconut oil. Always combine these with a carrier oil (including coconut or jojoba oil) and apply to the affected area no more than twice daily. Perform a skin patch test first and then start gradually to test results, making sure you don’t experience an allergic reaction.


What Should I Look For?

According to Western Medical System


According to: Robynne Chutkan, MD, a gastroenterologist 


A number of lifestyle and environmental factors can trigger a rosacea flare-up, including your diet. Although rosacea affects your skin, what you eat can play a big role in managing your symptoms, according to Robynne Chutkan, MD, a gastroenterologist and assistant professor in the division of gastroenterology at Georgetown University Hospital in Washington, D.C., and author of the book Gutbliss.

“The relationship between the gut and the skin is fascinating, and rosacea is a prime example of how they interact,” explained Dr. Chutkan. “As a rosacea sufferer myself, I’m particularly interested in this.”

Although factors that cause rosacea to flare up vary from person to person, in the following question-and-answer session, Chutkan shed some light on the link between diet and rosacea. She also provided rosacea diet tips that may help keep your symptoms in check.

The gut is a hollow tube that runs the length of the body, from the mouth to the anus, so think of the digestive tract as the inside of the skin,” Chutkan said. “It’s helpful to think that way. Really, the two are very connected. I’m not the first, and I’m sure I won’t be the last, to comment on that observation.”

A bacterial imbalance in the gut can show up on the skin and worsen conditions like rosacea, she added. “For those with bloating and GI upset who also have rosacea, there is a clear correlation between bacterial overgrowth and this skin condition,” she explained. Certain foods, frequent antibiotics, steroids, and antacids are among the factors that can upset the delicate balance of bacteria in the gut and lead to an overgrowth of bad bacteria and a shortage of the good bacteria. Chutkan explained that identifying the cause of a bacterial imbalance is key to improving rosacea symptoms.

A 2008 controlled study conducted by researchers in Genoa, Italy, looked at 120 patients from a dermatology clinic with rosacea and 60 people that didn’t have it,” Chutkan said. “They found that a significant percentage of the rosacea patients had small intestinal bacterial overgrowth or SIBO. There was a higher prevalence of this bacterial overgrowth among the rosacea patients than in the control group as well as the general population.”


Q: What are some common food triggers that can cause rosacea to flare-up?

“Alcohol seems to be a universal trigger for people with rosacea,” Chutkan said. “Some people find dairy worsens their symptoms. Others say soy or artificial sweeteners trigger a flare-up. Caffeine also affects some people.” think of it this way foods that have acidity to their nature are probably an NO.

Chutkan’s advice is two-fold. “It’s a good idea to avoid things that kill off good bacteria like antacids [because], if you block stomach acids, you get overgrowth of bacteria in the digestive tract. You should also avoid the starchy and sugary foods that encourage the overgrowth of bad bacteria species.”


Q: What foods should I eat to help control my rosacea?

Leafy greens and other high-fiber foods, such as legume, asparagus, and kale, in genera,l green organic vegetables can help create an environment in the gut that allows good bacteria to grow, Chutkan pointed out. “We are talking about cutting out process foods like cake, ice cream, and sugar making changes that will have other health benefits,” she said. “There are also probiotics that are very useful, but it’s more about diet and eating the kind of food that will encourage the growth of good bacteria and discourage the growth of bad bacteria.”


Q: Is there a specific rosacea diet?

Although there’s no specific rosacea diet due to the fact that every individual is different, Chutkan noted that two diets limit starches, sugar and other foods that may lead to the overgrowth of harmful bacteria in the gut. “I looked at what was written in medical literature about the anti-inflammatory diet for skin,” she said. “This diet excludes refined sugar, complex carbohydrates, and high levels of saturated fat. It encourages nutrient-dense foods, such as deeply pigmented fruits. It also encourages eating good sources of omega-3 fatty acids, such as wild salmon and chia flax seeds.” that is a contradiction.

Another diet that may promote a healthy balance of bacteria in the gut is the Paleolithic or Paleo diet, added Chutkan. “It’s an early low-carb diet, in which people eat as cavemen or women did before the advent of fire,” she said. We consider this diet extreme and is  a great amount of vegetarian and vegan so what are they support to do? “You cut out sugar and processed grain ( that means no breads) and eat unlimited amounts of animal protein, fruits and vegetables, nuts, and seeds. You avoid peanuts and  as well as dairy of any kind.. yogurt from coconut milk is excellent, goat yogurt also a good choice ” Chutkan noted the Paleo diet is popular among endurance athletes.


Q: Why do hot liquids seem to make symptoms worse?

The facial blood vessels of people with rosacea may dilate too easily. This increased blood flow near the skin surface can make the skin look red and flushed. “Extreme temperatures do not cause rosacea, but this can make the condition worse by dilating the blood vessels and increasing blood flow even more, so the skin appears even more red,” Chutkan explained. Alcohol increases blood flow also and the heat rises up so the head will hold more flushing, have you notice that a hangover gives you a headache? and at the same time nausea? Well, there is inflammation and acidity.


Q: Why do citrus fruits and spicy foods seem to make rosacea symptoms worse?

“Citrus fruits release histamine, which can aggravate rosacea; spicy foods aggravate rosacea by causing dilation of the tiny blood vessels under the skin,” Chutkan said. “It’s important to remember, however, that rosacea triggers are different for everyone,


Q: After making dietary changes, how soon can I expect to see an improvement in my rosacea symptoms?

“What I tell my patients is that they didn’t develop this condition overnight — they developed it over their lifetime,” Chutkan said. “There must be a shift in the bacteria in the gut towards more beneficial species and less of the not-so-good species. You can’t cure rosacea overnight, but over a period of time, you can really see improvements again everyone is different.”


Q: What about craving foods that have been eliminated from the diet?

“If things do clear up after making healthy dietary changes, and you find that you are really missing something, you can reintroduce it and see how you react,” Chutkan said. “It’s important to do this with one food at a time in order to evaluate your body’s response.”


Primary Signs of Rosacea

Rosacea can vary substantially from one individual to another,since are individuals. According to a consensus committee and review panel of 17 medical experts worldwide, rosacea always includes at least one of the following primary signs, and various secondary signs and symptoms may also develop.

Primary Signs of Rosacea

  • Flushing
    Many people with rosacea have a history of frequent blushing or flushing. This facial redness may come and go, and is often the earliest sign of the disorder.
  • Persistent Redness
    Persistent facial redness is the most common individual sign of rosacea, and may resemble a blush or sunburn that does not go away.
  • Bumps and Pimples
    Small red solid bumps or pus-filled pimples often develop. While these may resemble acne, blackheads are absent and burning or stinging may occur.
  • Visible Blood Vessels
    In many people with rosacea, small blood vessels become visible on the skin.

Other Potential Signs and Symptoms

  • Eye Irritation
    In many people with rosacea, the eyes may be irritated and appear watery or bloodshot, a condition known as ocular rosacea. The eyelids also may become red and swollen, and styes are common. Severe cases can result in corneal damage and vision loss without medical help.
  • Burning or Stinging
    Burning or stinging sensations may often occur on the face. Itching or a feeling of tightness may also develop.
  • Dry Appearance
    The central facial skin may be rough, and thus appear to be very dry.
  • Plaques
    Raised red patches, known as plaques, may develop without changes in the surrounding skin.
  • Skin Thickening
    The skin may thicken and enlarge from excess tissue, most commonly on the nose. This condition, known as rhinophyma, affects more men than women.
  • Swelling
    Facial swelling, known as edema, may accompany other signs of rosacea or occur independently.
  • Signs Beyond the Face
    Rosacea signs and symptoms may also develop beyond the face, most commonly on the neck, chest, scalp or ears.


Subtypes of Rosacea

Subtypes of Rosacea

The consensus committee and review panel of 17 medical experts worldwide identified four subtypes of rosacea, defined as common patterns or groupings of signs and symptoms. This includes:

  • Subtype 1 (erythematotelangiectatic rosacea), characterized by flushing and persistent redness, and may also include visible blood vessels.
  • Subtype 2 (papulopustular rosacea), characterized by persistent redness with transient bumps and pimples.
  • Subtype 3 (phymatous rosacea), characterized by skin thickening, often resulting in an enlargement of the nose from excess tissue.
  • Subtype 4 (ocular rosacea), characterized by ocular manifestations such as dry eye, tearing and burning, swollen eyelids, recurrent styes and potential vision loss from corneal damage.

Many people experience characteristics of more than one subtype at the same time, and those often may develop in succession. While rosacea may or may not evolve from one subtype to another, each individual sign or symptom may progress from mild to moderate to severe. Early diagnosis and treatment are therefore recommended.


How is Rosacea Treated?

How is Rosacea Treated


When appropriate, treatments with lasers, intense pulsed light sources or other medical and surgical devices may be used to remove visible blood vessels, reduce extensive redness or correct disfigurement of the nose. Ocular rosacea may be treated with oral antibiotics and other therapy.
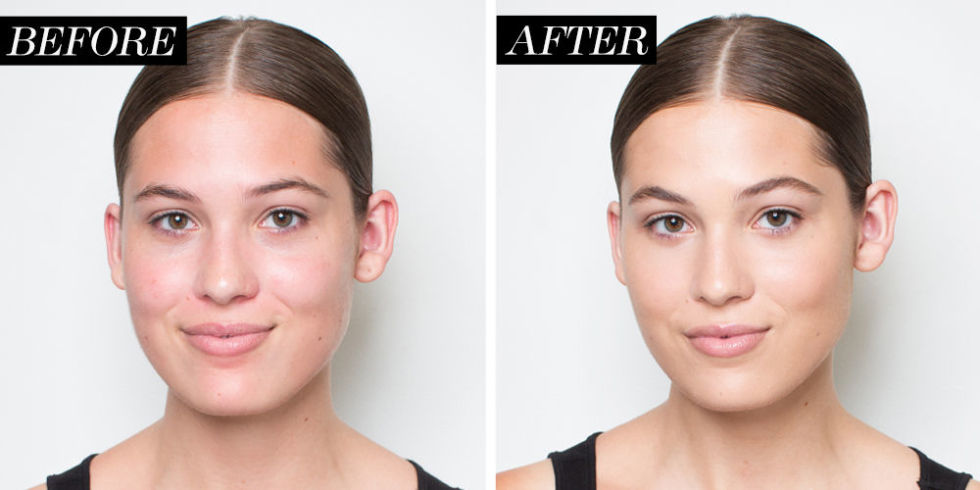
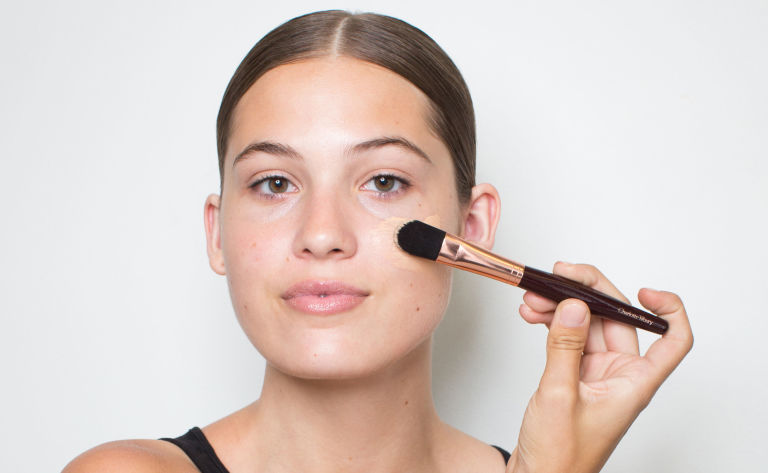
 

Skin Care

rosacea skin care


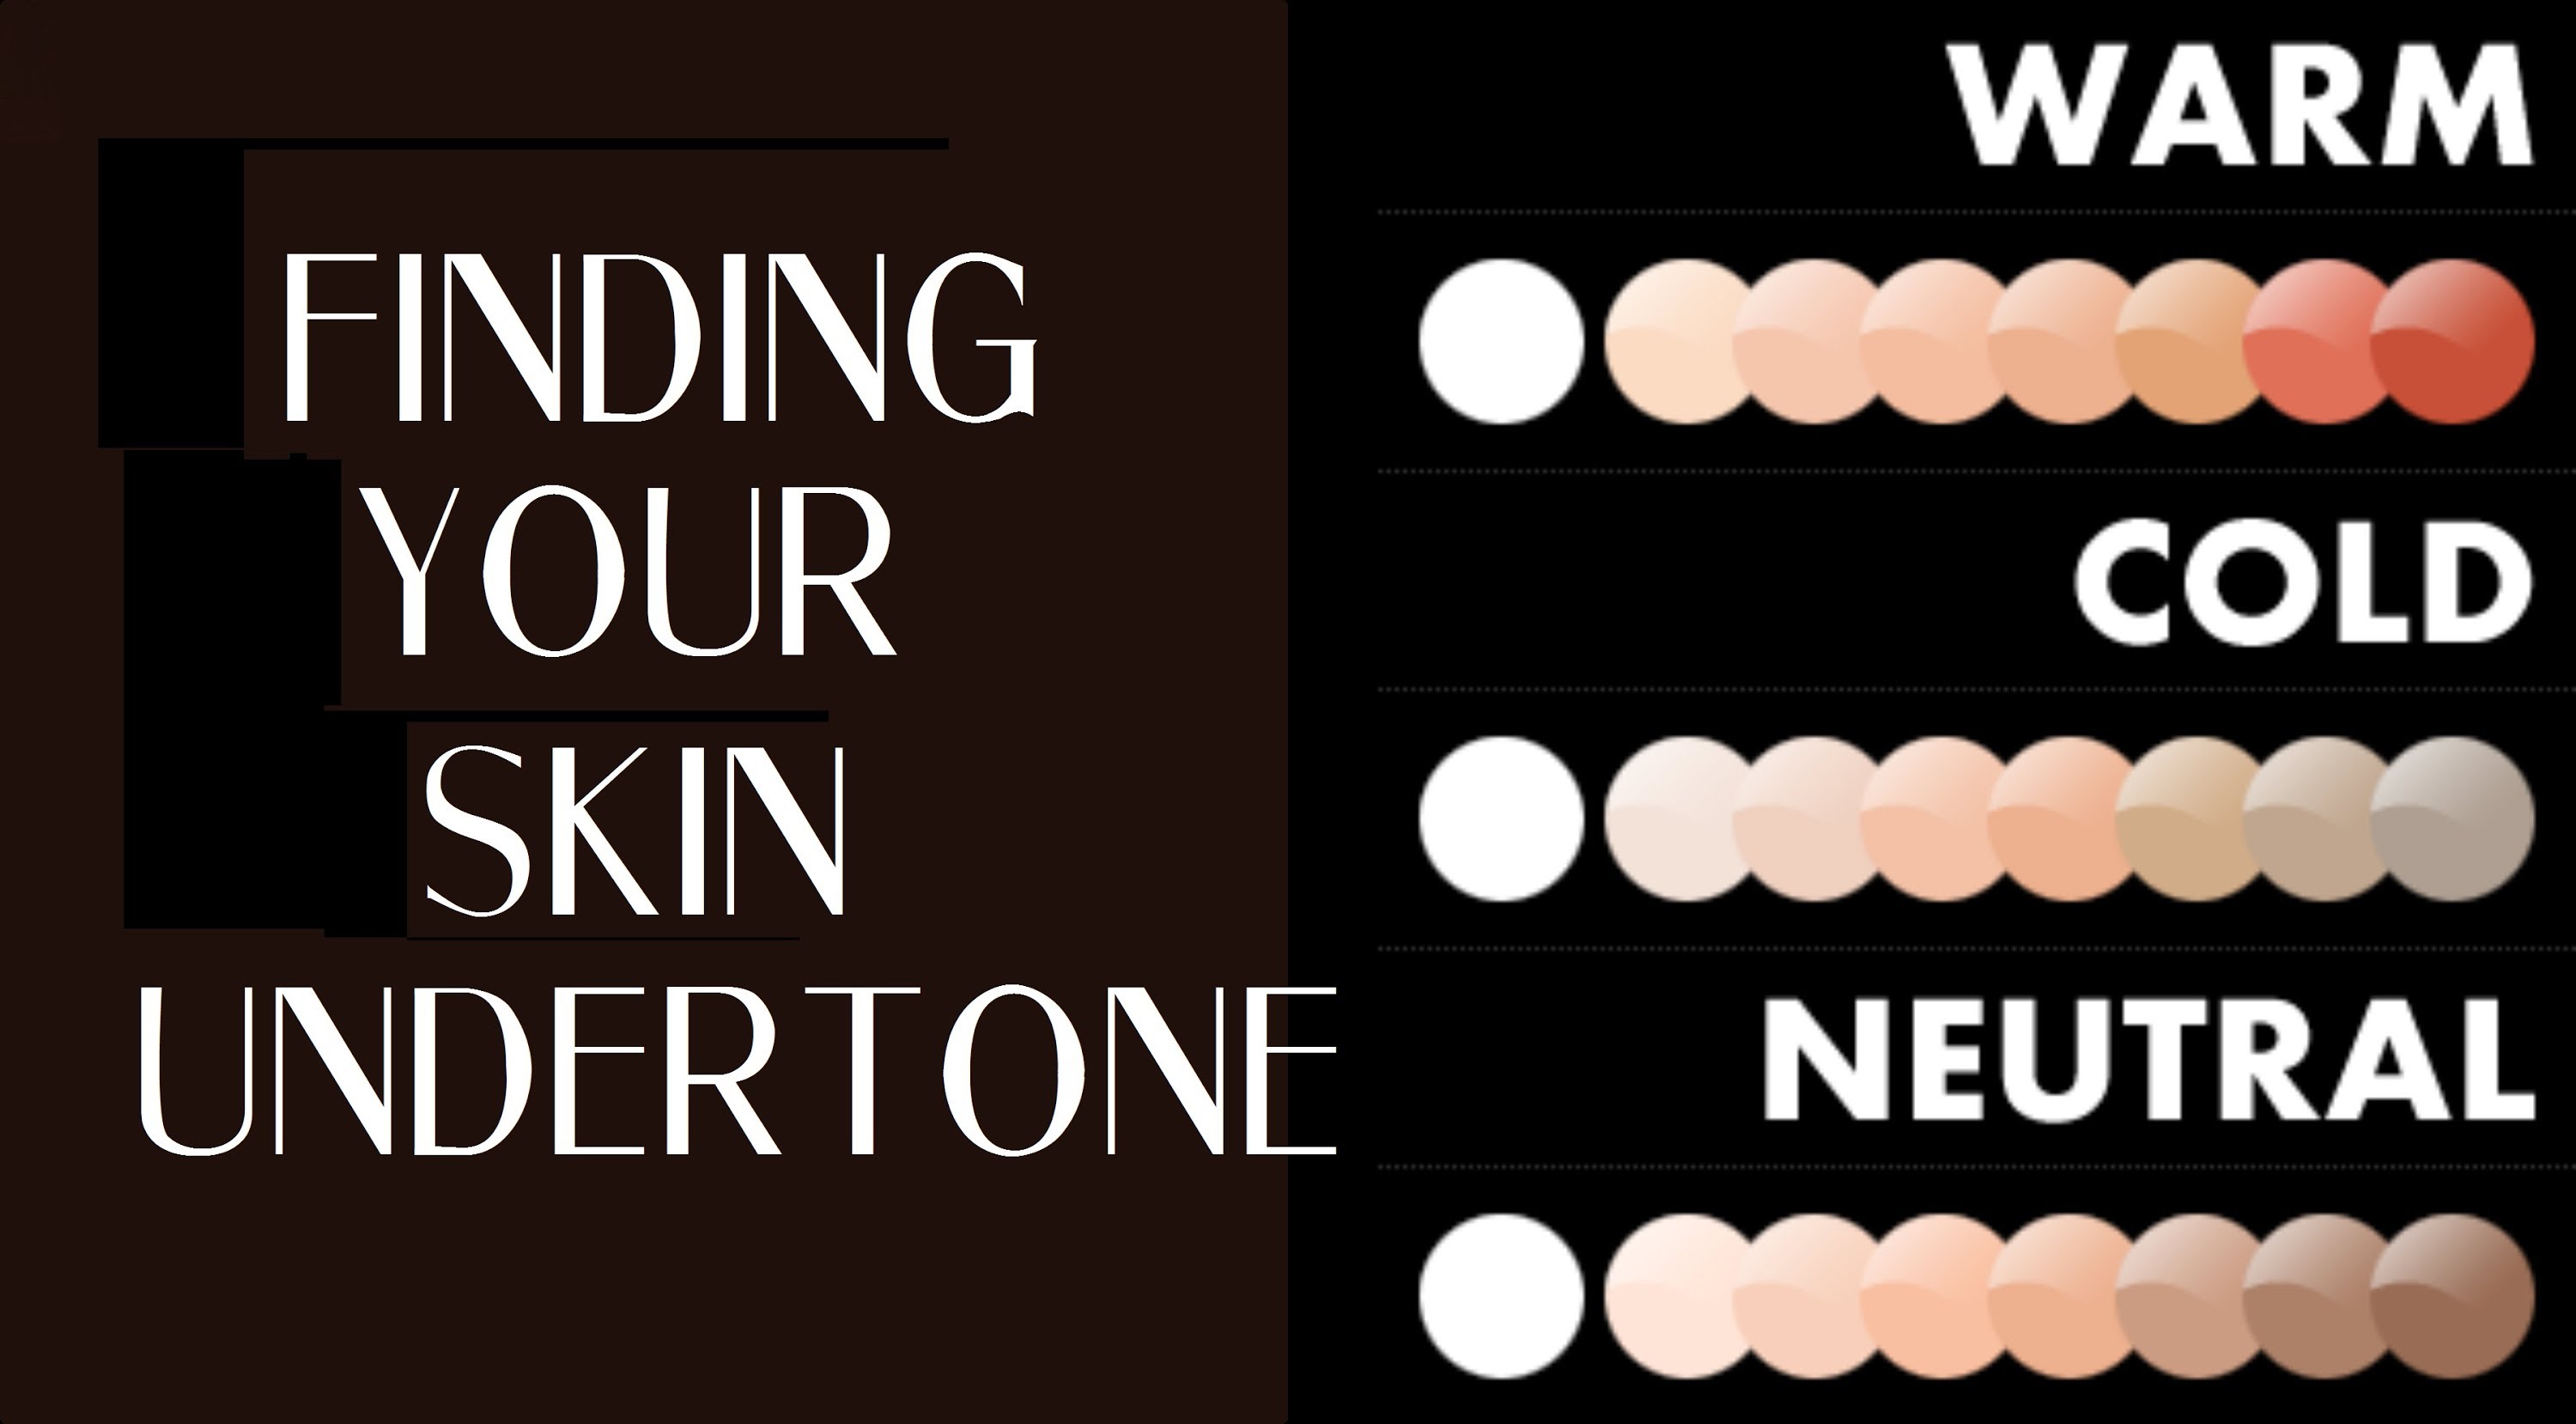
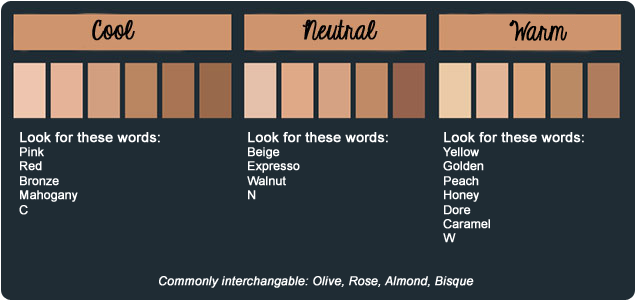
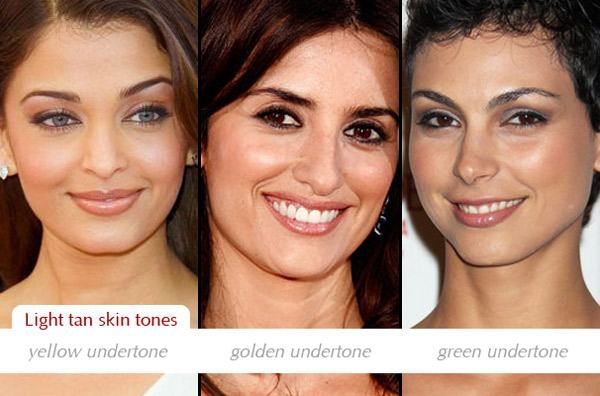
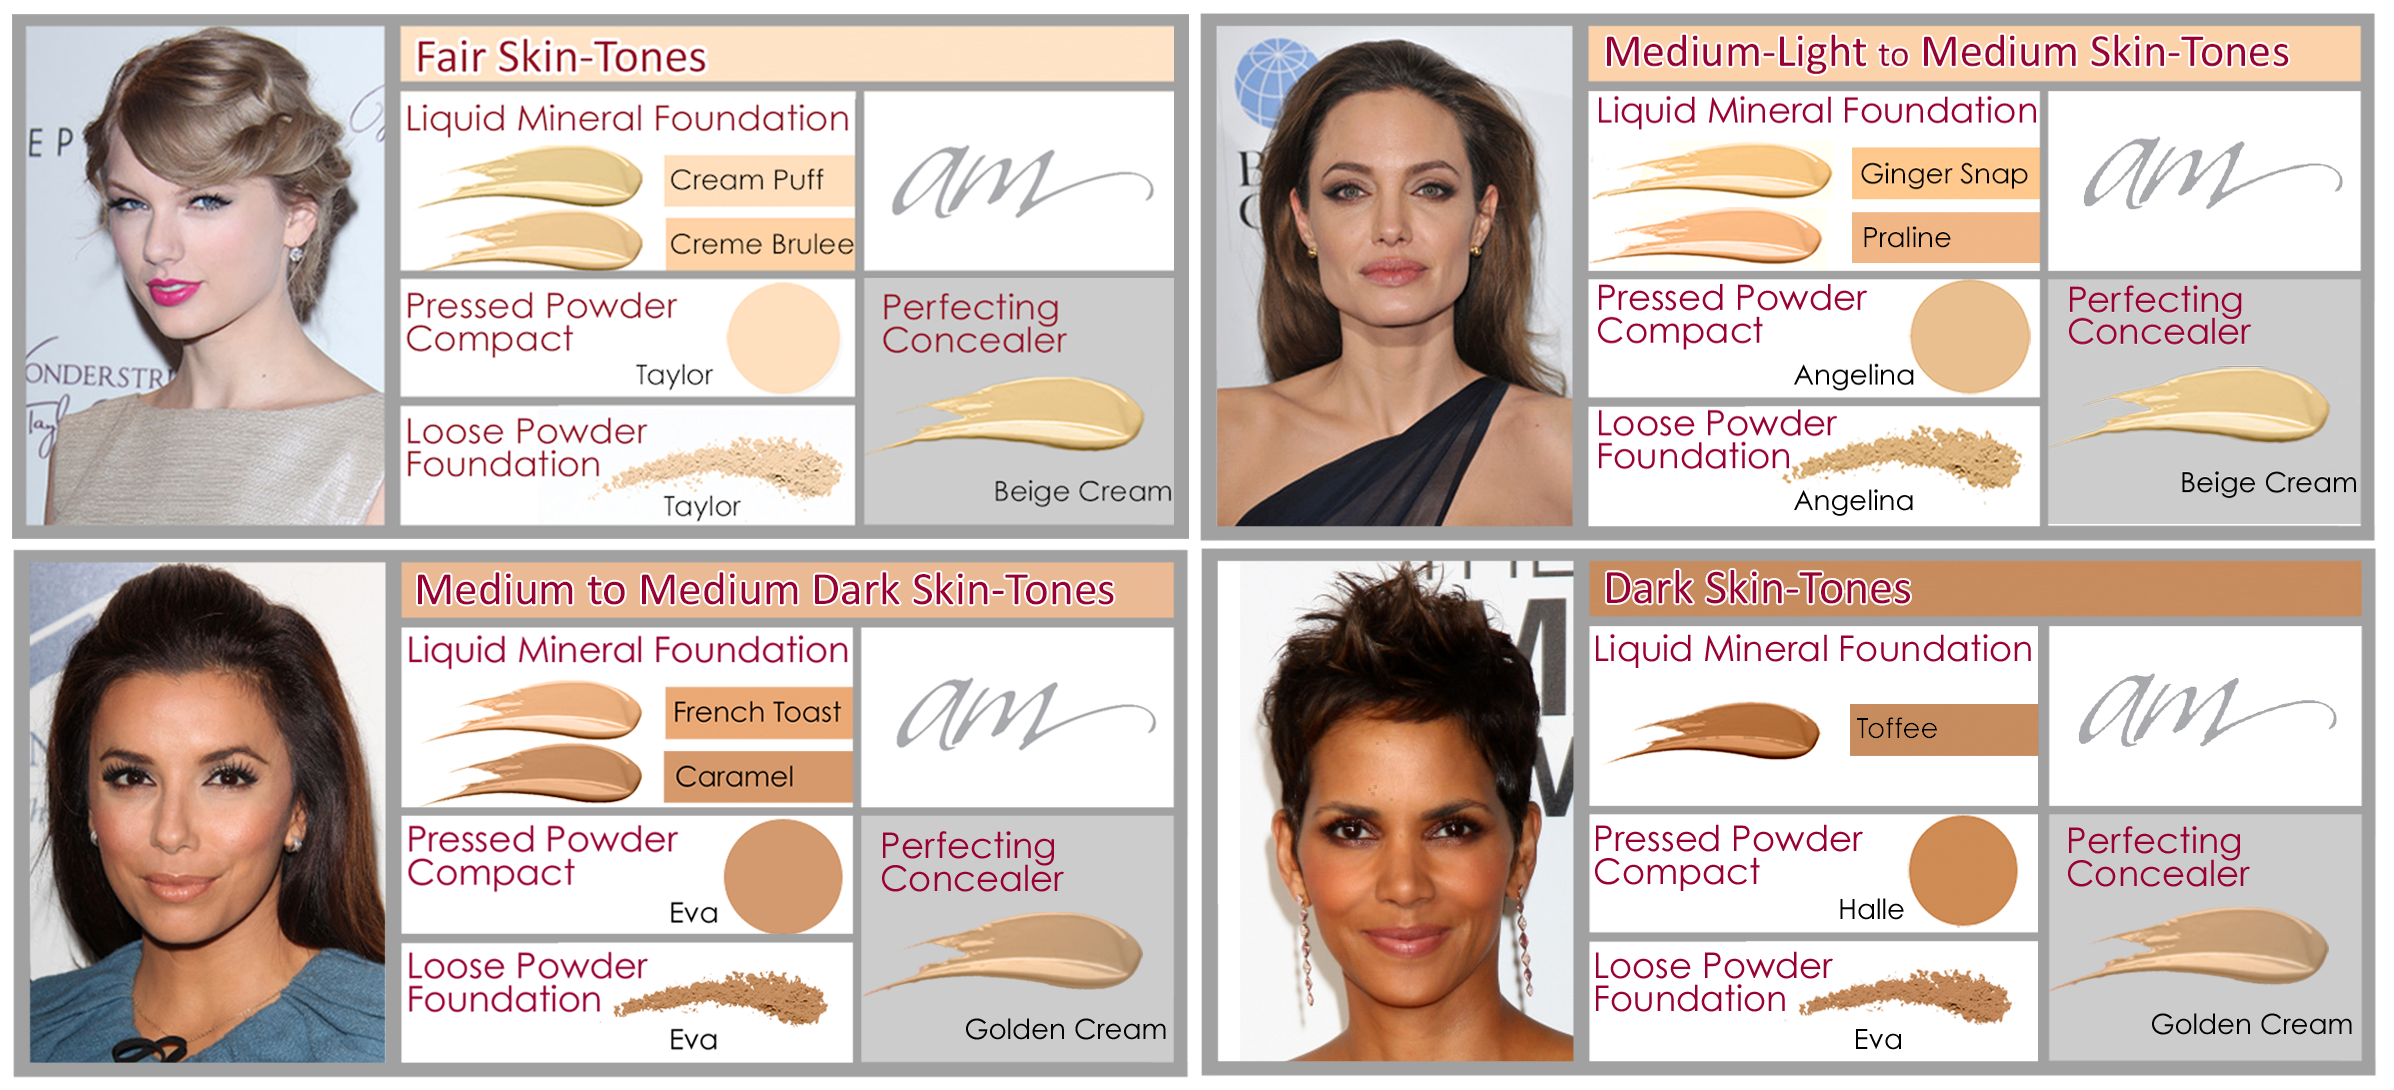
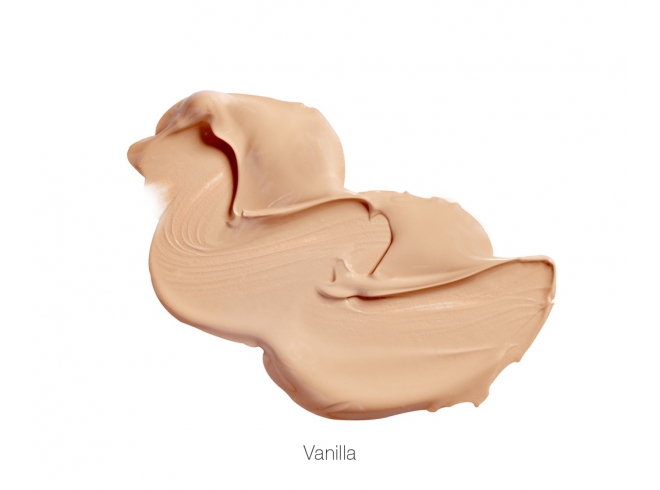
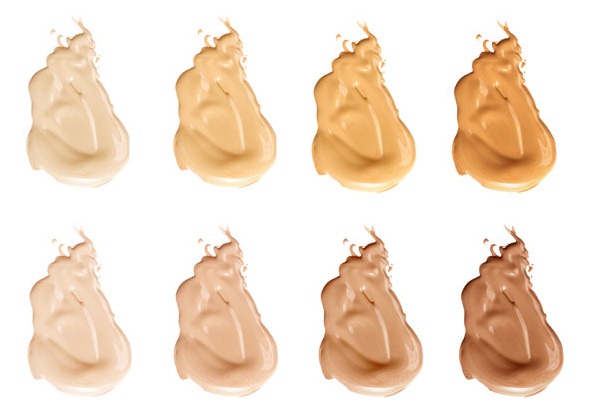
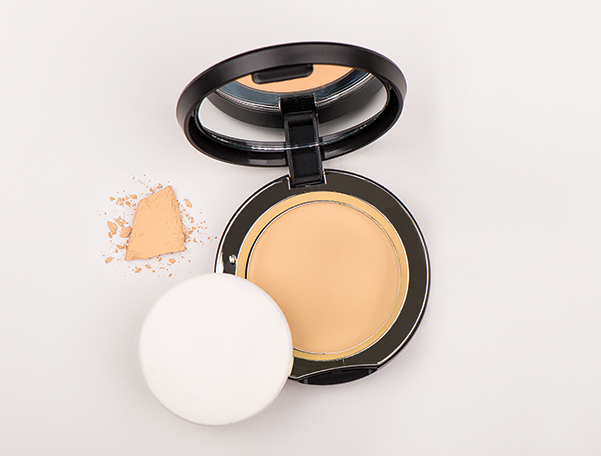
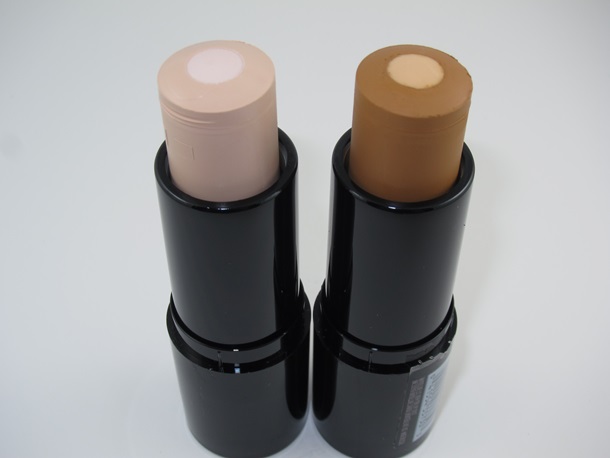
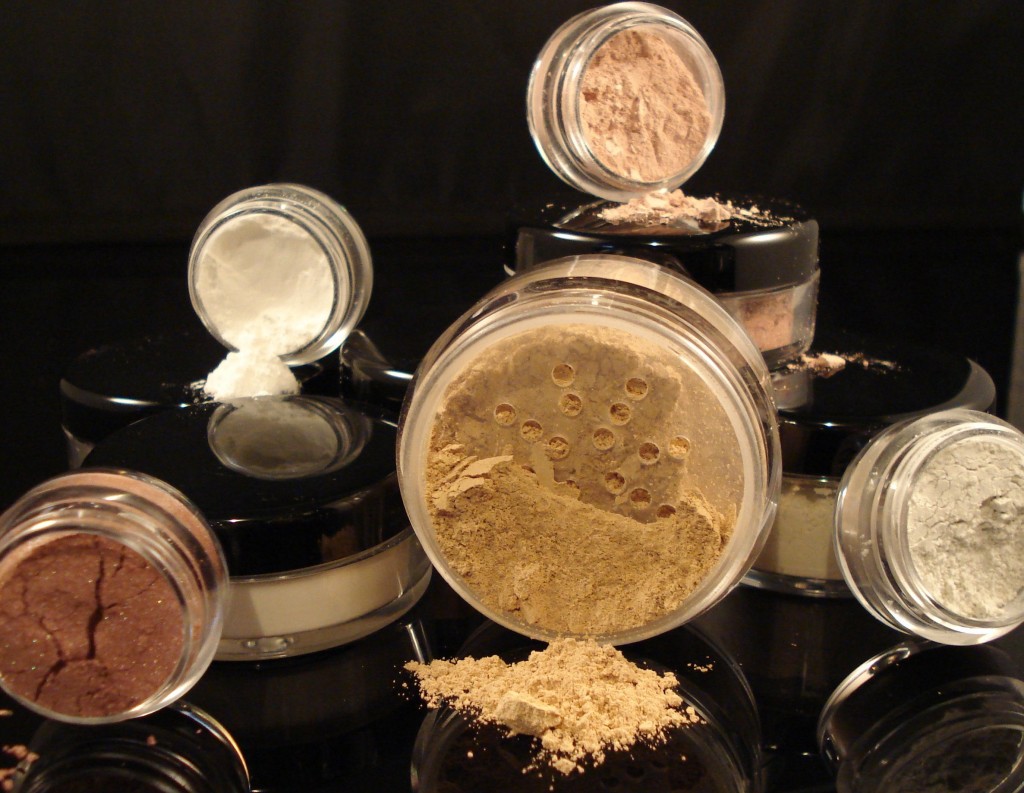
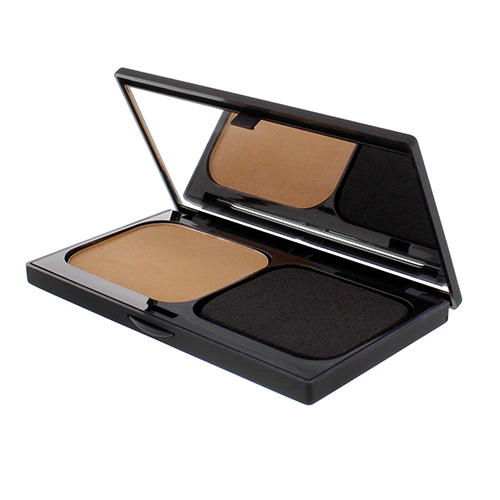
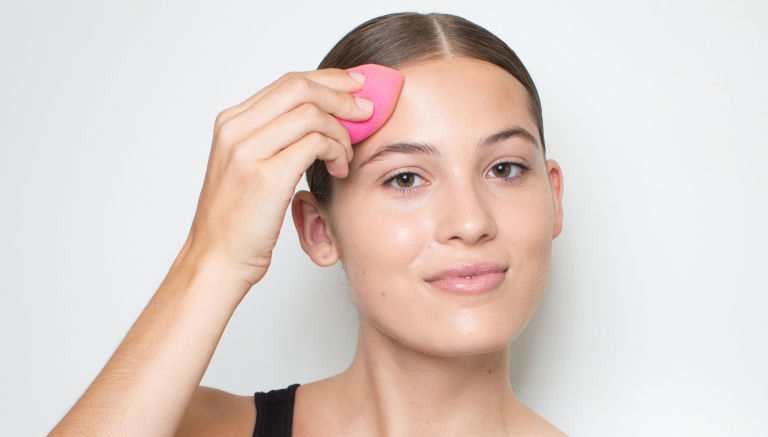
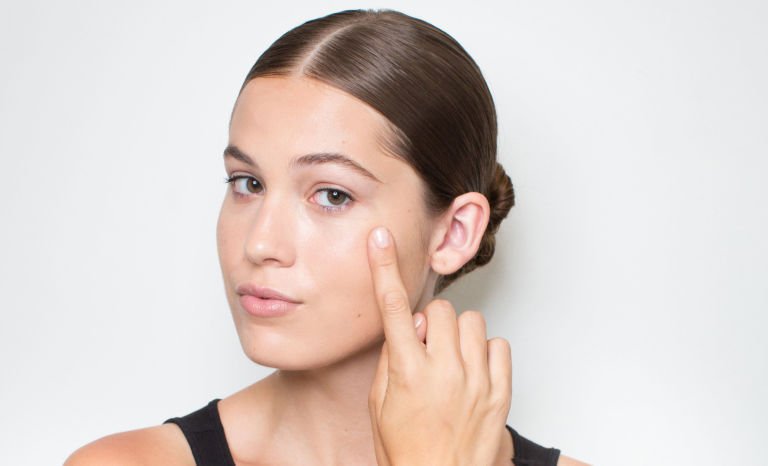
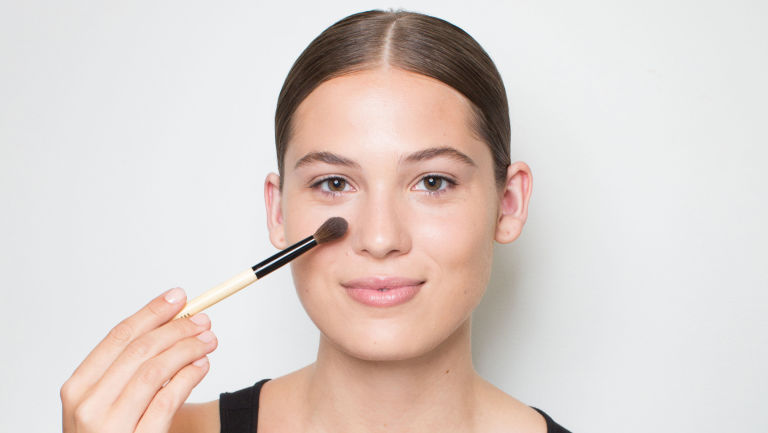
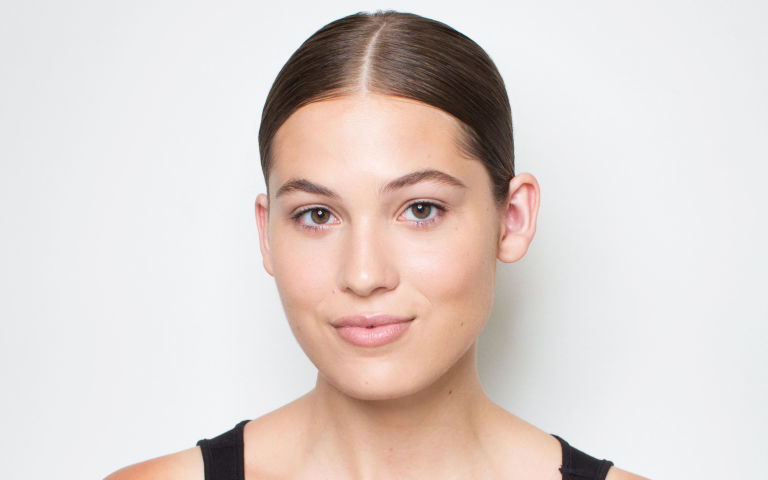
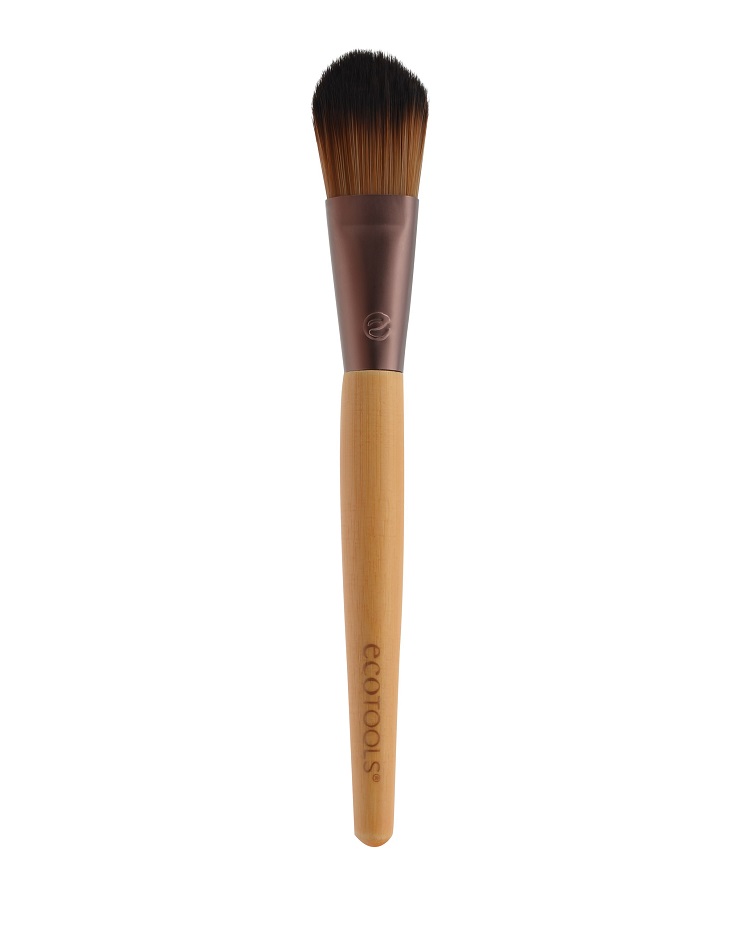
Cosmetics may be used to conceal the effects of rosacea. Green makeup or green-tinted foundations can be used to counter redness. This can be followed by a skin-tone foundation with natural yellow tones, avoiding those with pink or orange hues.


Home Remedies for Rosacea

Home Remedies for Rosacea

from: http://www.naturalalternativeremedy.com/the-20-best-home-remedies-for-rosacea


Topical Choices


Cucumber Mask

cucumber-mask

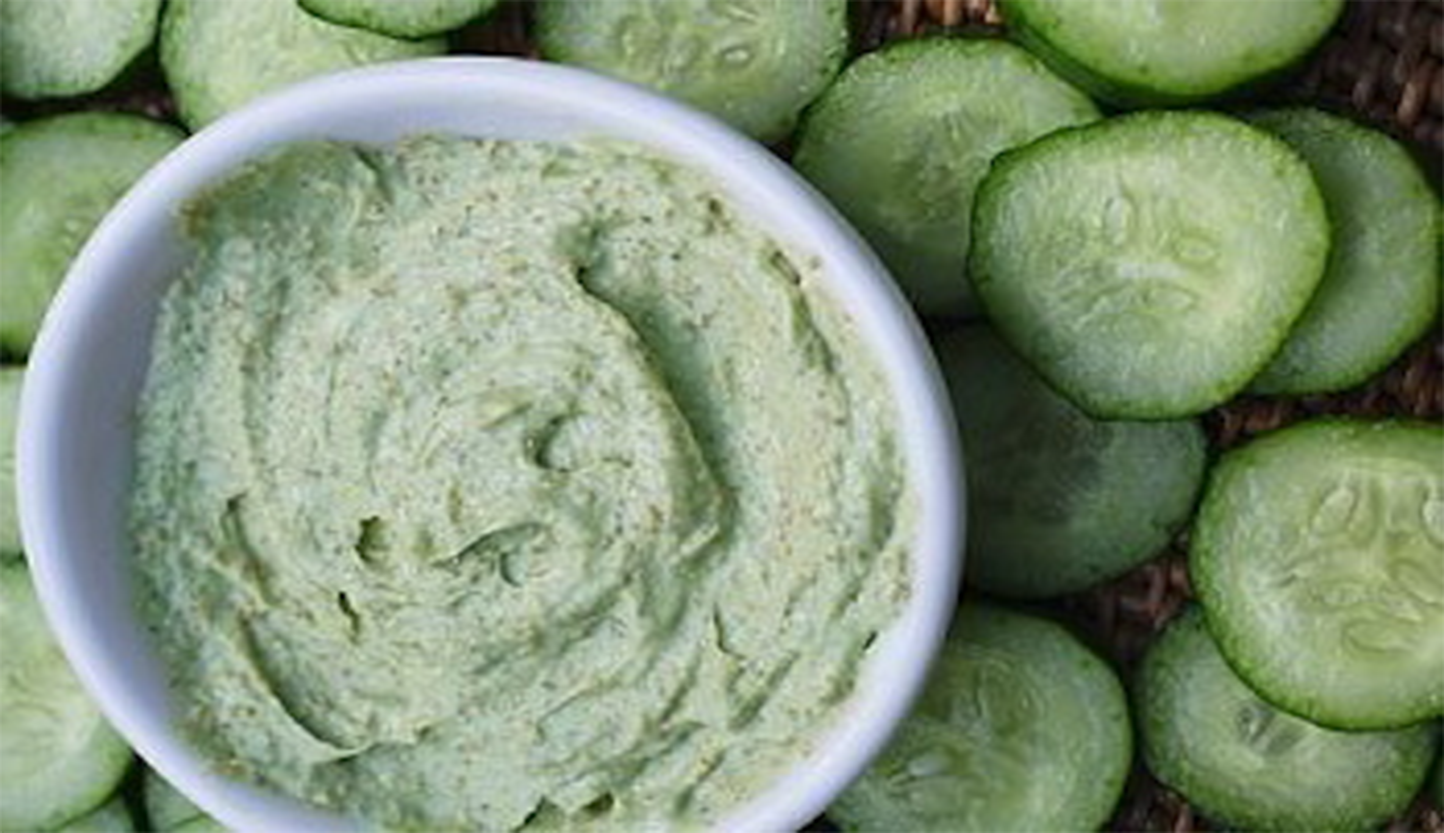
Fresh cucumber blended into a facial mask may help with rosacea. Gently smooth the mask on your face, and leave it for a half an hour or so. Rinse the face completely with cool water, once the 30 minutes are up. You typically will see progress within a month of daily use. One of our favorite cucumber masks is Beauty by Earth.


Chamomile Compress

Chamomile Compress
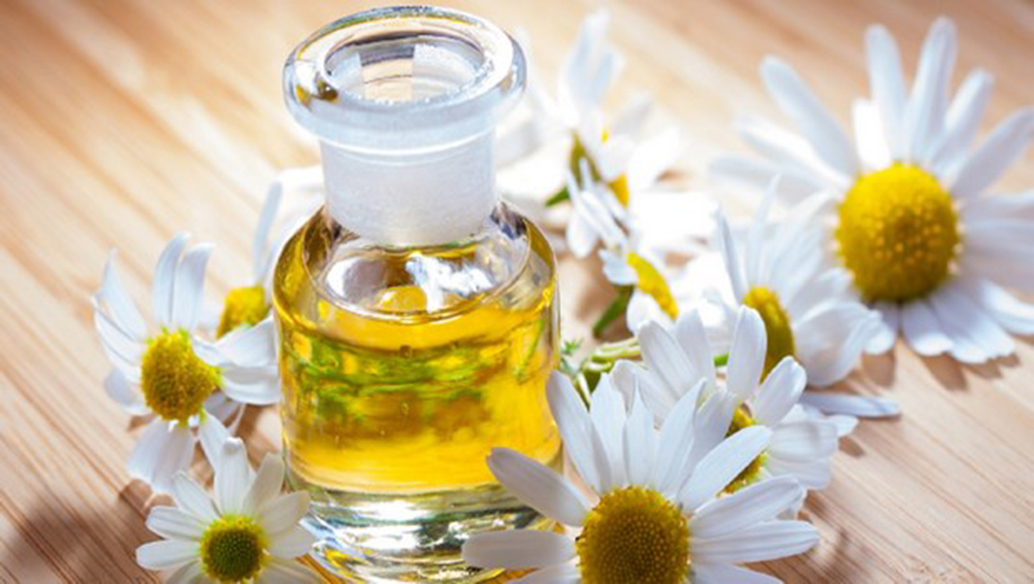
A mild compress with chamomile oil might help lessen the redness associated with rosacea. Debora Yost recommends using this to help handle rosacea-related flareups. Cool the resultant mixture in the fridge. Dampen a soft fabric in this mixture whenever you start to feel a flare-up and place it on your face for fifteen to twenty minutes. Some individuals are sensitive to chamomile, particularly when they have responses to daisies, marigolds, and ragweed, and should avoid using chamomile.


Apple Mask

Apple-Mask-for-Clear-Skin
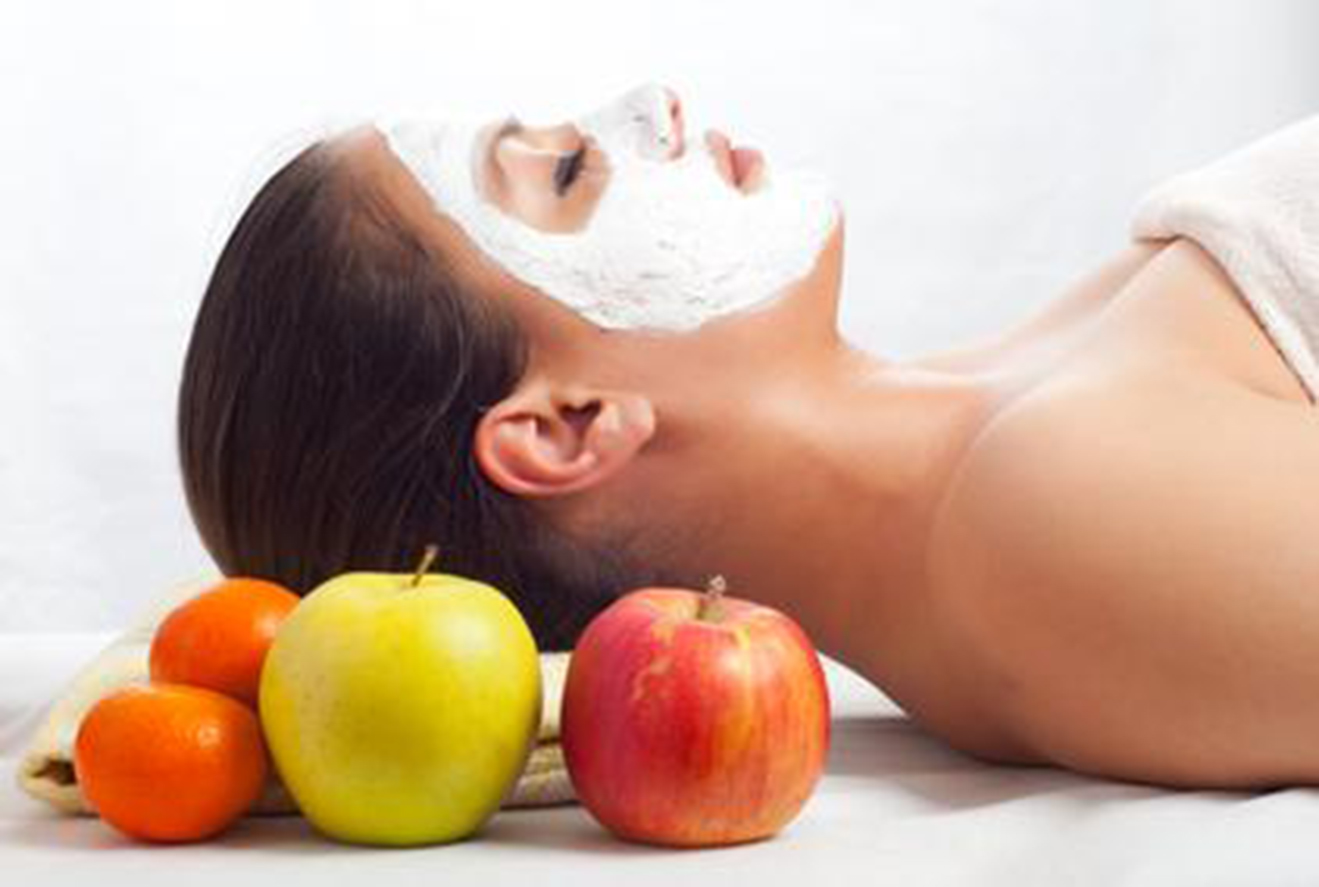
Lynne Paige Walker and Ellen Brown, in “A Woman’s Complete Guide to Natural Healing,” propose a fresh apple mask as a tender, natural method to look after this continual skin condition. Smooth the resultant mask on your face, and leave it in place for about 15 minutes. Once the mask has dried, rinse it away with cool water. It is suggested that one use this every single day.


Herbal Paste

Herbal Paste
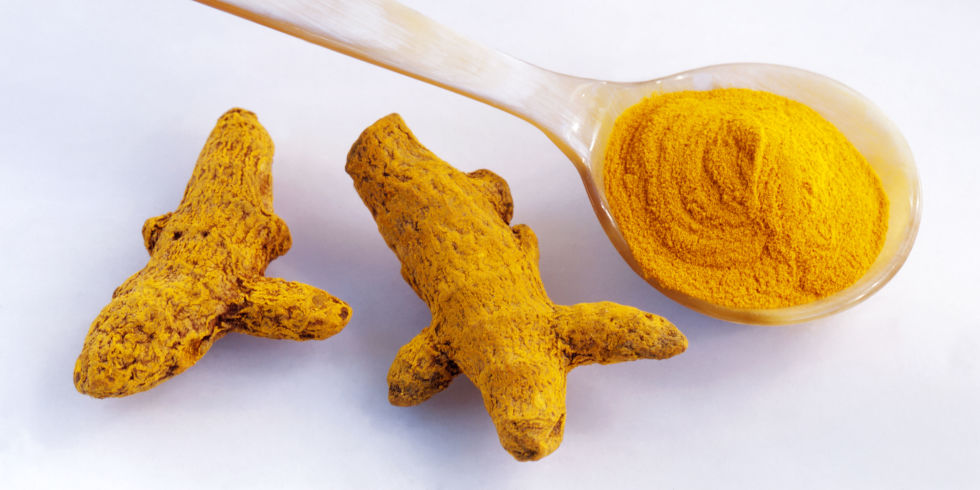
In Janice Cox’s novel, she recommends this herbal remedy as an effective method in dealing with rosacea. Mix together two teaspoons of turmeric powder, four teaspoons of coriander powder, and one to two tablespoons of fresh milk until the combination turns into a smooth paste. Keep the concoction in the fridge. Once prepared, utilize the paste as a facial mask two times a day for ten minutes.


Horse Chestnut

Horse Chestnut
Some individuals who have rosacea report that horse chestnut helps with this condition when used in a cream. You can use it on the affected area two times each day.


Aloe Vera

Aloe Vera
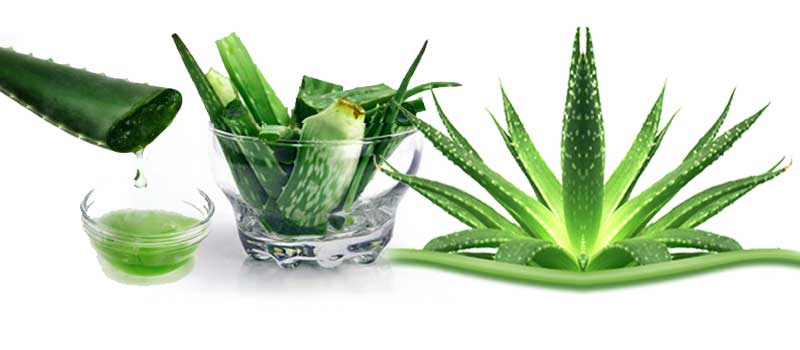
In addition to the significant health advantages of aloe vera, it’s also capable of helping with rosacea. While it efficiently helps to get rid of rosacea, aloe extract can heal so many skin problems. Aloe vera can be used both orally and topically to take care of rosacea. It is suggested that aloe vera is used for this condition two times a day.


Tea Tree Oil

Tea Tree Oil
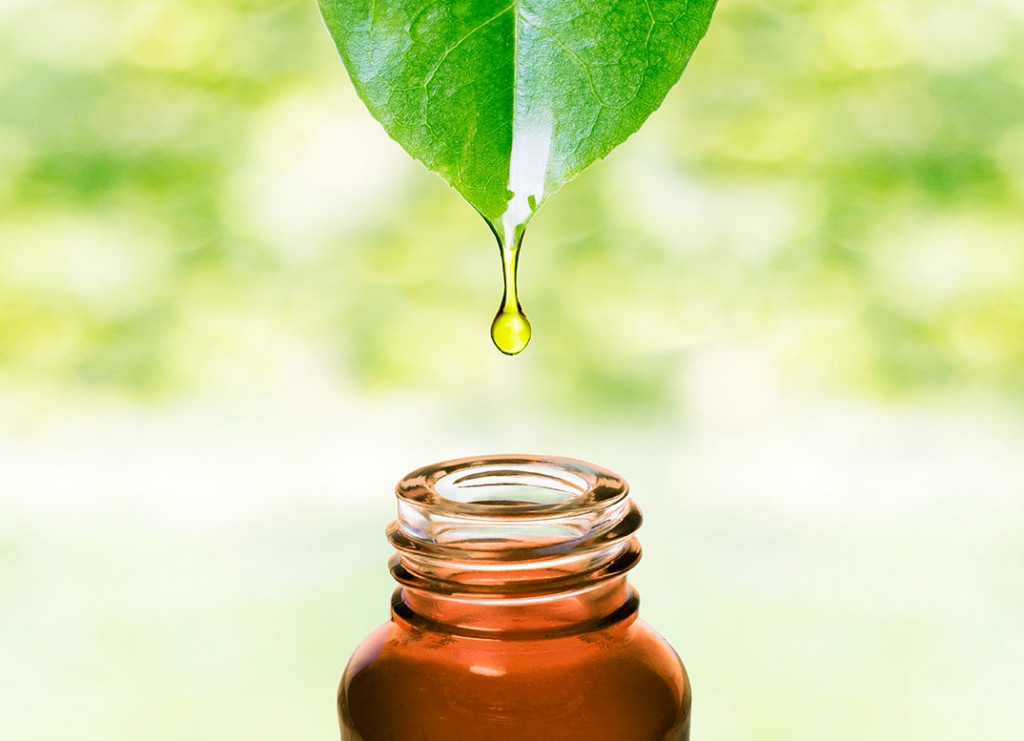
Tea tree oil is a strong generator of anti-inflammatory and antiseptic properties that can help to get rid of rosacea naturally. You can directly use tea tree oil on the problem area.


Green Tea

rosacea green tea
Rubbing green tea over the area of skin with this condition is yet another way to help. Green tea has anti-inflammatory, anticarcinogenic, and antioxidant properties that work brilliantly to take care of rosacea. Green tea can be simply used by you just as chamomile is above.


Oatmeal

oatmeal-mask
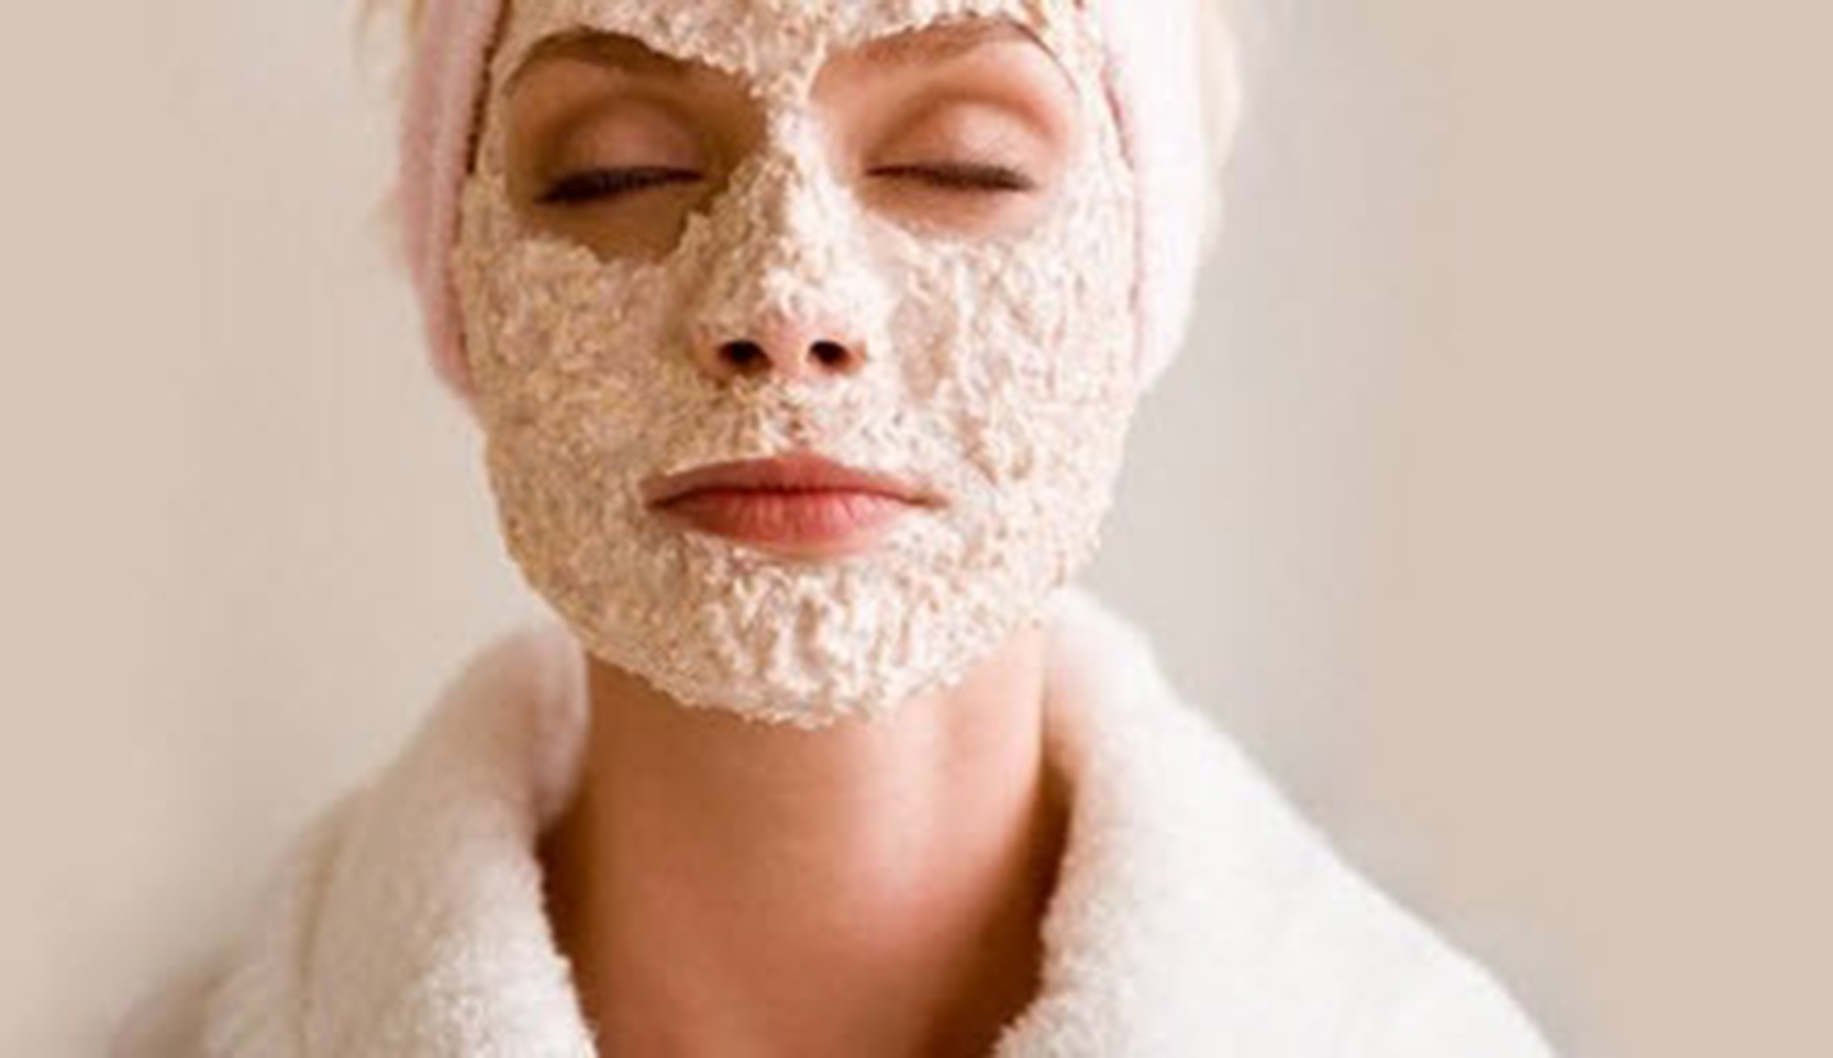
Oatmeal is one of the lesser known, but exceptional, options for rosacea. Oatmeal soothes and reduces redness, itching, and functions as an agent to get rid of rosacea.1 Take a little water in a cup and add 2 tablespoons of oatmeal. After that, apply the oatmeal on the affected region.


Rose Hip Oil

Rose Hip Oil
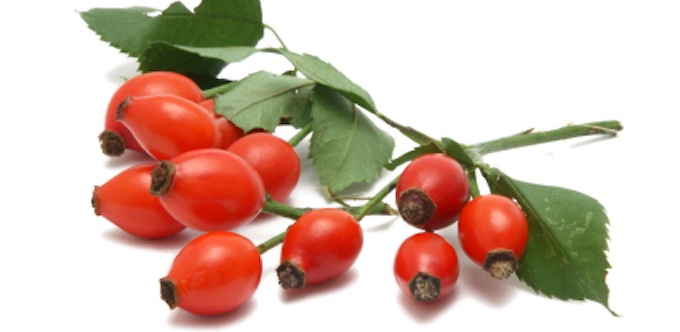
Rose hip oil is a well-known treatment for many skin problems, for example, blisters, scars, sunburns, eczema, and more. It also works well to help with rosacea. You ought to use several drops of rosehip oil on the contaminated area every day.


Cold Compresses

chamomile
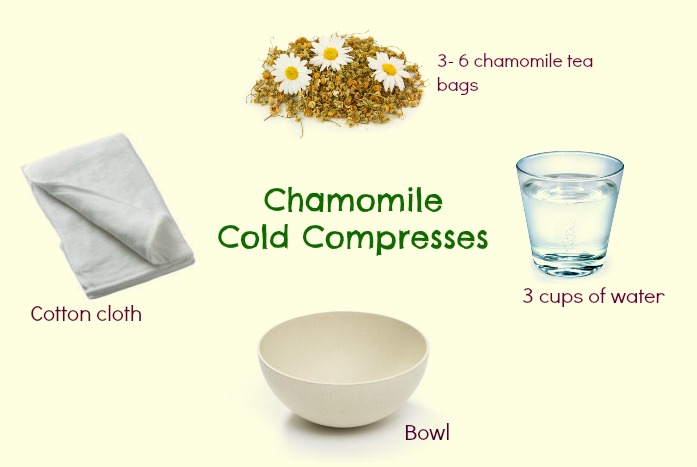
A cold compress is an extremely powerful approach which helps to reduce redness. To obtain a cold compress, you must soak three chamomile tea bags in a little bowl of boiling water for 10 minutes. After that, place the bowl in the fridge. You can use chamomile tea or one of the other options above if you need to obtain a cold compress. It works amazingly well.


Apple Cider Vinegar

apple-cider-vinegar
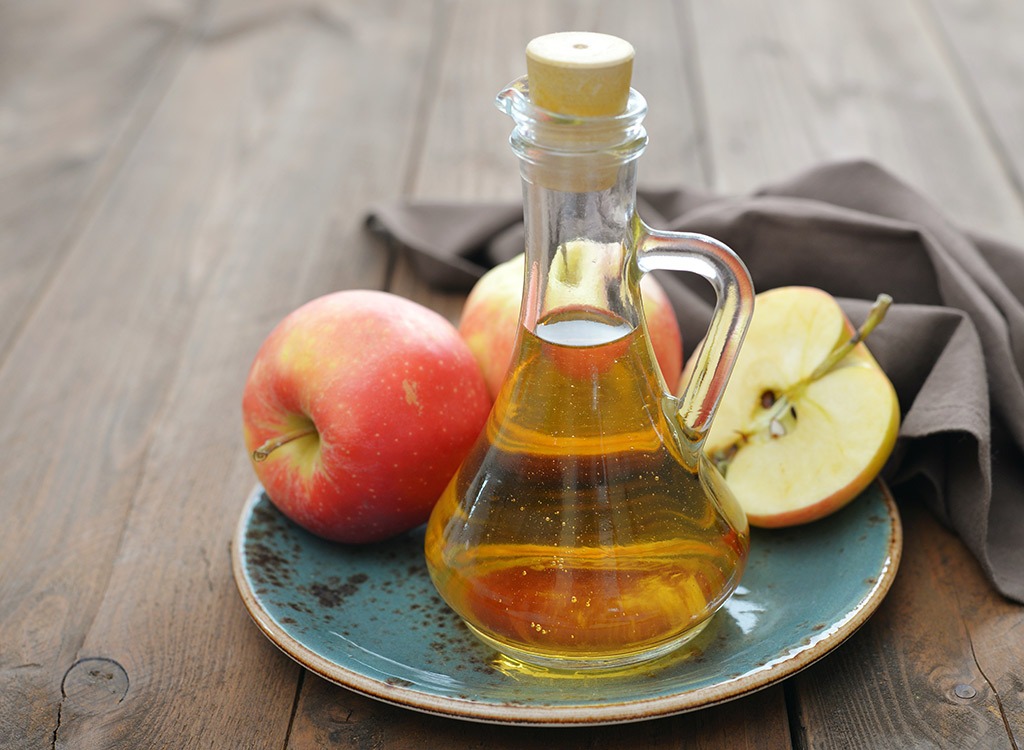
Apple cider vinegar contains anti-inflammatory properties. You can either drink two tablespoons of apple cider vinegar each day or apply it to the skin. You can always do both for extra benefits!


Internal Treatment Options

Flaxseed Oil

Flaxseed Oil

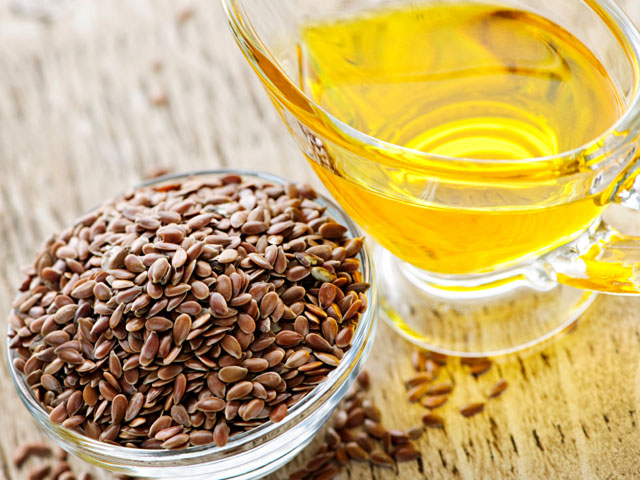
Flaxseed oil provides essential fatty acids which assist to reduce inflammation. Take 1 tsp. 3 times a day. Alternatively, you could take flaxseed oil in soft gel form.


Cat’s Claw

Cat’s Claw
Cat’s Claw helps to reduce food sensitivities by reestablishing a healthy intestinal environment. Take this 3 times each day (approximately 500mg each time). Don’t take this herb if you’re pregnant, nursing, on blood thinners, or if you’re an organ transplant recipient.


Zinc

Zinc

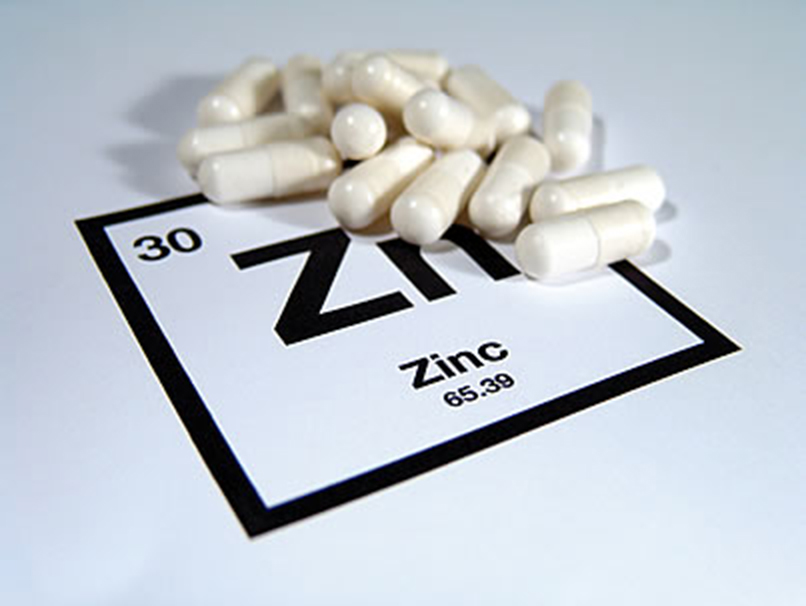
Zinc also helps you to fix your skin in a number of ways. Take 25 milligrams twice per day with meals.


Gotu Kola

Gotu-Kola-Extract
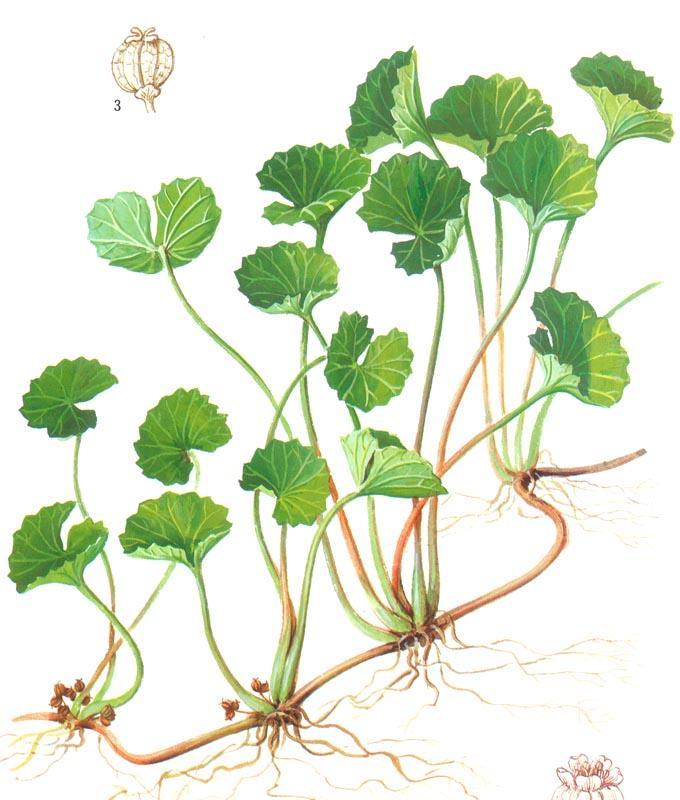
Gotu kola helps to promote healing of the body’s skin. Take 3 times each day (approximately 100 mg).


Grapeseed

grape_seed_extract
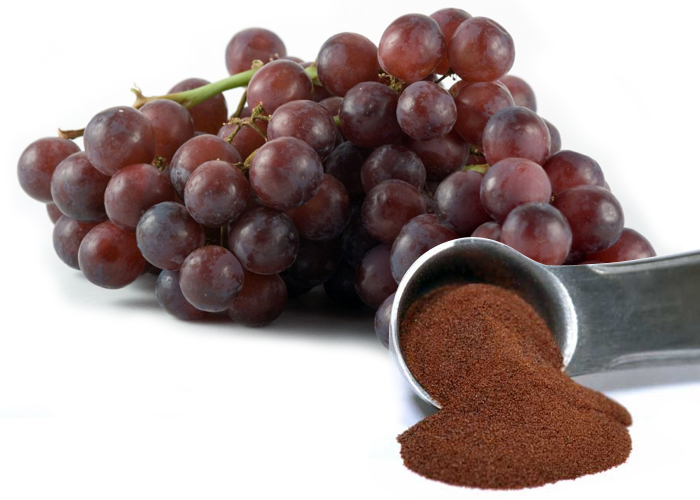
Grapeseed extract assists in collagen formation, it is antioxidant, and also anti-inflammatory. Take this 3 times each day (50 mg).


Red Clover

redclover
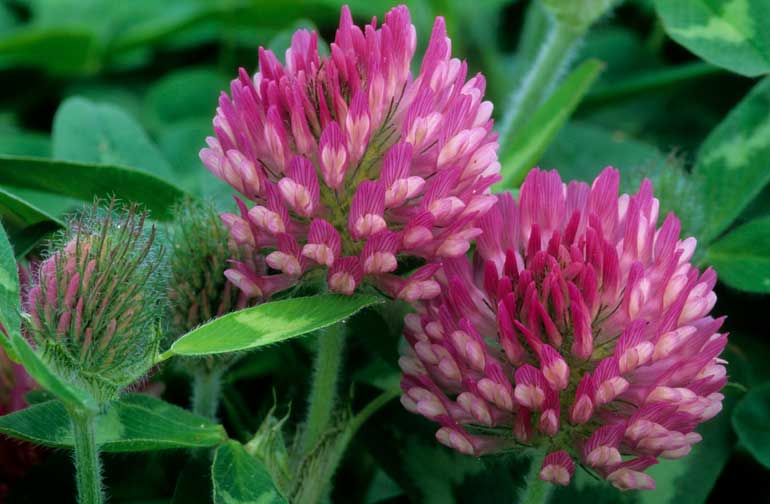
Red clover is considered as one of the safest natural ways of dealing with rosacea. It moderates redness and reduces irritation. Red clover tea should be taken by you twice per day to obtain the desired effect.


Licorice

liquorice root
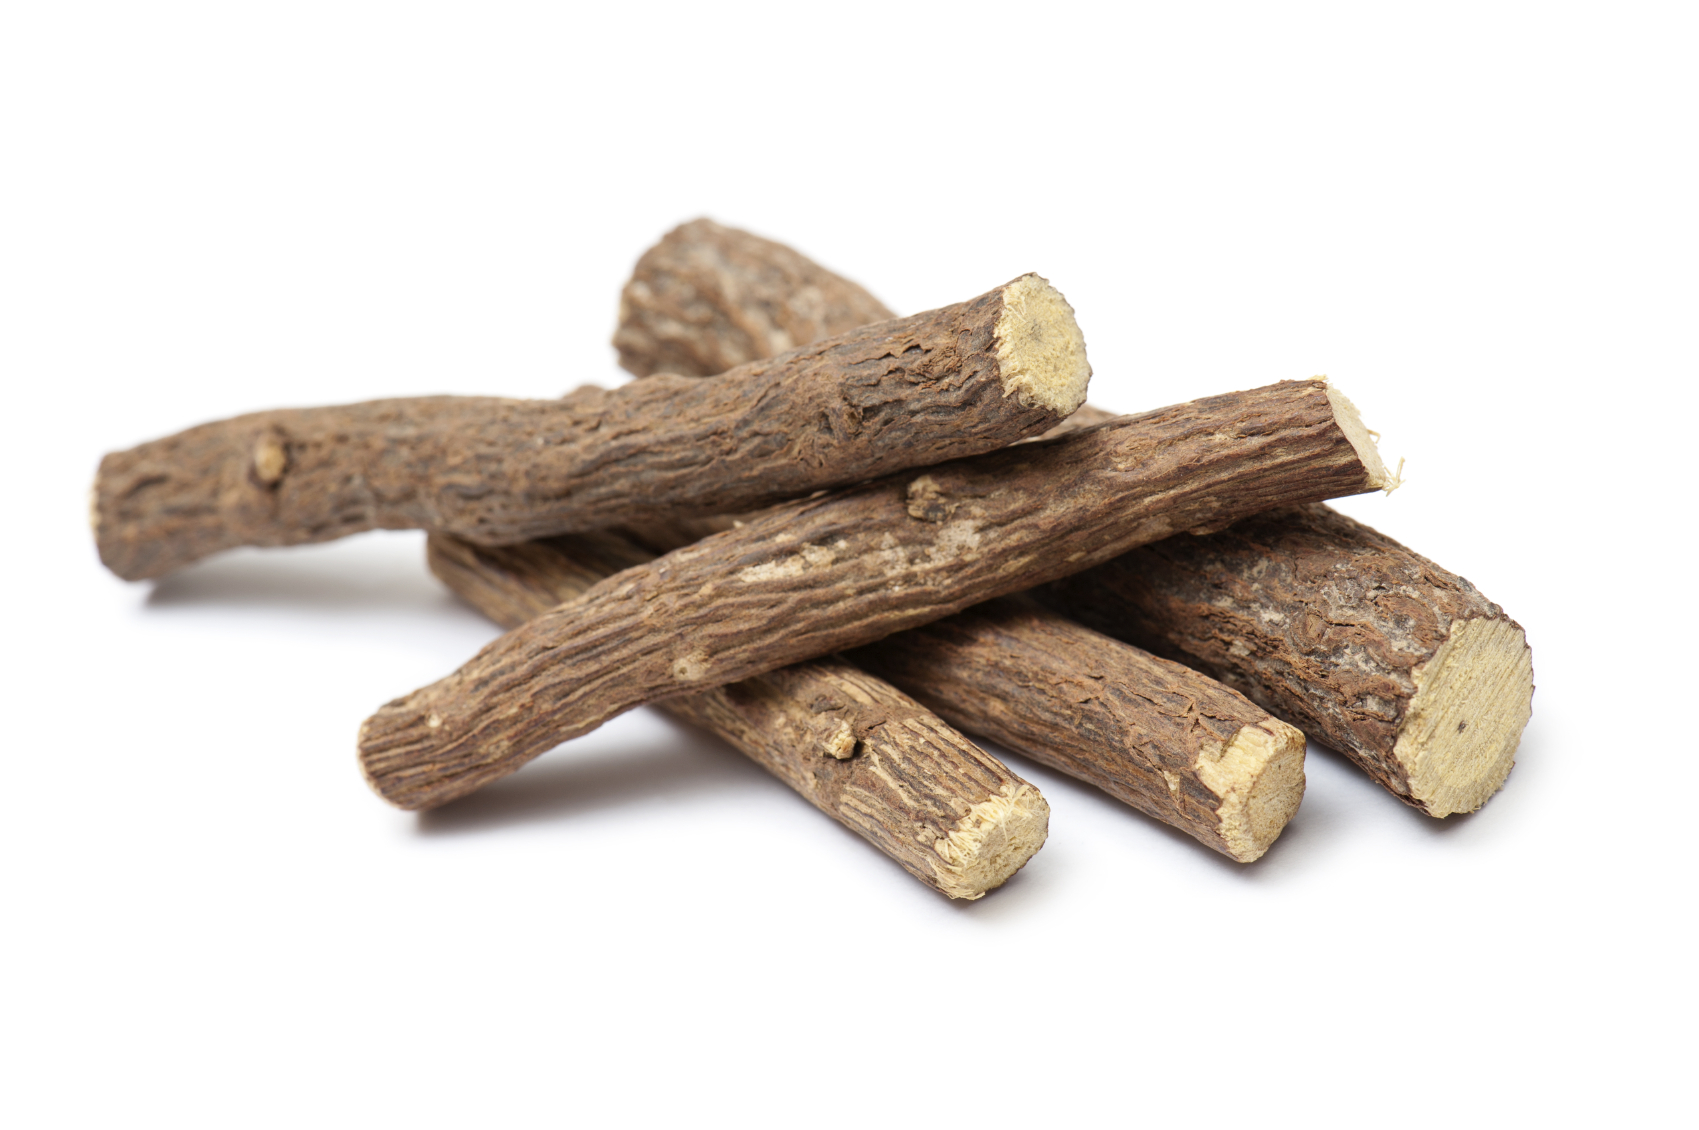
Licorice extract is a powerful anti-inflammatory for skin cells, according to a 2008 study at the University of Science and Technology. That’s because licorice root (aka sweet root and licorice) has coumarins, flavonoids, phytosterols and glycyrrhizin, which all reduce rosacea’s redness.


Feverfew

feverfew
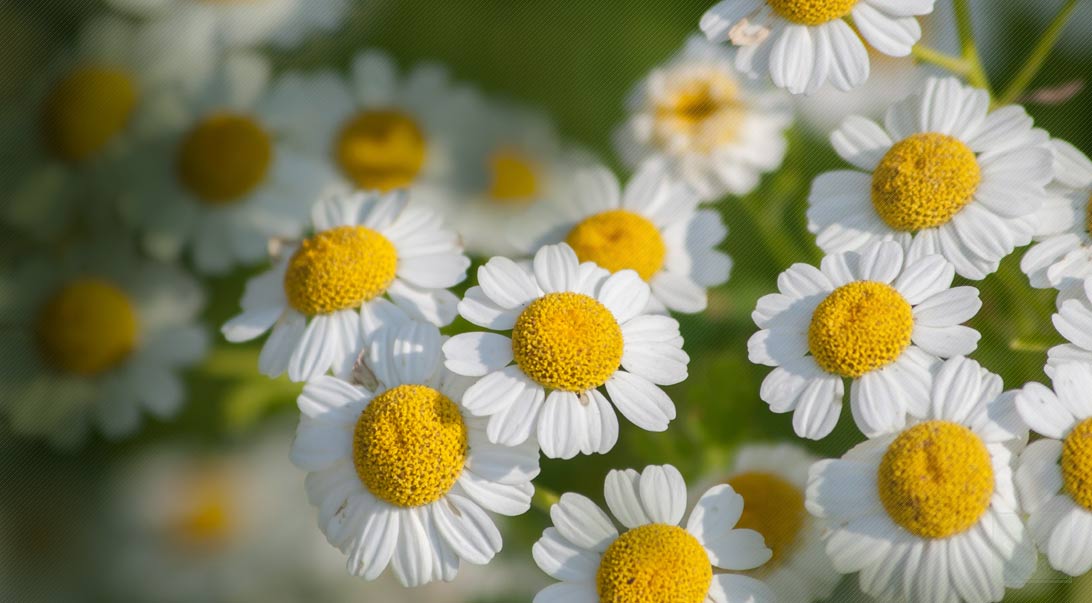
When applied topically, feverfew prevents blood from pooling in capillaries, based on a 2010 University of Louisville study.


isclinicaltravelkitrosacea_1

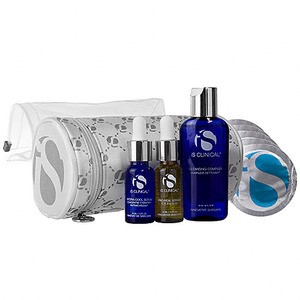
iSClinical Rosacea Travel Kit

This travel kit combines four extremely effective products that are designed to treat and calm rosacea symptoms.

Kit Includes:

* Cleansing Complex, 2oz

This cleanser incorporates a balance of bionutrients, antioxidants and mild resurfacing ingredients that thoroughly cleanse the surface and pores of the skin without stripping essential natural oils.

* Pro-Heal Serum Advance Plus, 0.5oz

This advanced serum combines Vitamin C, Olive Leaf Extract, Vitamin E and Vitamin A for excellent antioxidant and healing properties. This serum is excellent for treating rosacea, cystic acne, insect bites and some forms of dermatitis.

* Hydra-Cool Serum, 0.5oz

This refreshing serum combines superior antioxidants with essential botanicals and bionutrients. Providing lasting hydration this serum also calms, soothes and cools irritated skin.

* SPF 25 Treatment Sunscreen, 5 sample packets

This revolutionary lightweight cream combines powerful antioxidants and sunscreen actives which have been clinically proven to reduce UV-induced redness by more than 53 percent in 24 hours.

glymedrosaceaskinessentials

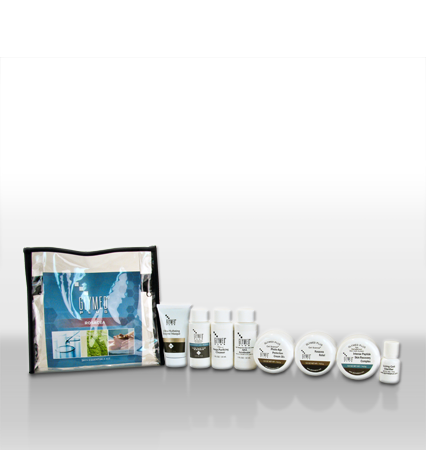
Glymed Plus Rosacea Skin Essentials Kit

The GlyMed Plus Rosacea Skin Essentials Kit has everything you need to beat rosacea!  With eight amazing GlyMed Products that work to soothe and balance rosacea, reducing redness and irritation, this kit is the perfect way to improve the problematic skin condition. 

Each GlyMed Plus Rosacea Skin Essentials Kit Includes

  • Gentle Facial Wash – gently purifies the surface of the skin while nourishing the skin with protective antioxidants and nutrients
  • Living Cell Clarifier – promotes a clear, vibrant complexion with a blend of active ingredients that neutralize bacteria and unclog pores for clear, beautiful skin; removes discoloration
  • AHA Accelerator – soothes and hydrates the skin while stimulating the skin’s natural repair process
  • Intense Peptide Skin Recovery Complex – targets age signs and damaged skin to stimulate cell activity and quicken the healing process, reducing redness, irritation, and symptoms of rosacea
  • Mega-Purifying Cleanser – powerful cleanser that removes unwanted impurities from the surface of the skin down to the pores
  • Rosacea Relief – relieves irritation and inflammation associated with rosacea while neutralizing its causes for long term clarity
  • Ultra-Hydrating Enzyme Masque – dual-action masque that infuses the skin with moisture while using botanical enzymes to enhance the skin’s natural regeneration process
  • Photo-Age Protection Cream 30+ – broad spectrum protection against eh harmful rays of the sun that also hydrates and treats rosacea
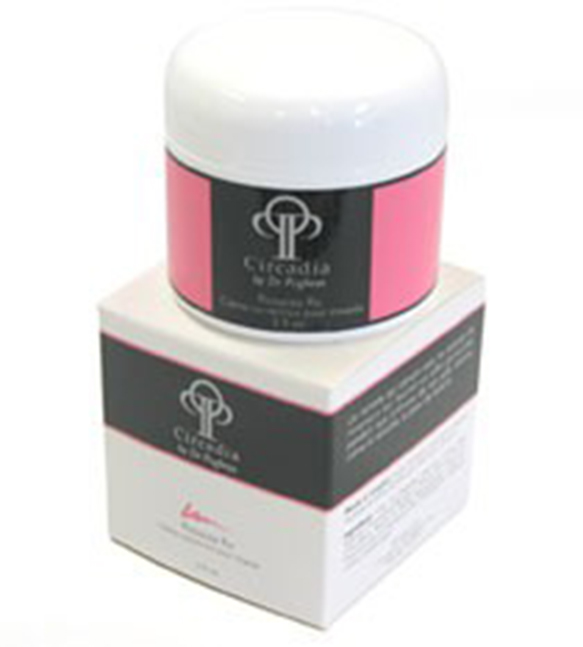
 

CircRoseaceaRx

Circadia Rosacea Rx

Skin Type: Sensitive, erythematous, inflammatory

Properties:

* A lightweight, velvety cream that contains calming and antimicrobial properties

* Contains anti-inflammatory, hydrating, soothing and healing agents

* Contains powerful botanicals to help kill the Demodex mite

* Contains botanicals to support skin barrier function and moisture


History of Nail Polish Facts, Videos, and More


History of Nail Polish Facts, Videos, and More


Hello everyone thank you for your support we are truly grateful for all your support, on week 237 we are sharing a post on the history of Nail Polish, from its origins to now, wow very interesting the developing of it and how much it has changed through the times, I am personally very thankful that it has because there were very toxic materials used to manufacture these products so nail polish has come a long way.

I usually let my nails breathe especially in winter. I only use nail polish for an event. I prefer it I am usually doing many activities with my hands and the nail polish doesn’t last me and I don’t favor the chipped nail polish look. With that said here we go with the post enjoy and please share so other people can learn about it.


from: https://en.wikipedia.org/wiki/Nail_polish

Nail polish originated in China, and its use dates back to 3000 BC. Around 600 BC, during the Zhou dynasty, the royal house preferred the colors gold and silver. However, red and black eventually replaced these metallic colors as royal favorites. During the Ming dynasty, nail polish was often made from a mixture that included beeswax, egg whites, gelatin, vegetable dyes, and gum Arabic.history of nails


A Time-Consuming Process

from:http://classroom.synonym.com/origin-nail-polish-9845.html
While modern nail polish typically dries in a matter of minutes, that definitely wasn’t the case with the rudimentary versions made in ancient China. Once women painted their nails, they typically had to wait for several hours. Some women even went to sleep hoping for it to dry fully by the morning.

Zhou Dynasty and Nail Polish

china nails

During the Zhou Dynasty of the 11th to 3rd centuries B.C., women of different classes wore nail polish, whether they were privileged or not. Nail polish color denoted the social status of a woman. In 600 B.C., royals painted their nails with silver and gold. Average Chinese women were permitted to wear light pink nail polish. The consequences of not abiding by the color regulations were extremely severe. Any lower-class Chinese girl who painted her fingernails in royal colors would have faced the death penalty. By the time of the Ming Dynasty (14th to 17th century), royal nail polish color preferences had switched to red and black.


Nail Polish in Ancient Egypt


Although the Chinese were pioneers in the origins of nail polish, Egyptian women (and men too) were also coloring their nails by 3000 B.C. Their methods for painting their nails differed from the formulas used by the Chinese, but the color still signified social status, with deep red hues reserved for those of high rank. Ancient Egyptians often immersed their fingertips in reddish-brown henna, a type of dye extracted from flowering plants. Cleopatra, for one, was a big fan of henna for nail coloring. Ancient Egypt also produced some nail polish blends that were lacquer-like in a formula. Egyptian women frequently used berries to color their nails, too.


Ancient pigments


from: http://www.nailbargamax.it/the-history-of-nail-polish.html
Different materials, techniques, and colors have transformed the use of nail polishes, always in line with the evolution of tastes and trends. The origins of Nailart were India and China. The history of ancient and millennial civilization. During the Bronze Age, the henna, obtained from the powder of dried leaves, starts to be used also for nails decoration and in 1500 B.C,  in Mesopotamia, China, and Egypt, appear the first nail polishes, obtained from a mix of powders of crystal, malachite, and sulfur.

egypt

Nefertiti and Cleopatra are remembered, among other things, as two of the most beautiful women of their time. It is no surprise, then, that they were the first to make something as iconic as red nail polish famous! During their respective reigns, a societal hierarchy was indicated by the specific color worn. The stronger the shade of red, the more power the person possessed.

Although the practice likely existed earlier, sources suggest that Nefertiti, Queen of Egypt (14th century B.C.) colored her fingernails a ruby-red color. Nefertiti and her royal court would use henna (and sometimes even blood!) to color their nails.
The colors, that go from black to green, from red to gold, were used to define the belonging of a social class while sometimes, symbolizing the individual or tribal power. The colored nail polishes consist in real and unique representations, as traditional Incas narrations.
During the Medieval Age this practice was abandoned, and only restarted gaining popularity during the Renaissance in order to embellish the hands of noblewomen of that time. In the Victorian era, as explained in Madame Bovary – of Gustave Flaubert – with the protagonist Emma Bovary, a new nail polish became popular, made out of oil and chamois.


manicure-set


From: http://www.cosmeticsandskin.com/ded/polish.php

Until the 1930s, polishing powders were the main preparations used to shine the nails plate. These were made in many forms including sticks, blocks, pastes, loose powder and even liquids but all used fine abrasives that were buffed on the nail to produce a shineDuring the 1930s powder polishes were largely replaced by liquid polishes that were painted on the nails to produce a more or less instant shine. Early forms of liquid polishes were made using a variety of materials but eventually most were formulated using nitrocellulose.


Wax polishes

rosenail

Many paste polishing powders included waxes to help suspend the powder, thicken the paste and add shine. If the abrasive was left out of this mixture then any shine produced would be due solely to the wax, which polished the nail plate in the same way that a polishing wax makes wood furniture shine.

Wax nail polishes were made as pastes or liquids and what they lacked in effectiveness they made up for in simplicity of manufacture. Paste wax polishes were simple mixtures of substances like beeswax, ceresin, spermaceti and soft paraffin, melted together and poured into small pots.

Wax polishes could also be made as a liquid by dissolving the wax in a suitable solvent, either cold or gently warmed in a steam-heated mixing bowl. When applied to the nail plate the solvent evaporated leaving a thin layer of wax behind. As the solvent used was highly volatile, these liquid polishes had to be sold in sealed stoppered bottles.


Solvents and films

Liquid wax polishes were the first nail polishes that used a solvent to deposit a film on the nail plate. The film helped protect the nail and maintain the shine for a longer period of time, thereby reducing the need to rebuff the nail. Liquid wax polishes were often applied over a nail that had first been buffed with a polishing powder – so they simply helped to preserve the polished surface – but they could also be subjected to further buffing after the wax polish had dried.

When nitrocellulose polishes appeared, the need for buffing was reduced and eventually disappeared. However, old habits died hard and reference to buffing – either before or after applying a nitrocellulose polish – were still occurring up until the outbreak of the Second World War.
Before applying varnish, if it is to be used, the nails must be well polished with the buffer and one of the various preparations now in favour, which are generally made in stone, powder, or cream form. … Never apply varnish to a nail that has not been burnished in this way; otherwise, the natural gloss of the nail will eventually disappear. … Care must be taken in its application to obtain an even surface. Work is always from the lunule down towards the fingertips.
Many French women to-day varnish from the entire base right over the nail. This is not really very becoming. The half moon showing is always rather intriguing. Dip the brush in the varnish and then press against the bottle so that only a portion remains on it; this guards against and excess of varnish, which usually results in a blob on the nail. Make an even sweep with the brush from the half-moon down to within ½ in. from the edge, or where it can bee seen that the nail ceases to adhere to the flesh. The amount on the brush is usually sufficient for two lengths of the nail. Be careful not to allow the varnish to contact with the edges of the cuticle, as this spoils the effect. Allow to dry and apply a second coat, and once again when the enamel has completely dried use the buffer.


Nitrocellulose

Varnishes and lacquers


Once the idea of applying a film of polish to the nail with a suitable solvent had taken hold, the door was opened to using other varnishes and lacquers, many of which had been developed in the nineteenth century. The range of materials used included shellac, gum benzoin and cellulose nitrate (nitrocellulose). Although these liquid nail polishes appeared early in the twentieth century it took a while for serviceable polishes to be developed and for the idea to catch on.

When industrial lacquers and varnishes began to be used, it became possible to source nail polishes from larger and older lacquer firms that had the technical knowledge to deal with this dangerous material and the facilities to produce polish in bulk. This left nail polish companies with the relatively simple tasks of bottling, packaging, selling and distributing the polish meaning that they could to start with relatively small overheads. A number of new nail polish firms began in this way, perhaps the most important of which was Revlon.
The wise manufacturer selects one of the private label house to make his enamel. Elaborations and special effects can be worked out.
The danger from fire—perhaps even explosions—is so great that the risk isn’t worth the result. Private label houses in many cases have spent years in perfecting their clear lacquer. They have studied every conceivable coloring material and know its behavior in nail lacquer. Most of all they know the dangers of the business and are adequately protected.
Many successful businesses have been built in this field by delegating the manufacture of nail lacquer to the private label house.

Given the relationship with the varnish and lacquer industry, it is understandable that many early liquid nail polishes were known as varnishes or lacquers. However, they were also referred to as polishes or enamels by cosmetic companies and beauty writers of the time. Unfortunately, the story of nail polish in the twentieth century is muddied by the fact that the terms polish, lacquer, varnish and enamel were used haphazardly and covered a wide range of nail products.


Benzoin polishes


Benzoin-based nail polishes provided a reasonably good shine to the nail but they took longer to dry, required buffing to bring out the shine and had a tendency to become brownish in color, so could not compete with cellulose nitrate polishes in the long run.

Poucher (1932) provides us with a formulation for a gum benzoin polish, tinted pink with a small amount of eosin, perhaps to hide the brown, but a similar product could be made that was completely clear.

1935-nitrocellulose

Nitrocellulose polishes


Nitrocellulose – also known as cellulose nitrate – is produced by immersing cellulose in nitric acid, or a mixture of nitric and sulphuric acids, for a short time. A common source of the cellulose in the United States was cotton and when nitrated it was known there by such names as pyroxylin, nitrocellulose, nitrocotton, soluble cotton or guncotton, in part depending on the composition of the cellulose nitrate which varied according to how much the cotton had been acted on by the nitric acid.

A number of uses were found for cellulose nitrate in the nineteenth century including the manufacture of explosives, celluloid (an early plastic), nitrate film stock, varnishes and artificial silk. Some of these technologies relied on the fact that partially nitrated cellulose could be dissolved in organic solvents – like alcohol, ether, and acetone – and when these evaporated a clear film was left behind.


Collodion and liquid court plaster


Collodion was first produced in 1846 when Louis-Nicolas Ménard [1822-1901] and Florès Domonte produced a clear gelatinous liquid by dissolving pyroxylin (a partially nitrated cotton) in a mixture of ethyl alcohol and ether. Its discovery was put to good use the following year when John Parker Maynard [1817-1898], a Boston physician, discovered that dried collodion formed a clear, waterproof, protective film over a wound. Maynard’s discovery gained wide medical acceptance and led to a number of commercial forms of this liquid medical dressing being put on the market, generally badged as liquid court plasters.

Early liquid court plasters tended to contract and crack on drying but a flexible form was later developed an important advance. It used plasticisers like Canada balsam and castor oil to produce a film that could bend and flex with the skin.

In 1882, John H. Stevens [1853-1932] patented the use of amyl acetate as a solvent for pyroxylin. It produced a more durable, transparent film than that generated from using ethyl alcohol and ether, and it found a number of industrial uses including the development of nitrocellulose-based wood and metal lacquers.

Liquid court plasters were also formulated using amyl acetate rather than ethyl alcohol and ether.

Given the developments in nitrocellulose-based medical dressings, and industrial varnishes and lacquers, it was almost inevitable that someone would produce a nitrocellulose-based nail polish. Exactly when the crossover happened is open to question, with most cosmetic chemists placing this landmark event in the history of nail polish in the late 1910s or early 1920s. However, evidence suggests that it took place a good deal earlier than this. For example, the Bijou Chemical Company of New York was putting their Bijou Fluid into a nail polish/enamel as early as 1903. Given that this preparation also formed the basis for their liquid court plaster, a metal lacquer, an adhesive, and a leather waterproofer, there seems little doubt that Bijou Fluid was a flexible collodion containing nitrocellulose, and that their nail polish was nitrocellulose-based.

Unfortunately, the situation regarding liquid nail polishes produced before 1920 is far from clear. As I have already noted, there were numerous liquid nail polishes on the market before 1919, but it is difficult to know whether they were made as liquid abrasive powders, liquid waxes, liquid benzoin polishes or liquid nitrocellulose polishes, without access to their original formulation.


Nail polish and automobile paint


One reason why some have suggested that nitrocellulose nail polishes were developed in the 1920s is the belief that they were inspired by developments in glossy car paint, specifically the Duco Paint that E. I. du Pont de Nemours developed for General Motors in 1923. This seems unlikely. Although it is true that Duco Paint is based on nitrocellulose, came in a wide range of colours, and was advertised as having a fast-drying, tough, durable, waterproof finish, Duco was designed to be sprayed on not painted on, required at least twelve hours not minutes to dry, and only had a satin sheen so required further polishing to develop a high gloss (E. I. du Pont de Nemours, 1925). This, and the 1923 date suggests that the development of Duco Paint coincided with a greater use of nitrocellulose in nail polish but was not directly responsible for it; both products evolved from the varnish and lacquer industries.


Celluloid film stock and nail polish


Nitrate (celluloid) film was patented by Hannibal Williston Goodwin [1822-1900] in 1898. It was later reinvented by the Eastman Kodak Company – which started a legal dispute which was not settled until 1914. Eastman Kodak reportedly made their celluloid film stock by dissolving pyroxylin in a mixture of methyl alcohol, amyl alcohol and amyl acetate (Sabin, 1904, p. 113). Camphor was added as a plasticiser and the resulting film was then coated with a photosensitive gelatin emulsion.

Given that nitrate film was liable to catch fire, it was dangerous to store and was often sold as scrap after a movie had played out in cinemas. A nail polish could be made from this film scrap by stripping off the gelatine and then dissolving the remaining film in amyl acetate and acetone or other solvents.
The preparation used by photographers which consist of celluloid obtained from scrap sources and dissolved in amyl acetate is widely employed.
The work consists of cutting up the scrap and charging into a comparatively large mixing pan, because of the space occupied. Amyl acetate and acetone are poured into the pan, and heat gently applied.
The consistency of the product can be varied by the amount of scrap added, and should be reduced to a syrupy condition. some selected perfume is then added in the usual manner, and the charge emptied.

Scrap celluloid was widely used to make nail polish early on but the practice began to disappear in the 1930s. Using scrap celluloid film was cheaper but the presence of any synthetic camphor adversely affected the brightness of the finish so its use had declined by the time the Second World War broke out. When nitrocellulose supplies were diverted for the war effort there was a renewed interest in using celluloid film stock but this faded when normal supplies resumed after 1945.


Color

glazo

The first nitrocellulose nail polishes were generally made in a clear ‘Colourless’ or pink ‘Natural’ shades. The pink colour was produced using dyes like carmoisine, safranine, erythrosine or phloxine. By the end of the 1920s nail colour had become more obvious, with many companies making enough shades enable nail polish to match the clothing colours that a woman was wearing. Mother of pearl polishes, made by adding in fish-scale essence, also made an appearance.

Although companies like Glazo made nail polishes in a wide range of colours, manicurists could also mix up colours to meet the needs of individual clients. Unfortunately, it is clear how a manicurist accomplished this for their society clients. Some materials such as gold, silver or pearl powder could be mixed directly into clear polish as could some colours. Its is also possible that manicurists first applied colour to the nail and then covered this with a clear nail polish. Clients could return the following day to have it replaced with something more suitable or use a remover.
Very pink fingernails and sometimes blood red nails have been popular for some time with women in London. The latest idea, however, is to have fingernails to match dresses. At a recent function, a lady was observed in a Parma violet chiffon frock, and Parma violet fingernails to tone exactly. The idea is an off-shoot of the matching craze which is sweeping over London and Paris just now.
A well-known London beauty specialist is pushing the craze, and her clients arrive with samples of the frocks they will wear in the evening to have their nails “done!”. Mauve, violet, blues, greens, orange, yellows and reds are used. One girl wearing a pearl-colored satin frock had her fingertips enameled a lovely pearly tint, which looked really pretty. The enamel comes off quite easily with a special preparation used for the purpose so that there is no fear of one’s blue or green fingers clashing next morning with one’s favourite orange jumper suit.

Some nail polish firms used this idea as well. Cutex, for example, sold a clear nail polish in the 1920s that came with a separate tint which could be used to produce a polish with different degrees of color.

In the more sombre depression years of the 1930s, bright colours went out of fashion to be replaced by subdued reds and smokey-reds.
Lately, the cult of the coloured fingernail—gold, mother of pearl, blood red, or tinted to match the gown—marks us as to hand consciously. Pointed fingers with nails trained like pencil tips, and coloured in unnatural tones, makes lovely hands look like the claws of some exotic bird and not the warm and human hands that have charmed lovers down the ages.


Transparent polish

With the exception of pearl and metallic types, most nail polishes used in the 1920s were transparent, either clear or coloured with dissolved dyes. They were generally applied across the center of the nail, leaving the lunula (half moon) and free edge visible Having color only across the center of the nail plate was believed to make the fingers look long and elegant.


Opaque polish

By 1930, opaque (cream) nail polishes were becoming fashionable in Europe. Initially, these cream polishes were made by European companies or smaller American firms that had a presence there and only became more common in the United States after Revlon started up in 1932 and Cutex began selling them after 1934.


Revlon

history-of-cosmetics-revlon3
1932 When Revlon launched the first ever opaque nail enamel, it was referred to as cream enamel – the product was created using blended pigments, instead of dyes – this enabled a vast choice of colors. The nail enamels were only available in beauty salons to start with. 1937 The nail enamel was launched into department stores & pharmacies.

In 1939, when Revlon began to make lipsticks, they heavily promoted the notion that nail polish and lipstick should match, a fashionable French trend that had first appeared in the 1920s. Cutex had previously pushed this idea when it introduced its own line of lipsticks in in 1935.

Even earlier, two other American companies, Peggy Sage and Glazo, were producing nail polish shades to match lipsticks no later than 1930, even though neither firm made a lipstick at that date. Peggy Sage matched their nail polishes lipsticks from other companies in Peggy Sage salons and when Revlon became a much bigger threat in the late 1930s Peggy Sage entered into an agreement with seven cosmetic companies operating in the United States – Schiaparelli, Lelong, Lentheric, Charles of the Ritz, Du Barry, Dorothy Gray and Coty – to match Peggy Sage nail polishes with their lipsticks. This was a stop-gap solution with most of these lipstick manufacturers soon making their own nail polishes.


Modern nail polish


By 1930, there was a general agreement about the characteristics of an ideal liquid nail polish. It should be harmless, easy to apply, dry quickly and evenly, harden well, resist chipping and abrasion, be waterproof, have an even colour that did not stain the nail, be stable in the bottle, and have a pleasant smell. Unfortunately, early nitrocellulose nail polish formulations did not share all these qualities. Their adhesion was poor, if coloured they often stained the nail, and they took a relatively long time to dry. Many early nail polishes did not even have a dedicated nail polish remover, being lifted by applying another layer of polish or by using acetone.
The use of nail enamel is now almost universal. It is a rapid means of acquiring a brilliant lustrous finish and may if desired, be applied without previously burnishing the nails. The only disadvantage it possesses is that of coming off in streaks after a few days. This is not very noticeable when a colourless enamel is applied, but if a tinted one has been used the effect is grotesque. Before applying the second coating of enamel, the remains of the first must be removed. This may be done by painting on the enamel itself and then rubbing off with a cloth, or better still, by using Acetone in the same way.

By the end of the 1930s, dedicated nail polish removers had been added to most manicure lines.


Components


All modern nail polishes have four main components: a film former, solvents, resins and plasticisers. Coloured nail enamels also contain pigments and pearlescent materials and may also include suspension agents to help stabilise the suspended pigments. Other ingredients such as U.V. filters and proteins were added to more recent formulations.


Film former


The film-former is the glossy coat that is left on the surface of the nail after the solvents have evaporated. As previously noted, before the Second World War a range of substances was used to generate the film – including gum benzoin, shellac, and waxes – before nitrocellulose became the film-former of choice. Since then, other film-forming substances have been proposed as substitutes for nitrocellulose – one of the earliest being cellulose acetate, also used in ‘safety film’. Although there are nitrocellulose free nail polishes on the market today, nitrocellulose is still the commonest film-former used; it has a low solvent retention and dries quickly to form a waterproof, tough film.
Nitrocellulose is outstanding for its hardness, toughness, resistance to abrasion, and excellent solvent release. It is interesting to note that nitrocellulose is also the oldest man-made substance among the film-forming agents which dry solely by evaporation and without any subsequent oxidation or polymerization.

As noted earlier, nitrocellulose comes in a range of grades depending on how nitrate it is. This affects its volatility and solubility; highly nitrated nitrocellulose being more volatile and less soluble, lower nitrate forms being less volatile and more soluble.

The second characteristic of nitrocellulose that affects its use in nail polish is the length of the polymer chains that make it up. Shorter chains result in a more brittle film that has a lower viscosity, while longer chains make it softer and more viscous. Polishes that have a low viscosity will not adhere well to the brush and will not give a thick enough coat, while those that are very viscous will not flow easily and leave a coat that is too thick and streaky. Nitrocelluloses with medium length polymer chains are the types most commonly used in nail polishes, identified as E27 and E32 in Europe or ¼ and ½ RS grades in the United States.

Plasticisers

Nitrocellulose produces a tough transparent film but as it is also brittle, the polish will crack and flake if it is used alone. To make the polish more flexible, solid and liquid plasticisers are used. Liquid plasticisers, such as castor oil, produce a soft flexible polish, while solid plasticisers, such as camphor, generate a harder film. To get the best of both worlds both types were used. Camphor and castor oil were two of the commonest plasticisers used in early nail polishes. Castor oil is no longer used and although camphor is still found occasionally in some polishes, both of these early plasticisers have been largely replaced by better substitutes.

Resins

Resins are added to nail polish to help it adhere to the nail plate so that chipping or peeling are reduced. They can also make the polish tougher and improve gloss. Two main forms are used: natural resins – like benzoin, de-waxed dammar, mastic sandarac, shellac and benzoin – and synthetic forms.

Until the 1930s, most of the resins used were natural and they suffered from a number of drawbacks. Some, like benzoin, darkened when exposed to light and most required some burnishing of the nail plate after the polish had dried to bring out the full gloss. Being natural products there was also the issues of batch uniformity and rising costs.

In 1938, the synthetic resin, toluene-sulphonamide-formaldehyde (TSFR or TSAfr), was introduced into nail polishes and gained wide use. As well as being colorless and transparent it made the nitrocellulose film tougher and improved its adhesion. Unfortunately, in 1943, TSFR was identified as a common cause of allergic contact dermatitis. Symptoms could appear around the nail but a common site of an allergic reaction was the eyelids, due to users rubbing their fingers against their eyes when their eyes were ‘tired’.

TSFR is still found in nail polishes today, generally listed either as tosylamide/formaldehyde resin or toluene sulfonamide/ formaldehyde resin, but some manufacturers avoid it. Some go even further and along with camphor and dibutyl phthalate (DBP) – an early plasticiser banned by the European Union in 1976 – sometimes specifically list TSFR as being absent.

Solvents

There are a large number of solvents that can be used for nitrocellulose-based nail polish. Selecting which to use and in what proportion depends on a number of factors including drying time, cost and odour. It might be thought that fast drying solvents would be ideal but this is not necessarily the case. If the nail polish dries too quickly the film may be streaky and the rapid evaporation can cool the polish below the dew-point causing clouding (blushing), particularly on humid days when the water content of the air is high. Best results are therefore obtained by including a range of solvents, some of which have a slower rate of evaporation.


Color

As mentioned previously, until the 1930s nail polishes were largely coloured with soluble dyes like carmoisine, safranine, erythrosine, and phloxine. These were easy to incorporate into nail polish, the only major problem being that they often stained the nail.

The first nail polishes that included suspended particles first appeared in the 1920s. These were the pearl polishes – made with fish essence from fish scales – and metallic polishes – that used bronze, silver or gold metallic pigments. The use of other suspended pigments such as titanium dioxide and iron oxides occurred in the late 1920s when opaque cream polishes were developed. In the United States, these became more common a few years before the 1938 Food, Drug, and Cosmetic Act (FDCA) and the introduction by the American Food and Drug Authority (FDA) of an approved list of colours that could be used in cosmetics. By this time, the fashion for matching nail polish and lipstick had taken hold in the United States and similar pigments began to be used in both lines.

The early pearl and metallic polishes experienced a degree of sedimentation – settling out of the solid particles – but the problem became acute when cream polishes replace transparent forms. The issue was made more difficult by the fact that that sedimentation occurred at different rates for different particles. For example, pearl essence made from fish scales settled more slowly that made from bismuth oxychloride.

Of particular concern was titanium dioxide. Being white and heavier than the iron oxides it settled first, and once settled it was difficult to get it to back into the mixture. A number of solutions to the problem were tried over the years: some early polishes included a stirring stick to mix the polish before use; the iron oxides were deliberately coarse ground so that they would settle with the titanium dioxide to produce a residue that was reddish rather than stark white; the titanium dioxide was dyed so that when it settled it was not as noticeable; new ingredients were added to try to reduce the problem; bottles were designed to hide any sediment that might appear; and instructions were added that suggested shaking the bottle vigorously before use.

The ultimate solution to the problem was to develop a nail polish that was highly thixotropic, that is, one that was thick and viscous when still, but thin and less viscous when applied. A number of compounds were tried over the years but synthetic bentonite and hectorite clays proved to be the most effective and, although not without their problems, many nail polishes contain stearalkonium hectorite or stearalkonium bentonite to this day.


Base coats and top coats


One way to achieve good adherence, reduce staining and improve hardness, colour and gloss were to use a base coat before applying the polish and then follow that with a top coat. The three products contained similar ingredients but differed in the amounts used. The base coat had more resin to help it adhere to the nail and reduce chipping, while the top coat contained less resin but more plasticiser and nitrocellulose to improve gloss and resistance to wear. In between these two, a layer of colour was applied although top coats often contained colour as well.


The first base coat (undercoat or foundation coat) appears to have been developed by Perma-Nail in New York in 1946. It was quickly followed by others including Everon (Revlon, 1946), Fulpruf Undercoat (Elizabeth Arden, 1947) and many others. I make note of this product mainly because they were the cause of numerous reports of allergic contact dermatitis. Subsequent products of this type showed similar problems.

Base coats and top coats formed a part of many professional manicures well up to the end of the twentieth century but for the average consumer they were too much trouble and in the 1950s many manufacturers made the point that their polishes did not require either, Charles of the Ritz being one of the first to do so with their Fresh Paint polishes.


Bottles


No discussion of nail polish can be complete without a mentioning their bottles. Nail polish is now sold in bottles capped with a screw top lid – to help reduce solvent evaporation – with a brush attached to the cap. However, early nail polishes came with a brush that was not integrated with the bottle but was included in the box as a separate item.


With the introduction of titanium dioxide and iron oxide pigments in the 1930s, triangular shaped bottles became more common for a number of reasons: they ensured that pigments settled on the bottom of the bottle, rather than on the sides of the glass containers; the shape also minimised any signs of floating artifacts or streaks that might appear at the top of the polish; and it also gave the bottle a low center of gravity that helped prevent it from tipping over and spilling.

The introduction of thixotrophic nail polishes made the use of triangular bottles to disguise artifacts largely redundant and enabled nail polish manufacturers to experiment with the wide variety of bottle shapes we see today.


Moon Manicure

Dita von tease

The first modern manicure was known as the “moon manicure”. To achieve this look the cuticles were cut, free edges filed into points, and polish was applied to the nail but not to the moon and tip.  Covering the entire nail with lacquer was considered extreme and improper. Red was considered the most ladylike color, but pale pink, nude, white and peach were also popular. It was considered important to choose a lacquer that would complement your outfit as well as match your lipstick.

In the 1940s and 1950s, the half moon style was still popular and there were dozens of colors introduced, including green, yellow, blue, mauve, and black. Matching nails with your clothes was still in vogue.


1960s

1960 nails

The fashions of the 1960s were far more relaxed than in previous decades. Instead of the half moon manicure, it was customary to paint the entire nail. Colors were less vibrant, including coral, purple and frosty blue hues.


1970s

1970s


Eventually, colors evolved to the full spectrum, such as various reds, oranges, and eventually the French manicure style polish, says Pattie. “The shape changed from almond-shaped to  square nails around the mid-70s through to the 90s, and French manicures became extremely fashionable.”


1980s

1980s

In the 80s creativity abounded and women went wild with nail art. This included multiple polish color applications to one nail, airbrushing, hand painting, embellishments, feathers, foil art, bright shades of pink, neon hues, real gold nails, and nail charms, Just about anything has experimented with to create designs. Longer lengths were in and a square shape. Various products were introduced to enhance the nails and their length, to include gels, tips, ‘organic’ nail powders and advanced types of acrylic blends.


1990s

ZOYA_NAIL_POLISH

After the run of nail art, consumers became more aware of their nail ‘health’ and products advanced in this direction. “Late 90s to early 2000, natural nails became popular again.” Black also had its heyday with the grunge crowd.


2000s

Nail-Art-Designs-2


Into the 2000s, nail polish colors evolved to every and all shade. Various gel products and gel polishes were introduced, 3-D nail art, glitter, and Japanese style art are now seen on all types and classes of women. The shape has also gone back to the original almond shape and even to a more dramatic stiletto shaped nail.


Now

nails 2000s

Recently, the evolution of nail appliqués has become the biggest trend,  The first appliqués were introduced by the Minx brand in 2007, and now Dashing Diva is the innovator in the field, offering appliqués with embellishments to make producing the popular 3-D art styles a breeze for anyone.  Gel polishes are also trendy, although removal is difficult.


Modern nail polish

nail polish production machine 3


from: http://www.encyclopedia.com/topic/Nail_polishes.aspx


Modern nail polish is sold in liquid form in small bottles and is applied with a tiny brush. Within a few minutes after application, the substance hardens and forms a shiny coating on the fingernail that is both water- and chip-resistant. Generally, a coating of nail polish may last several days before it begins to chip and fall off. Nail polish can also be removed manually by applying nail polish “remover,” a substance designed to break down and dissolve the polish.


Raw Materials

Nitrocellulose

There is no single formula for nail polish. There are, however, a number of ingredient types that are used. These basic components include film forming agents, resins and plasticizers, solvents, and coloring agents. The exact formulation of a nail polish, apart from being a corporate secret, greatly depends on choices made by chemists and chemical engineers in the research and development phase of manufacturing. Additionally, as chemicals and other ingredients become accepted or discredited for some uses, adjustments are made. For example, formaldehyde was once frequently used in polish production, but now it is rarely used.

The primary ingredient in nail polish is nitrocellulose (cellulose nitrate) cotton, a flammable and explosive ingredient also used in making dynamite. Nitrocellulose is a liquid mixed with tiny, near-microscopic cotton fibers. In the manufacturing process, the cotton fibers are ground even smaller and do not need to be removed. The nitrocellulose can be purchased in various viscosities to match the desired viscosity of the final product.

Nitrocellulose acts as a film forming agent. For nail polish to work properly, a hard film must form on the exposed surface of the nail, but it cannot form so quickly that it prevents the material underneath from drying. (Consider commercial puddings or gelatin products that dry or film on an exposed surface and protect the moist product underneath.) By itself or used with other functional ingredients, the nitrocellulose film is brittle and adheres poorly to nails.

Manufacturers add synthetic resins and plasticizers (and occasionally similar, natural products) to their mixes to improve flexibility, resistance to soap and water, and other qualities; older recipes sometimes even used nylon for this purpose. Because of the number of desired qualities involved, however, there is no single resin or combination of resins that meets every specification. Among the resins and plasticizers in use today are castor oil, amyl and butyl stearate, and mixes of glycerol, fatty acids, and acetic acids.

The colorings and other components of nail polish must be contained within one or more solvents that hold the colorings and other materials until the polish is applied. After application, the solvent must be able to evaporate. In many cases, the solvent also acts a plasticizer. Butyl stearate and acetate compounds are perhaps the most common.

Finally, the polish must have a color. Early polishes used soluble dyes, but today’s product contains pigments of one type or another. Choice of pigment and its ability to mix well with the solvent and other ingredients is essential to producing a good quality product.

Nail polish is a “suspension” product, in which particles of color can only be held by the solvent for a relatively short period of time, rarely more than two or three years. Shaking a bottle of nail polish before use helps to restore settled particles to the suspension; a very old bottle of nail polish may have so much settled pigment that it can never be restored to the solvent. The problem of settling is perhaps the most difficult to be addressed in the manufacturing process.

In addition to usual coloring pigments, other., color tones can be added depending on the color, tone, and hue of the desired product. Micas (tiny reflective minerals), also used in lipsticks, are a common additive, as is “pearl” or “fish scale” essence. “Pearl” or “guanine” is literally made from small fish scales and skin, suitably cleaned, and mixed with solvents such as castor oil and butyl acetate. The guanine can also be mixed with gold, silver, and bronze tones.

Pigment choices are restricted by the federal Food and Drug Administration (FDA), which maintains lists of pigments considered acceptable and others that are dangerous and cannot be used. Manufacturing plants are inspected regularly, and manufacturers must be able to prove they are using only FDA approved pigments. Since the FDA lists of acceptable and unacceptable pigments change with new findings and reexaminations of colors, manufacturers occasionally have to reformulate a polish formula.


Today’s Manufacturing Process


The modern manufacturing process is a very sophisticated operation utilizing highly skilled workers, advanced machinery, and even robotics. Today’s consumers expect a nail polish to apply smoothly, evenly, and easily; to set relatively quickly, and to be resistant to chipping and peeling. In addition, the polish should be dermatologically innocuous.

Mixing the pigment with nitrocellulose and plasticizer
1 The pigments are mixed with nitrocellulose and plasticizer using a “two-roll” differential speed mill. This mill grinds the pigment between a pair of rollers that are able to work with increasing speed as the pigment is ground down. The goal is to produce a fine dispersion of the color. A variation of this mill is the Banbury Mixer (used also in the production of rubber for rubber bands).
2 When properly and fully milled, the mixture is removed from the mill in sheet form and then broken up into small chips for mixing with the solvent. The mixing is performed in stainless steel kettles that can hold anywhere from 5 to 2,000 gallons. Stainless steel must be used because the nitrocellulose is extremely reactive in the presence of iron. The kettles are jacketed so that the mixture can be cooled by circulating cold water or another liquid around the outside of the kettle. The temperature of the kettle and the rate of cooling are controlled by both computers and technicians.
This step is performed in a special room or area designed to control the hazards of fire and explosion. Most modern factories perform this step in an area with walls that will close in if an alarm sounds and, in the event of an explosion, with ceilings that will safely blow off without endangering the rest of the structure.

Adding other ingredients
3 Materials are mixed in computerized, closed kettles. At the end of the process, the mix is cooled slightly before the addition of such other materials as perfumes and moisturizers.
4 The mixture is then pumped into smaller, 55-gallon drums, and then trucked to a production line. The finished nail polish is pumped into explosion proof pumps, and then into smaller bottles suitable for the retail market.
Quality Control

Extreme attention to quality control is essential throughout the manufacturing process. Not only does quality control increase safety in the process, but it is the only way that a manufacturer can be assured of consumer confidence and loyalty. A single bottle of poor quality polish can lose a customer forever. Regardless of quality control, however, no single nail polish is perfect; the polish always represents a chemical compromise between what is desired and what the manufacturer is able to produce.

The nail polish is tested throughout the manufacturing process for several important factors (drying time, smoothness of flow, gloss, hardness, color, abrasion resistance, etc.). Subjective testing, where the mixture or final product is examined or applied, is ongoing. Objective, laboratory testing of samples, though more time consuming, is also necessary to ensure a usable product. Laboratory tests are both complicated and unforgiving, but no manufacturer would do without them.


DIY Nail Polish

Make-Your-Own-Nail-Polish


from: http://www.girlishh.com/how-to-make-natural-fingernail-polish/


Recipe 1
Mix a tablespoon of Olive Oil, cold and pressed, with half a tablespoon of Kaolin Clay Powder, or White Clay and make them into a paste. Olive Oil helps moisturize cuticles and nails, while clay will bring shine to the nails.
Add henna dye to the nail polish to get a color. Henna comes in different colors and can give a natural shade to your nail polish. Make a paste from Olive Oil and henna that is smooth.
Use an old brush or cotton swab for applying polish on nails evenly. Keep it on for fifteen minutes. If you are going to use henna for tinting nails, wipe out leftovers on skin and air dry the nails.
If you are coloring your nails with henna, moisturize them often. A cotton swab immersed in warm water is enough to dab on the surface. You should leave the polish on for a minimum of one hour.
When the paste dries off, use a damp cloth to wipe away the nails. Gently rub to buff your nails. To get natural gloss, you should repeatedly apply this.

Recipe 2
Gather 3 tbsp Olive Oil, 2 tsp Alkanet Root, 1/4 tsp Beeswax, and two drops of Vitamin-E Oil. Heat the Olive Oil and Alkanet Root. When they are warm, remove from heat and allow them to set.
Use a good mesh strainer to strain the blend and separate Alkanet. Strained oil should once again be put into the boiler. Add beeswax to the oil and let it melt. After this, you can mix in the Vitamin E Oil. Mix and remove. With an old brush, apply the nail polish evenly on the nails. Do not smear it on the skin that surrounds it.

Recipe 3
Henna has been growing in popularity as a natural dye. It has been widely used in the East for many centuries. It is found to be very safe while giving an attractive color to your nails. It is easy to make a natural nail polish from henna.

Firstly, mix water and red henna in a small container. Stir the mixture until a fine paste form. Henna is made from herbal leaves that are dried before being ground to fine powder. You can purchase red henna from most of the local health food shops or online.

Next, paint the henna carefully on your nails; fingers or toes. Use a clean and small paint brush; paint slowly so that no henna will get onto your skin. When you are done, let your nails dry naturally.
Once the henna polish is dry, wash your hands. As the henna polish is really a stain, there is no worry of chipping or smearing like the commercially prepared nail polish. Henna polish will stay permanently on your nails as you have applied it until your nails grow out. Do not keep the remainder of the henna polish. Make a fresh paste each time you want to polish your nails again.


https://youtu.be/maHStEQ9_dM


81FfN+QiyCL._SX522_

Zoya Naked Manicure Mini Professional Kit


The ultimate custom color blending kit for any Naked Manicure lover including 0.25oz bottles of all six perfectors (Pink, Buff, Nude, Mauve, Lavender and White Tip), plus Naked Base, Satin Seal Topcoat, and Glossy Seal Topcoat. Perfect for travel or for gifting!


51V4OocOdSL._SX522_

Heavenly Haze – Nail Polish; Non-Toxic, Vegan, and Cruelty-Free


Karma Organic Nail Polishes are 7 free contain no toluene, formaldehyde, DBP (phthalate), camphor, formaldehyde resin, n0 xylene, and parabens. are safe for pregnant women, kids, cancer patients, and allergy sufferers. Chip resistant, durable, and with no harsh odors, they are available in glossy, matte and glow-in-the-dark shades. The non-yellowing formula is cruelty-free (not tested on animals). Packaging is 100% recyclable. This nail strengthener contains calcium and coffee extract to help strengthen natural nails without the use of Formaldehyde. Weak, thin, splitting nails or peeling nails will benefit from the use of this product which is free of Toluene and DBP, as well as Formaldehyde.


71FTfZf+FvL._SX522_

Nail Polish Remover – 100% NATURAL & Plant Based – USDA BioCertified – NonAcetone – Also Acts As Conditioner & Strengthener For Nails & Cuticles


  • UNLIKE MOST OTHER ACETONE FREE REMOVERS Pure Vitality Beauty nail polish remover is also free from Acetate, Ethyl Lactate & Petroleum Chemicals – all of which are harmful with repeated or prolonged exposure.
  • HIGH PERFORMING WITHOUT DRYING OUT YOUR NAILS – Will strengthen & moisturize your nails, unlike traditional nail polish removers which leave you with weak, brittle fingernails and toenails. Even removes stubborn UV gel nail polish!
  • ALL INGREDIENTS RATED 0 OR 1 IN THE COSMETIC SAFETY REVIEW by the Environmental. Working Group’s Skin Deep database. Pure Vitality Beauty nail polish remover is nonhazardous, non-toxic, non-carcinogenic and pregnancy safe.
  • ECO-FRIENDLY – biodegrades quickly and fully. No chemical fumes to pollute the air. Cruelty-Free.


100_-pure-creamy-nail-polish-pepper

100% Pure Creamy Nail Polish – Pepper


Apply 100% Pure Horsetail Base Coat first for strong, healthy nails with a smoother surface. Apply one coat of nail polish color. After the first coat dries, apply a second coat. Finish with 100% Pure Glass Top Coat for a chip-free high gloss finish.


Face Reading Learn what your face has to say


 The Power of Face Reading your face never lies 


little girl facereading


This post on week 236 is about one of my favorite and most fascinating subjects I have studied. When I lived in China I was introduced to Face Reading and anytime I could I would go to learn from the readers Wow, it is like they know your whole story.  A well tuned professional face reader can describe you and your ancestors so well that it may make you feel that he or she has been involved in your life on a daily basis. It is amazing. The accuracy and finesse of the system.
You may know someone whom people adore. Most likely this person isn’t wrinkle-free and doesn’t have perfect features, this is our blueprint of our feelings, the day to day history of our lives, I notice when people gets plastic surgery in a few months people started to go back to how they looked before, that inspired me to do some research on the source of this fact and I remember my studies on Face Reading and Bingo!! there it was we make all these lines. Droopiness and all those details that we start resenting and disliking, but if we get to know why it is happening our perception shifts to the understanding that if we made it we can change it, Chinese medicine teaches all the organs involved in Skin, Muscles, and basically the whole body, we are fully interconnected, I notice that when I teach this subject people are very surprised. It is amazing to me that most people don’t have a conscious relationship that we are fully connected mind, body, and spirit. For the most part, everyone is running around so fast and the common denominator is I don’t have time!!!! So when we are in our heads all the time it is no wonder we feel that we get up and function all day with just your head. Well, sweet dear readers that definitely is not it and if you wish to change your physiognomy this post can help you along, I love to be able to understand how my whole system works and many miracles happen in our bodies minute to minute. Please enjoy and share so many people can benefit from it.

mother-teresa

She was a perfect sample of the radiance, kindness, and compassion that read through her beauty.


Yet when he or she walks into a room, everyone’s heart just soars. What they are responding to is the information that radiates out from that individual’s face and body language. When people are living according to their true nature, everyone finds them beautiful.

With that being said, here we are posting a few facts about face reading there is so much more to it, we will continue to share with you in the future, here you can research more than the post with the links provided.


What certain areas of the face mean

mans-facereading 2

From http://english.eastday.com

Chinese face reading is as relevant today as it was in the past and its use is cross-cultural. We all have a blend of elements and all faces reflect part of nature pattern. Face reading first appeared in China during the 6th century BC, possibly as the specialty of magic it was not affiliated with any religion. It is thought that they were probably Taoist shamans from rural areas such as Szechwan who specialized in non-traditional deviational arts. By 220 BC, the art of face reading was established in Chinese life and classic treatises, such as the Golden Scissors and Bamboo Chronicles, were written at this time.

There were also professional face readers during this time that combined the roles of priest, astrologer, and counselor. They were well-educated men with great compassion for human frailty. The Chinese understood the concept that the face represents the energies, health, and fortune of a person and they wished to live in harmony with these, and with the prevailing energies of the five elements, yin and yang, and the seasons. This wisdom has seen a huge resurgence in the West during the past 20 years with the growth of acupuncture, Chinese herbal medicine, Feng Shui and Qi Gong.

mans face

Face-shapes-chinese-face-reading-1-16-15


The Principles of Face Reading:  Chart from The Joey Yap Store


The starting principles of face reading are the cosmic energies of the five elements and yin and yang. The elements are symbols and represent qualities of energy within each person that are reflected in the face. An elaborate physical, psychological and emotional profile can be built up, incorporating the energies of the features, the life points of the face, the three divisions from top to bottom (forehead, midface and lower face) which show the nervous, circulatory and digestive systems and the facial zones which represent the internal organs.

Each face is a map of the past, present and future. The past would be described as our inherited constitution, our mother’s pregnancy, our childhood, and adolescence, with either difficulties or support in the family, and our early years as we start out in the world. The present reflects our health at the time of the reading. This is something we create ourselves.


Coco Chanel said: Inappropriate diet, persistent negative emotions, drugs, toxins and stress all contribute to lines, congestion, and colors on the face.


The facial zones affected are related to the internal organs under stress. In the same way that the feet are a microcosm of the whole in Reflexology, so the face shows the inner health status and the person behind the persona. The future is not predestined in Chinese philosophy: acts of compassion can lengthen one’s life, and taking greater care with health can resolve possible future symptoms. Sometimes destiny and the ups and downs of life can be improved by facial surgery? Correcting squints help one’s fortunes during the years 35-40. However, nose jobs, which expose the nostrils and shorten the nose can affect the end of the 40s.


Our Face and the areas representing our organ connection

Chinese-Face-Reading-Health-Diagnosis


Here are some examples of various shapes and qualities of face reading:


What Eye Shapes Mean

eye readingWhat Mouth Shapes Mean

lips face reading JOEY YAP


What Face Shapes Mean 

Face shapes chinese face reading 1-16-15

Charts from The Joey Yap Store


Round Face: They are known as water-shaped faced people. They have a plump and fleshy face. They are known to be sensitive and caring. They are thought to have strong sexual fantasies. If you are looking forward to a long-term and stable relationship, these people will prove to be the right choice.


Oblong Face: The long, thin face is called the wood shape face. These people may have a muscular or athletic physique. They are thought to be practical, methodical and tend to be a tad more overworked. They are weighed along with narcissism and may have problematic relationships.


Triangular Face: These face types are usually related to a thin body and intellectual persuasion. They are considered to be creative and thought to have a fiery temperament according to the Chinese face readers.


Square: They are known as the metal shape face. These people are thought to have an intelligent, analytical and decisive mind. The face shape is associated with an aggressive and dominating nature.


Rectangular Face: signals some variety: they tend to dominate but with less force, often they get their way in politics, business, sports, being always balanced, sometimes ambitious, sometimes melancholic.


Oval: expresses a character somewhat balanced, sweet, charming even, in which case those individuals are often best diplomats, but also able to duplicate,  women are often best artists. Sometimes they can be dangerous, but temperamentally are weak, often they are weaker in physical strength, sometimes underactive.


Face Shape and Profile

Broad face:
Having a broad face means that the height and width of the face are very close to each other in length. A person with a broad face is confident by nature unless he has lost his self-confidence somewhere through his life. When we say confident by nature, we mean that he’s usually secure and confident about doing things for the first time; he’s fine with new experiences. This person has got good influencing abilities; he usually has a relativity larger distance between his two eyes (high tolerance) because of his broad face. This person may not be interested in small details but would be rather interested in the bigger view or the full picture. For example, when telling him about a car accident, don’t bother telling him about the car colors because he wouldn’t be interested, he may not be even interested in the car types. From that, we conclude that someone like that would make a good manager; that’s why you would notice how most managers are broad-faced.


Thin face:
The thin face is easily noticed because it appears to be longer than normal faces. People with thin faces have faces that are higher in length than its width. A thin faced person is confident by experience and not by nature, that means that when trying something new, he may feel afraid or anxious. If he has a small eye distance too, then he may be interested in small details. The main challenge concerning thin-faced people is fear; fear is a very big part of their lives and this may make them stick to a certain comfort zone and curb their adventurous side.


Round face:

People with round faces are friendly by nature; they like the social gathering and provide nice company. When intending to ask for help, head for the round faced because they may be friendlier than other people around.


Types of foreheads 


Forehad and fingers
The straight forehead (The progressive thinker):
This person follows a progressive style in his thinking; he can’t jump to the third point without first knowing the second. Sometimes he is misunderstood as a child and thought of as dumb, but in fact, he may be very intelligent; it’s just his progressive style of thinking that needs to be taken into consideration. This person may not have the fastest reflex action response; if he drops something, he may not be able to catch it before it reaches the ground. He may have problems working under pressure as he needs more time to think progressively; that may make him lose control in the last ten minutes of exams.
The sloped forehead (The fast responder):
That person builds conclusions fast, to the extent that he may interrupt you many times when talking because he keeps on guessing what are you about to say. This person may get bored talking to someone with a straight forehead because of the speed difference between them. The response of such a person is very fast, and that’s why you tend to find most football and basketball players with sloped foreheads, you’re also most likely to notice how players with straight foreheads aren’t that good because of their slow responses, and again I repeat, this is not related to intelligence at all. One final thing about such people is that they are fast decision-makers, which may cause them many problems.
The curved forehead (The creative):
This person is very creative, just notice how the forehead of those who study fine arts; you will notice how most them have curved foreheads. That person would hate restrictions and rules; he likes to use his imagination, and would probably hate math and accounting but excel in arts. When the forehead is curved and occupying a big section of the head, that person may tend to be very intelligent or even a genius. You’d be safe asking that person for help with in need of a creative solution to any problem you’re facing.


Chin

Pointed chin:

A person with a pointed chin is a stubborn person just like the one with long front teeth. Having both features tends to make the person very stubborn. He has a very fierce inner resistance that can be triggered upon being pushed. When dealing with such a person, you must depend on your flexibility because pushing against him will yield no result.


Square chin:
A square-chinned person is a challenger; he always challenges destiny by standing up tall upon falling, he never gives up until he reaches what he wants. He is usually very competitive and considers everything, even sports, as a challenge rather than look at the fun part of it. This person has the ability to point out the pros and cons of any issue, something that makes him a very good consultant and a debate lover. To get along with him, avoid igniting his fighting spirit and take his opinions into considerations.
The small chin:
Having a small chin is usually associated with having a pointed chin. In face reading, whenever the facial features are relatively smaller to those of normal people, then the person is a sensitive person. People with small chins and small facial features are very sensitive to criticism and overwhelming life events. Criticize those people and they will hate you, shout at them and they may not approach you again. In order to get along with a sensitive person try to be more nurturing than usual

Cheek Bones
People with protruding cheek bones leave an impression of respect and presence. Protruding cheek bones, in face reading, represent courage and adventure loving. A person with protruding cheek bones never escapes a fight; he is full of courage and has fewer problems with the idea of taking risks or trying something new. He is not bound by a certain comfort zone or definite habits; he just follows his instincts and accepts new challenges. This person also loves to travel and explore new places.


Facial Lines

We are not born with facial lines;they are developed through our lives. Lines can reflect a certain personality trait as we will see below:
Two vertical lines between the eyes:
This person is very hard to himself, he rarely takes the time to celebrate his achievements; he may push himself to work until he falls down.
More than two vertical lines between the eyes:
This person is usually very idealistic, he tends to be a perfectionist; he wants everything to be done perfectly and everything to be in its place. If that person is your manager, then you may be in deep trouble because meeting his perfectionism could be very hard.


Horizontal lines across the nose:
Some people have horizontal lines crossing over the top of their nose. These people are overly responsible; probably have been given lots of responsibility when children. These people rarely think about having fun.
Grief lines:
Some people have two lines below their nose and on either side of their mouth. Those are called grief lines because they appear when that person is sad for prolonged periods; a loss of someone close may result in the appearance of these lines


Balance and proportion are important in face reading

Chinese physiognomy large

Balance and proportion are important in face reading, as in Chinese paintings. There are needs for harmony between the mountains (the yang element, represented in the face by the bones) and the rivers, (the yin element which is the soft tissue). Although a face may be considered beautiful by society, in face reading terms it may be too yin (upturned nose, large wide mouth, eyes too far apart, thin eyebrows). Many models have this look. In our language we have many expressions to describe character traits: pay through the nose, two-faced, keeping one’s nose clean, chinless wonder? We may have forgotten how these came into a language in the first place, the mouth relates to communication, and the chin signifies determination, ambition, and practicality among other traits . So, face reading can be used, sum up a person’s energies, to get a health read-out, to assess character, fortune, and other a tributes to help gain self-knowledge and to plan for good health.

There are numerous ways to read a face in Chinese physiognomy: 3 Quarters, 8 Trigrams, 108 Spots, examining the shapes, the colors, the wrinkles and the moles, just to name a few. A master of face reader usually employs the combination of several techniques to gain multiple perspectives and perform cross-examination.


Skin talking

facialreadingchrt2

One example of what lines on the face mean

Line between the eys

Following is a brief introduction to the 12 Houses method.

12 Houses method large

1. Fortune House (Fude Gong)

It gives an overview of your general fortune trend. An ideal Fortune House should be round, full and smooth with no

visible marks, lines or scars. Flaws in these areas reflect challenges in your life, which can be in the form of poor health, distressful relationships or money troubles.

2. Parents House (Fumu Gong)

It is associated with Heaven Luck; in this regard, its state is quite a testimony to the situation that your parents were in

and your relationship with them. A forehead that is wide, round and shining speaks of a good family inheritance, a comfortable upbringing, and early achievement, while a small, bony or disfigured one illustrates an uneasy childhood.

3. Career House (Guanlu Gong)

Again, being broad, round and smooth is the basic criteria to identify a good Career House. If on the top of that, you also

have prominent cheekbones and protruding eyebrows, you shall have a great chance to achieve a great success in your chosen field.

4. House of Travel (Qianyi Gong)

If it is in any way disfigured with scars or deep lines, you might be better off staying put. Furthermore, jobs or businesses involving transportation, tourism or import/export are, understandably, not your best choice.

5. Life House (Ming Gong)

The key to your fortune is deposited here. Naturally, being smooth and shiny is ideal, which suggests a trouble-free life

journey. If it is receded, dimpled or scared, or there are permanent horizontal lines between the brows; or eyebrows meet in the middle, you may face a bumping road ahead.

6. House of Siblings (Xiongdi Gong)

Eyebrows and the areas directly above them represent and it also oversees your relationship with your friends and

colleagues. The state of your hair has a direct connection to the physical conditions of your parents at the time when you were conceived, which means it has a lot to do with your genetic make-ups. Brows that are dark, thick, long, smooth, orderly and located high above eyes indicate a healthy hormone level that gives rise to affection, calmness, and courage. If they look sparse, thin, pale, short, or chaotic, or too close to eyes, or marked with a scar, you could be tormented by your own physical or emotional states.

7. Assets House (Tianzhai Gong)

Your eyes portray your intelligence and temperament, and the very quality of these dispositions plays an important role in your asset acquisition endeavor. Good Asset Houses are constituted with eyes that are long with large pupils and clear whites, and up-eyelids that are broad and full. Recessed or narrow eyelids exhibit impatience. If the whites are colored with red streaks, and worse, if the streaks pass through a pupil, you should brave yourself for challenges in reference to your financial concerns.

8. House of Marriage (Qiqie Gong)

Being full and smooth in appearance indicates a happy marriage. A receded house however, rings a bell on extra-marital affairs. If the area bears visible spots, scars, black moles or messy lines, your marriage could have challenges due to some unscrupulous conduct.

9. House of Children (Ernu Gong)

This area is closely related to the cerebellum and also governs your love and sex life, so again, being full and round is better than being flat or receded. Dim moles or slant lines across the area are especially undesirable, suggesting some challenges regarding your own sex life or your children’s future development.

10. Health House (Jie Going)

If the House is broken or marked with horizontal lines, or if it is stained with spots, marks or discoloration, you shall pay extra attention to your health, especially your digestive system.

11. Wealth House (Caibo Gong)

A nose that has a high and straight bridge, big and round tip, full and fleshy wings, and invisible nostrils, not only indicates  sound physical health, a positive mental attitude, also denotes success in career and abundance in wealth. On the other hand, a nose that is low, or crooked, pointed, or narrow, bony, or with a contoured bridge, upturned tip, visible nostrils, reveal a problematic personality, a troublesome financial situation or a difficult career path. If blood vessels are clearly visible or have  a dim blue color tone the surface, pay attention to blood pressure and heart health. When a nose turns bloody red, which is dubbed Fire in Lounge in Chinese physiognomy, it should be viewed as a to excessive warning sign

12. Popularity House (Nupu Going)

This House rules your relationship with your colleagues, subordinates or younger generations, and foretells your situation in your old age. When they are round and full, you can expect to enjoy your popularity among your followers. But if it sharps off, or appears crooked or boney, you probably should reconsider your dream about being a politician. And what’s more, you’d better prepare for self-support during old age.

Marks, spots, scars on, and even shapes of your face can change over time, meaning your fate can alter through the years. You can utilize your Man Power (your attitudes – good deeds, better learning, and hard work) and the Earth Power (your environment – favorable Feng Shui) to neutralize the Heaven Power (your time of birth – what you have inherited from your parents and your previous lives). Ultimately, you are the real creator of your own fate. When you change your heart, you change your face; when you change your face, you change your fate.


Here are some examples of Face reading 

physiognomy character

Face-Reading-Flashcards-Personality-Character-Set_b5

Face-Reading-Flashcards-Personality-Character-Set_b7

Face-Reading-Flashcards-Illness-Deficiency-Set_b7


physiognomythe-science-of-observation-in-homoeopathy-way-20-638


physiognomythe-science-of-observation-in-homoeopathy-way-63-638

ears

Large middle area face


studies-research-papers-other-interesting-tid-bits-72-638 physiognomythe-science-of-observation-in-homoeopathy-way-63-638


More Face Reading will come in future posts stay tuned


https://youtu.be/q7dQ7i0T4Tc


https://youtu.be/eEA7kT5fTzg


51vGOOHA1HL._SX394_BO1,204,203,200_


Face Reading: How to Know Anyone at a Glance

FACE READING WILL HELP YOU – Choose the Career you were born to do. Read your Boss’s face. – Protect your children by knowing Dangerous features in strangers – Hire Smart! Know how to choose people of Destiny. – Date safely on the Internet. Avoid mistakes! – Gain insight about your Health or illness by using facial indicators. – Know the Secrets for effective managing and business strategy – Learn psychological meanings for over 100 Facial Features


41b+W1NuBwL._SX403_BO1,204,203,200_


Joey Yap’s Art of Face Reading: Unmask the Secrets of Your Personality and Destiny

Chinese face-reading, or Mian Xiang, is a form of physiognomy, or the observation of appearances. This ancient technique reveals not only a person’s true character but also his or her fortune, luck, and talents. “Joey Yap’s Art of Face-Reading” is a brilliant introduction to this powerfully accurate art. In this illuminating guide, bestselling author and master trainer Joey Yap explains how the face is essentially a map of our destiny and luck. With detailed illustrations, he presents the ‘100-year map’ of the face or the 100 points that govern a person’s fortune and luck from the age of 1 to 100. He also unlocks the areas of the face known as Officers and Palaces, which tell us about a person’s character, future challenges, obstacles and talents in life – along with other facial features such as moles, which Joey explains how to identify and interpret. With this guide, you will learn to use face-reading to examine your own life stages and destiny, and those of others, at a glance.


51iTcwMvrTL._SX332_BO1,204,203,200_


The Wisdom of Your Face: Change Your Life with Chinese Face Reading!

What if you could tell, just by looking at others, how they tend to think, feel, and behave? What if your partner’s face revealed the best way to resolve any conflicts between you? And what if you could discover in your own face the wisdom that you need in order to be the best you-you can be?

Based on the same ancient foundation as acupuncture and Chinese medicine, face reading has been in the “research and development” phase for over 3,000 years. When translated to make it meaningful for our Western lives, it’s a powerful source of wisdom that we can all access. Chinese face reading shows you how to live your life in alignment with your own natural flow, find the life path that gives you joy, attract relationships that nurture you, and most of all, enable you to feel compassion for yourself and others. This book will forever change how you see yourself . . . and all the people in your life!


Which Foundation Type is Best for You?


Five-Ways-Of-Applying-Liquid-Foundation-1
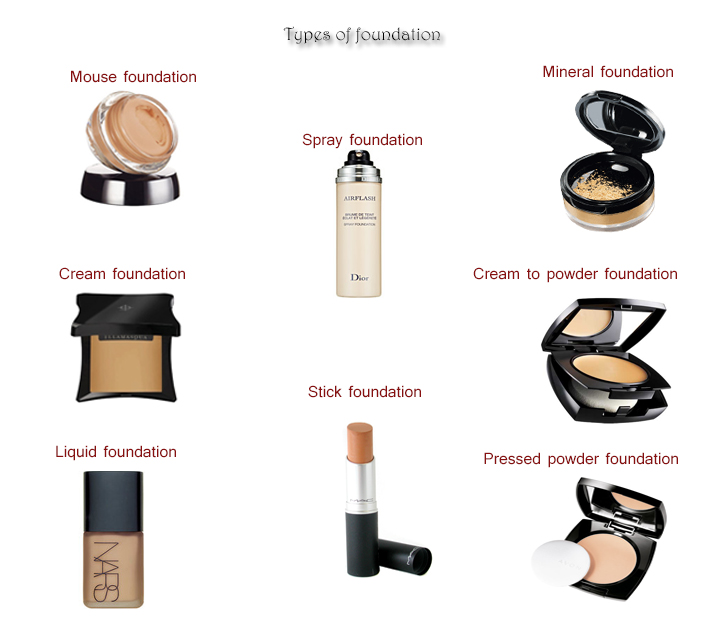
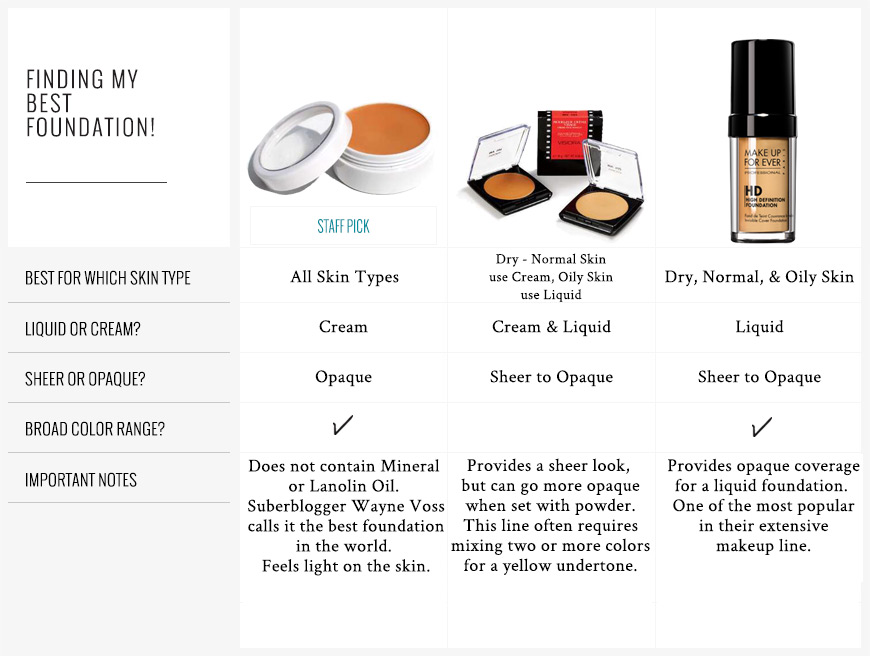
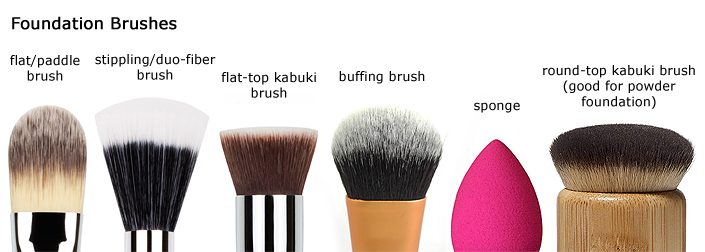
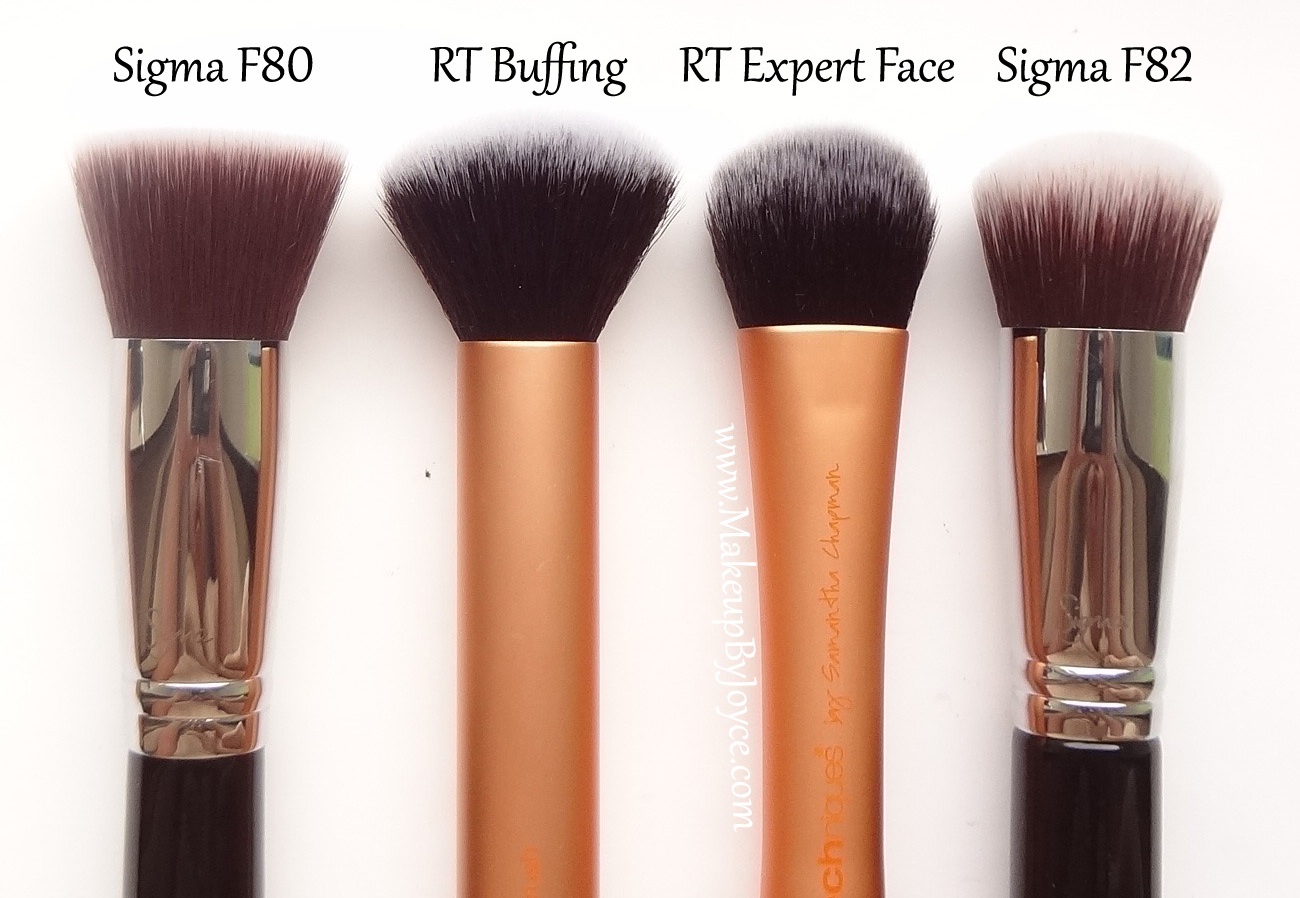
Hello everyone on week 235  we are sharing Tips, videos on what makeup foundations is, what it does and how to selective one that suits you best.

Through the years that I have worked as a makeup artist I got to try hundreds of different foundations, and I, like many other artists, have my favorite one in particular and that is RCMA, from the Research Council of Make Up Artist. I have worked all over the world with different lights, different shades of skin and always RCMA worked perfection. I have used it in photo shoots in the water for commercials such as Victoria Secret and much more. The models were in salt water for hours and it didn’t move at all. Okay enough of my preference on foundation I just thought I would give them recognition since their products have helped me for close to 40 years.

Foundation is our canvas, so it is best to invest the time trying what is the best match for you. Today’s foundation is multipurpose, offering far more than color correction and coverage, with built-in sun protection, moisturizer, and many with vitamins and claimed anti-aging formulas. For the most part the claim is that they allow the skin to breathe and look “NATURAL” that is the case if we apply a good light moisturizer that has SPF build into it so we don’t apply too many coats that may not get along and make the foundation look unnatural, to say the least.  Blending is the secret to a good foundation finish, aside from choosing the foundation that matches your undertone color and there is the key to a smooth transition from a foundation that glides on your skin and you can not tell the difference as it goes over because it MATCHES your underton., In certain cases some skin has two and sometimes three undertones and here is where you can use a concealer to even spot covering and apply your foundation once you have a more even canvas. Let’s keep in mind less is more here. Finesse is at work once you finish the overall look with the eye makeup and lips you can go over and tweak it so it doesn’t look cake and muddy and this will still allow the skin to breathe.  Foundation aids with protecting the skin from the elements and environmental pollutants .

It is crucial to find your undertone, here are some charts and examples of what I am talking about.


undertones chats


Color-Theory-Best-Diagram-V1A undertones to choose from


Three brown beautys

medium_skin

tan_skin_tones

 dark_tan_skin_toneslight_tan_skin

What to chose

MIN_FoundationColors

Let’s talk a little about your skin type first


skintype care skin_type_check like it

First things first Types of skin: 

Find what is your skin type

what color undertones do you have in your skin

How much coverage do you spect

What type of finish you want by that we mean silky finish, matt finish semi-matt finish, the kind that has a glow, the thin kind that looks like you have nothing on.

The answers to this questions will help you to choose the ideal product for you bellow we share the type of finish to help you make a happy decision on what to choose.


Dry Skin

facial-dry-skin

Dry skin:

Is usual to think in mature skin first, my experience taught me that even teenagers ca be owners of dry skin due to dehydration and lack of healthy fats and oils.However the age is if we deal with skin that lacks emollients and is less elastic that feels tight after cleansing and has small pores it usually indicates that needs more moisturizing foundations   with a formula that contains emollients and some antioxidants like tinted moisturizer, liquid moisturizing ones, mousse kinds they are you fluffy I like them, try them first some dry pretty cakey.

Those with a dry skin type will often experience flaking, as well as sensations of tightness after washing. This skin tone is prone to the development of a sallow complexion, fine lines and wrinkles and fine pores. An ideal DIY face cleanser for dry skin like coconut oil will moisturize and nourish dry skin, keeping it healthy and vibrant and will minimizing cracked skin, dry patches, and flakiness.

Normal Skin

Normal skin

Normal Skin

Is the kind of skin that has a few breakouts; neither too oily nor to dry with medium size pores with a smooth quality to it consequently smooth texture with a healthy color, generally this skin can use a cream powder foundation, tinted moisturizer, all types of liquid foundations, cream kind, the dual finish types, stick foundation and mousse, so this type of skin has quite a bit of selections as you can see.

Normal skin types don’t suffer from any particular afflictions, they are not prone to extreme or frequent breakouts, and don’t experience any oiliness or dryness. The complexion is fresh, elastic and supple. This is the ideal skin type that most people aspire to attain, and is the easiest to take care of. Face cleansers for normal skin types are meant to cleanse, refresh and moisturize the overall skin rather than treat any specific conditions or problem areas.


Oily Skin


-oily-skin

Oily Skin

 This type of skin is more prone to blackheads, larger pores, tends to get shiny fast, breaks out often, the good news is that it has less tendency to wrinkles due to the fact that is more elastic, so here is best to select foundations oil-free , non-comedogenic ( denoting a skin-care product or cosmetic that is specially formulated so as not to cause blocked pores.) so we mean products enriched with oil absorbers like cream to powders foundations, liquid oil free, water based,  dual finished  and good all mousse foundation.

Oily skin comes in many variations and is one of the most distressing to those who have it. Those with oily skin are most prone to breakouts and bouts of acne, as well as an overall course, greasy and/or shiny appearance.

Although it can be difficult to tackle at first, once you find the right oily skin face regime, you should experience minimal complications. The keys to treating oily skin are having a good cleanser and cleaning ritual, minimizing of carbohydrate, sugar and process foods consumption, and avoiding rich creams, moisturizers, and many standard face washes.


Sensitive Skin


Sensitive Skin

Sensitive skin

The kind of thin skin that burns easily and it gets blotchy and it obviously has dry patches, this type of skin is more susceptible to rosacea and is very sensitive to products , it flushes easily is thin and very delicate, so consequently this type of skin needs non-allergenic  products because even the hypoallergenic still can create allergies, is good to to use any products that contain fragrances, good to use moisturizing formulas, and avoid the formulas with sunscreen included.

Usually, sensitive skin types suffer from acne, leading them to require special products that are higher priced than standard skincare lines. Tightness, inflammation, redness, and irritation are all common problems for those with sensitive skin, so a very particular type of care is needed to avoid any further irritation.

Combination Skin

combination

Combination Skin:


Here we recommend using a combination of foundations to accomplish the final finish you desire

Those with combination skin tend to experience a mixture of oiliness and dryness in their “T-zone”, the area comprised of the forehead, nose, and chin. Different types of face washes and cleansers are needed to treat the different areas of the face. A face cleanser that moisturizes and freshens the skin will be best on the cheeks and nose, where combination skin types usually experience the most dryness, and a non-irritating, simple cleanser is best for those portions of the face that are oily.


skintype care


Different types of foundation finish

types of foundations 2

Matte finish:

this finish is a great choice for normal to oily skin. It works best on skin with imperfections such as breakouts,scars, and discolorations. It gives you the best coverage and is great for oily skin due to the fact that it doesn’t contain oils.However use a very light hand, because if you apply too heavily it will look like a mask.


Dewy finish:

This foundation works great on dry skin because it adds moisture. It works wonders for most types of skin,  except oily skin, where it can increase the shine and showcase any flaws such as surface bumps or blemishes.   Dewey foundation is not such  a good thing in the hot weather climates or in humidity locations because it can become to shiny and oily looking and no so much dewy.


Satin:

This foundation works for almost all skin types , with the exception of excessively oily skin. It gives the skin a soft, smooth appearance different than the dewy look it looks like healthy skin.The finish is not as flat as matte, or shiny as dewy, it falls in between the two.

Satin is the most common foundation finish


Luminous:


This foundation works well for any skin type. Its light-reflecting properties help hide tiny flaws and little lines by reflecting light off the surface of the skin.


foundation_guide_1_web


Tip:

 Foundation can also be applied  to your lips. It creates a blank canvas for any reshaping you want or needs to do. It’s also useful as an anchor for lipstick since it makes the lipstick stay longer, I sometimes put a pretty gloss on it and it looks like the pale lips you see on JLO, some lips have lots of colors and can change the color of the desirable lipstick this can help that.

Which Foundation Type is Best for You?


Chart for foundations colors and textures

from:  http://www.paulaschoice.com/expert-advice/face/_/makeup-tips-tricks-foundation-selections

Without question, the right foundation is essential for a beautiful makeup application. Foundation serves as the canvas for the rest of your makeup and the best ones blend on smoothly and evenly, blending with your skin. If you’ve never tried foundation or if you don’t think you’ve found the best one for your skin type color yet, prepare to be surprised at the difference the right foundation makes!

Besides finding a foundation that matches your skin color exactly, it’s also important to choose the type of foundation that is best for your skin type and color, and that also matches your personal preferences.

For example, if your skin is oily, you don’t want to use the same type of foundation someone with dry skin prefers it won’t blend correctly. If you have acne or struggle with rosacea, you most likely won’t go for a sheer coverage foundation. And if you have normal skin with an even skin tone, you may not want the level of coverage some foundations provide.

So what are the different types of foundation and how do you choose? Following is a rundown of the types of foundations you will find anywhere you shop for makeup. Remember, knowing your skin type, the level of desired coverage, and your personal preferences are key to finding a foundation you’ll love to use!

mucho celebrities colors


Oil-Free, Matte-Finish Liquid Foundations

Oil-Free, Matte-Finish Liquid Foundations

The best foundations in this category should have a smooth finish with no shine or dewy appearance. Ideally, the matte finish should last for at least a few hours, but that depends on how oily your skin is. Most oil-free liquid foundations provide sheer to medium coverage, but you can build coverage to the level you desire.

The best foundations in this category have these traits:

Lightweight texture and finish (this type of foundation doesn’t feel heavy).

Easy to apply and blend with a sponge or brush.

Buildable coverage.

Helps control excess oil to keep your skin shine-free for at least a few hours.

Generally a safe choice for breakout-prone skin.

Works great with pressed powder, powder blush, and bronzers.

Possible negatives to watch out for:

Depending on the formula, this type of foundation may make your skin look or feel dry. It can help to use a primer (such as a mattifying serum loaded with antioxidants) that adds a soft finish to the face, definitely, you can prep the skin with a light nonoily moisturizer let it sit and with a tissue.

Tip:

Here you can prep the skin with a light nonoily moisturizer or a light serum, let it sit and with a tissue or a sponge absorb the excess, in the meantime, you can do you brows or eyes.

If your skin is very oily, it could help a great deal to use an oil-control “primer”

Foundations with a matte finish can exaggerate little lines and flaws if the finish is too dry.

Not the best if you want to use cream blush or bronzer, as the finish makes it difficult to blend on smoothly.


Long-Wearing, Matte-Finish Liquid Foundations

Long-Wearing, Matte-Finish Liquid Foundations2

These liquid foundations are almost always oil-free and the best ones are truly long-wearing and stay put. Most have a thin consistency that sets in place quickly, so blending must be fast and precise. Most blending mistakes can be fixed, but not as easily as with other types of liquid foundations. Those with oily to very oily skin typically do best with this type of foundation.

Tip:

Here is important to keep in mind the blending again be aware not to rub or pull the skin too hard when applying the foundation and less is more.


The best foundations in this category generally have these traits:

Excellent if you have very oily skin or if you prefer your foundation to look “just-applied” all day.

Thin texture and matte finish make this type of foundation a safer bet for breakout-prone skin.

Can be great for those who live in humid climates and cannot get their foundation to last.

Perfect for those who prefer a strong matte finish.

If the foundation is rated SPF 25 or greater, it is a great way to ensure your oily skin gets the sun protection it needs without adding layers of products.

Great for use with sheer matte powder blushes and bronzers.

Possible negatives to watch out for:

Because these set quickly, blending must be fast and precise without rubbing or pulling a tapping motion is best.

Will magnify even the slightest hint of dryness (so prepping dry areas with a moisturizer or serum is essential).

Tip:

Use the lightest moisturizer or serum possible to hydrate without adding a moist, slippery feel.

The long-wearing finish can make powder blush and eyeshadow application tricky. Blush and eyeshadows with a soft silky finish are your best bets like cream or mouse kinds.

This is a challenging type of foundation to remove. For best results use a makeup remover as well as your regular cleanser with a soft washcloth to be sure you’re getting all your makeup off each night again be gentle, you may want to play the cleanser and let it sit for a few minutes to soften the makeup.

The long-wearing, relatively unmovable finish of a truly long-wearing foundation makes blending a cream blush or bronzer over it skillful.


Moisturizing Liquid Foundations

Moisturizing Liquid Foundations

These liquid foundations usually have a slightly thicker texture than oil-free foundations and typically are easy to blend due to the amount of slip they have. The best in this category also offer helpful skin-repairing ingredients as well. Because this type of foundation offers a satin or satin-matte finish, they’re perfect for women with normal to dry skin.

The best foundations in this category generally have these traits:


Typically provide light to medium coverage so your great skin shows through.

Easy to blend because most have great slip without being greasy.

Can be used with cream or cream-to-powder blush and/or bronzer.

The soft finish and slight sheen add a healthy glow to your skin.

Possible negatives to watch out for:


Generally not the best option for women with combination skin (the finish makes oily areas look worse).Here you can apply a different product in the oily areas that match the foundation.

A tricky option for those with blemish-prone skin because the moisturizing ingredients can perhaps contribute to clogged pores.

Satin finish is a beautiful look for women of color (strong matte finishes can make dark skin look ashen if the undertone is not correct for the color of skin).

Works with powder blush or bronzer only if you set the foundation with a sheer application of loose or pressed powder so the blush or bronzer doesn’t grab and look too heavy.


Pressed Powder Foundations

Pressed Powder Foundations

These foundations come in a compact and work like regular pressed powders, only with a bit more coverage and ability to stay put. The best ones in this category have a wonderfully silky feel and are easy to blend. Pressed powder foundations provide light to medium coverage and can work for normal to slightly dry or slightly oily skin types. If you have oily skin, powder foundations can look thick and clumpy; if you have dry skin, the powder will absorb moisture, making your skin drier.

The best foundations in this category have these traits:

For those with normal to slightly oily or slightly dry skin, this type of foundation is a fast, easy way to get a smooth finish.

Some pressed powder foundations have a slight shine, which can add a soft glow.

Portable and extremely easy to apply with a brush (sheer coverage) or sponge (medium to full coverage, but be sure to blend well to avoid a heavy, powdered look) I like to use a damp sponge with it very lightly misted so it doesn’t make streaks or uneven application.

Feels light and makes skin look even but not heavy, if applied carefully.

Excellent to use over a daytime moisturizer with sunscreen. These foundations help reduce the shiny finish of some sunscreens.

Works beautifully with powder blush or bronzer.

Possible negatives to watch out for:


Not a good option if you have any amount of flaky skin because the absorbent finish “grabs” and exaggerates this unwanted issue.

The finish can be too absorbent and feel uncomfortable on dry skin.

Can look too thick or change color on those with very oily skin. The color change occurs when pigments in the foundation mix with the excess oil and oxidize.

The powdery finish doesn’t work well with cream blush or bronzer, is best with powder kinds .

If you want more coverage, building too much powder on your skin can look thick and overdone.

Tip:

Here again is huge to determine the undertone of the skin or it will look like like a plank over your skin cardboard like, no so pretty.


Cream-to-Powder Compact Foundations


These foundations are a cross between a pressed powder and a creamy liquid foundation. They have a very creamy, almost greasy, appearance, but if you’re using the best ones in this category, the creaminess will disappear after you blend them on, leaving you with a slightly matte, powdery finish. Coverage can go from sheer to full depending on the formula and how much you apply.


The best foundations in this category have these traits:


Blends quickly and easily with a sponge or brush, setting to a semi-matte or powdery finish.

Great for those with normal to slightly dry or slightly oily skin if you don’t want a true matte or dewy finish.

Typically doesn’t need to be set with powder, which saves time and prevents the powder look.

A wide range of coverage, from sheer to full.

Portable, so touch-ups on-the-go are easy.

Generally works well with powder blush or bronzer.

Possible negatives to watch out for:


Depending on the formula, can blend on too thick and look more obvious than other types of foundation.

Not for very oily skin because the cream portion exaggerates shine and the powder finish isn’t strong enough to keep excess oil in check.

Not for dry to very dry skin because the finish exaggerates dry areas, even when they’re prepped with moisturizer.

Depending on how powdery the finish is, this type of foundation can impede smooth application of cream blush or bronzer.


Stick Foundations

Stick Foundations

Stick foundations are essentially cream-to-powder foundations in stick form. If you want a cream-to-powder foundation and prefer the convenience of a stick these are an option.

Most stick foundations go on a bit thicker than powder or cream-to-powder foundations, which make them a little more challenging  for those with oily or blemish-prone skin. Plus, some stick foundations feel thick and heavy, so are use your discretion when you choose perhaps you can get a sample and try it is what I recommend for products anyway, apply it and see how it wears and then make your decision. You will save lots of money in the process, Sephora usually is more than willing to give samples .

Because of their size and the type of packaging, stick foundations do travel well, but overall, even the best ones in this category should be approached with common sense.

The best foundations in this category have these traits:


Silky, smooth texture that you can “stripe” on the skin and blend with a sponge or brush.

Lightweight, soft matte finish that makes skin look refined.

Portable and can double as your concealer.

Possible negatives to watch out for:


Some stick foundations have a thick, waxy texture that looks heavy and can lead to clogged pores and/or can worsen acne not to mention look overdone.

Blending can be tricky because most stick foundations set quickly, so you don’t have as much play time as with liquid foundations.

If the finish is too creamy, it can crease into lines around the eye, so carefully blend.

This type of foundation is not the best for blemish-prone skin.

Sheer Foundations and Tinted Moisturizers


Sheer foundations and tinted moisturizers are basically interchangeable. They are an excellent choice for a touch of color along with moisture and, more often than not, sun protection. For casual weekend makeup, sheer foundations or tinted moisturizers are excellent options for normal to dry or slightly oily skin that does not need significant coverage.

The best foundations in this category have these traits:


Sheer foundations and tinted moisturizers are extremely easy to choose and use because they are so sheer you must pay attention again to undertones of your skin because they blend on almost invisibly but it will show streaks if is not match.

Great for adding a touch of color to pale or sallow skin.

Combines soft color, hydration, and sun protection in one product, although you must apply liberally to get the amount of sun protection stated on the label.

Works beautifully with cream or cream-to-powder blush or bronzer.

Possible negatives to watch out for:


Coverage can be too sheer for major apparent flaws, including skin discolorations, broken capillaries, or red marks from acne, rosacea, or dark circles etc.

Generally, these are too moist or creamy for oily or breakout-prone skin, putting you at risk for further breakouts.

The moist finish makes application of powder blush or bronzer difficult. For best results, set with a dusting of loose or pressed powder or go for a cream blush or bronzer.


Mineral Makeup

mineral makeup

Despite widespread marketing to the contrary or what you may have heard, mineral makeup isn’t a special type of foundation—it is merely a powder foundation sold in either loose or pressed form.

The same ingredients used in mineral makeup show up in other powder-based foundations, too. Although there is no compelling reason to choose mineral makeup over other types of foundation (it isn’t better or safer for your skin, even if it is sensitive), many women like the natural-themed names of these products and are attracted to the branding.

As mentioned above, mineral makeup comes in loose or pressed versions, although the loose powder version is more common. Both typically provide heavier coverage than what you can achieve from regular pressed-powder foundations.

The best foundations in this category have these traits:


Most mineral makeup provides medium to nearly full coverage without looking too powdery or making skin appear dull.

Mineral makeup with sunscreen rated SPF 25 or greater is an easy way to add to the sun protection from your daily moisturizer and/or liquid foundation.

Can add a soft shine finish to the skin, but be careful because many mineral makeups impart too much shine.

Works beautifully with powder blush or bronzers.

Possible negatives to watch out for:


Mineral makeup can be drying and too absorbent for dry skin or dry areas.

The color can oxidize, pool in large pores, and change color or look streaky over oily areas.

The loose mineral foundation is by far the messiest type of foundation. It can be a pain to travel with because the powder tends to “leak” and the component gets messy.

This type of foundation is not at all compatible with cream blush or bronzer.

The other drawback for us is that most people don’t clean the brush that buffs the makeup on the skin and it will collect bacteria, just keep in mind the powder itself contains Mica which is like tiny little crystals like particles and the rubbing into the skin that is aggressive causes tiny lacerations, not our favorite.


Self-Adjusting Foundations

Self-Adjusting Foundations


These foundations supposedly stop or claim to control oil production and also moisturize skin wherever it’s dry. We have yet to see one perform as promised, but it would be great if someone came up with one that did! Ignore the wild claims and focus on the other attributes of these types of foundations—they’re almost always lightweight, oil-free liquid foundations best for normal to slightly dry or slightly oily skin.

Be wary of foundations that claim to adjust to your ideal skin tone. They can come close if the shades are neutral and natural-looking, but you almost always will get a better match from a foundation that doesn’t make hocus-pocus skin-matching claims.

Last, avoid color-correcting foundations; that is, those with a mauve, mint green, bright peach, or strong yellow tone. For these to mask a skin-tone issue, they must provide enough coverage, and if they provide that much coverage, then the color-correcting product looks obvious and unnatural. For best results, look for neutral to slightly yellow-toned foundations to diffuse a ruddy, dull, or sallow skin tone.


Applying Foundation

foundation before and after

from: http://www.marieclaire.com/beauty/news/a14852/foundation-how-to-apply/


Foundation—it’s the all-important canvas for the rest of our makeup, but when it comes to technique, it always seems to be shrouded in mystery. Between what products to use and how to use them, it’s something you’ve got to get down to a science in order to achieve that flawless, yet miraculously natural-looking skin.


Step 1: Remove Makeup and Cleanse

remove makeup

Pro Tip: “It’s best to make sure the skin is completely clean and prepped before applying moisturizer. Even if you aren’t wearing makeup, you can use a cleansing water like a Rose one, almost always removes leftover makeup, dirt, and grime from the skin. Behind the scenes, at fashion week this cleansing water is what makeup artists use to remove makeup.”

Step 2: Moisturize to Prime the Skin

moistizer

After the skin is cleansed properly, use a rich,or light nourishing moisturizer depending on the skin to rehydrate the skin.

Pro Tip:


“It’s best to warm up the moisturizer in between your hands then press it into the skin. If you’re more on the oily side, use a gel-based moisturizer that is matte and applies with just your fingertips or a foundation brush.”


Step 3: Apply Foundation with a Foundation Brush

Apply Foundation

Pro Tip:

“Use a foundation brush and apply the foundation starting in the center of the face and blend out.”Please don’t forget the neck and go behind raping around the ear so it doesn’t look behaved!!.

When it comes to choosing a formula, look for something that looks natural, has a flawless finish, and feels weightless.

Step 4: Gently Blend in a Rolling Motion


Blend

Start with a *damp* sponge because it softens the sponge and won’t absorb any of the product you just applied to your face.A good brush will also do.

Pro Tip:


“Blend the foundation with a rolling motion and press it into the skin.” you can also use a foundation brush.

Step 5: Conceal Blemishes and Redness

Conceal Blemishes

Tap on concealer to conceal any blemishes or redness that’s coming through.

Pro Tip:


“I like to use a clean fingertip as the warmth of the hand helps blend it. It also adds just the right amount of product to cover the blemish.”

Don’t don’t always use fingers duet cross contamination not only to the product but to my clients.


Step 6 : Set

Set

You can set  the foundation with a noncolor powder or anti-shine. Using a soft, small, and synthetic hair brush, gently tap any excess product off then sweep the setting powder only over areas that tend to be shiny: in between the eyebrows, down and around the nose, under the eye, and on the chin.

Pro Tip:

“Be sure not to over-powder! we are not pastries.You still want your skin to look like skin.”


Step 7: Voilà

Voila


Congratulations—you’ve *officially* got glowing, skin—own it.


BLEND YOUR FOUNDATION WELL!!


b60d5c_defe41474010c59e871d8702890d56f8


from: http://beautyeditor.ca/2013/06/05/how-to-blend-your-makeup-like-a-pro-and-look-1000-times-more-flawless

Obviously, the purpose of foundation is to make your skin look magically radiant and even-toned—not like it’s coated in an opaque, all-one-colour mask.

To keep things natural (i.e., your skin looking like skin), it needs to be blend in. This means applying your foundation—whether it’s a liquid, cream, gel or powder—and then making small circular motions  or whatever motion is easy for you the idea is to blend well, with your tool of choice to gently blend the product into your skin. It should look and feel seamless as if it’s melted in instead of just sitting on top.

Let’s talk about the tools you can use:

foundationbrushes1

Flat foundation brushes: Require a skilled hand to “paint” on the product, otherwise you’ll be left with streaks or lines. My abilities with a flat brush extend only to using it to apply liquid foundation before then working it in with a buffing brush or a blender sponge. However, I’ve seen pros wield this brush alone to apply and buff in foundation—practice (and great lighting) makes perfect. 

Real Techniques Expert Face Brush Sigma F82 Comparison

Buffing brushes: Have densely-packed bristles cut at an even length, which enables you to buff the product into your skin. Buffing brushes can work powders, liquids, creams and gels into the skin for an airbrushed effect. They do all the hard work for you—just gently swirl the brush over your face and watch your makeup blend beautifully. For extra coverage, try tapping the brush on your skin to add more product—you may not even need concealer!

Fingers: Great for cream products, since your body heat warms the product to help it blend easily into your skin. Your fingers are also good for hard-to-reach spaces, such as around your nose. Dab the product in a diamond shape on your face (forehead, cheeks, chin) and then use your index, middle and ring fingers to blend it into your skin, making small, circular motions. Maybe a good idea when you don’t have any other tool, I don’t favor this technique for the simple reason of cross contamination for the makeup and the skin especially skin with breakouts.


The Best Way to Apply Foundation Depending On Your Skin


from: http://stylecaster.com/beauty/best-way-to-apply-foundation-depending-on-your-skin/

Who doesn’t want perfect skin? Or at least what we perceive as perfect for us. When you splurge on a foundation that’s supposed to be life-changing and it doesn’t perform well, it’s natural you get frustrated. Your first instinct is probably to march right back to the store and return it, right? But just wait one second. Have you ever thought that maybe it’s not the foundation that’s the problem, but the way you’re applying it?

It’s obvious that not every foundation will work with every skin type. Just as you have to choose a product that works with your skin, you need to choose an application method that does the same. The way someone with oily skin puts on makeup won’t necessarily work the same for someone with dry skin. And with all the different types of brushes and sponges nowadays, the ways you can apply foundation seem endless. So what do you choose? A brush? A sponge? Or what about nature’s best makeup tool, your fingers? And not even that, what’s the best way to actually go about applying the product? Do you buff? Stipple? Swipe? 

If you have dry skin, use downward strokes. Buffing in foundation may be tempting, but it can actually cause micro-exfoliation, which will lift the dead skin and emphasize any dry patches even more. Using downward motions with a paddle foundation brush will ensure that any flaky, dry skin lays flat and in the same direction.

If you have oily skin, there’s really no set way to apply foundation. If you deal with larger pores, it might be a good idea to use a brush or your fingers to press the foundation into the skin, rather than sweep it on. This will help “fill” the pores and make them less noticeable.

If you have acne prone skin, the most important thing is that whatever tool you use, it’s clean! This means cleaning your brushes after every individual use and steering clear of using your fingers (Even if you wash them, you’re still going to be handling products that carry germs). If you want maximum coverage, use a dense, round or flat-top brush and make sure you’re patting and blending the foundation into the skin, rather than sweeping or buffing. This will ensure that the foundation stays in one place and will keep the main concentration of coverage on your problem areas. With breakouts the bacteria involved actually is called strep! so you definitely should be conscious of this fact,contaminating the makeup for later use that won’t help you clear your skin is the other way around it will add to the exact opposite.

If you have mature skin, it will tend perhaps to lack moisture and elasticity. Try using a sponge, like the BeautyBlender, and make sure it’s damp. Wetting it beforehand will add moisture back into your skin while ensuring all the product doesn’t get soaked up. Pounce and roll the sponge on the skin for an even application.


How to Use a Foundation Brush

How to Use a Foundation Brush

from: http://makeup.lovetoknow.com/How_to_Use_a_Foundation_Brush

Learning how to use a foundation brush can mean the difference between a completely flawless face and an unpolished look. Foundation application can be tricky for everyone, from novices to seasoned makeup aficionados. Blending it into dry spots, sliding it over oily skin and trying to cover those nooks and crannies can be quite a challenging task, but a foundation brush can make it easier, practice makes perfect.


Simple Steps for How to Use a Foundation Brush

Alicia Silverstone Eco Brush

Foundation Brush

If you haven’t used a foundation brush before, it’s important to know the basics so that your makeup can be applied easily and flawlessly.


Preparing the Face

Wash the face

Before you begin the foundation application process, prep your skin so the foundation has a smooth and healthy canvas to adhere to.

Wash the face and gently pat dry with a towel until completely dry.

Apply a lightweight moisturizer onto the skin (this is important even if you have oily skin, in this case, you may choose a serum) and let dry for several minutes.

Apply a foundation primer to your skin if your type of skin is suitable for it. This can be done with a small foundation brush. Apply an even coat to the entire face and let dry completely.

If you need to add concealer to any problem areas or under the eyes, do so now, I prefer to use foundation in the correct tone so they get along better. Some concealers don’t really have the same consistency and it shows. A small foundation brush, concealer brush or even an eyeshadow brush make the ideal brushes for applying concealer. When applying concealer, always dab on and then blend.


Applying Foundation

Applying Foundation

Once your face has been prepped, it’s time to apply the foundation. Even if you’re a beginner, you’ll be able to follow these simple tips and create a smooth and even application.

Pour a small amount of foundation (assuming you are using a liquid) onto the back of your hand.( we prefer a palette that you can purchase at the art store or make your own)

Pick up some foundation with the brush or a small spatula so you don’t cross-contaminate. If you prefer light coverage, dip only one side of the brush in the makeup. If you want fuller coverage, use both sides of the brush to pick up the makeup.

Start applying the makeup in the center of the face so that you can blend outwards and avoid noticeable makeup lines.

Make sure to apply it even and blend down the chin to the neck and in the direction behind the ears you don’t have different shades a dead give away that this is not your skin, that defeats the purpose won’t you say?

Use the tapered edges of the brush to blend the makeup into those hard-to-reach areas, like the corners of the nose, corner of eyes, hairline and around the eyes and mouth.

Check for tiny makeup lines that are left behind after the foundation has set. If you see any of these lines, use a clean end of the foundation brush or a blender sponge and lightly blend these areas with small, circular motions.

If you’re using a cream or powder foundation, simply run the brush over the product in its container and follow the above steps. Several companies now offer brushes designed specifically for use with cream foundation, such as the CoverFX version available at Sephora. Its soft texture and short bristles allow for perfect application without streaking.


Caring for Your Foundation Brush

Cleaning

Once you know how to use a foundation brush, you’ll also want to take note of how to keep it clean. Cleaning all of your makeup brushes is imperative in order to keep them bacteria-free. Lingering bacteria not only poses the risk of causing acne breakouts, it also generally suggests that there is excess makeup building up on the brush.

Most high-end lines offer their own foundation brush cleaners I personally clean my brushes with 99% alcohol for a few reasons 1 that they dry very quickly 2 they get fully disinfected, 3 there is no water involved to get in the ferrule ( the metal part that connects the fiber hairs to the handle) that doesn’t dry and promotes bacteria and deterioration to the brushes I have brushes that I have used for over 40 years and they are in perfect shape . If you’re a frequent traveler, consider LBC Brush Shampoo by Sian Richards.

Perfect Application

By knowing how to properly apply foundation with a makeup brush, you can get the amount of coverage you want and flawless-looking skin. Practice the application steps until you’re comfortable, and your makeup will look professionally and beautifully applied every time.


The 9 Most Common Foundation Mistakes (and Exactly How to Avoid Them)

from:http://www.teenvogue.com/story/how-to-avoid-common-foundation-mistakes


You test it under the wrong light.

This is a huge deal when going to the makeup counter, the tendency is to try the products on the back of our hands!!!! well the color and texture of the skin there is very different than the skin on the face so it won’t tell you a true reading, not on color or the fish need it on your face, the next fact is that most stores have fluorescent lights which have a green hue and by that it won’t give you and accurate reading of the color you need, ask the salesperson if you can get a sample and if you can check it outside in natural daylight by that you will get an accurate reading on color and the texture that  matches you, trust me you will be happy.

Not everyone has a Glam Room with proper selfie lighting built into their houses like Kylie Jenner, but good lighting does play an important role when picking the right foundation “Then there’s the yellow-ish bedroom or bathroom lighting you typically have at home that can make you think you need more foundation than you actually need.” Bring a mirror to a window to observe your makeup in natural light to make sure it matches your neck and body in tone and consistency.

You don’t use it with the right tools.

Navigating the makeup tools section at Sephora can be as confusing as calculus class. While a Beautyblender has recently proved to be the closest one-size-fits-all option we’ve seen in recent years, certain formulas truly shine if you’re willing to invest in the right tools. “However, if you need more coverage or help to even out your skin texture, a synthetic brush with a cream or liquid foundation might blend more easily for you. Then there’re powder foundations, which works best with a synthetic fiber or kabuki brush to buff it flawlessly onto your skin.” It’s all about nailing the perfect formula for your skin type, and figuring out if a brush, sponge. 

You don’t switch your coverage with the changing weather.

You swap your skincare routine for the colder weather—the same should go for your foundation. “If you live someplace that experiences all four season, I recommend having a ‘winter’ foundation and a ‘summer’ foundation. Not only should you be thinking about how your skin color is darker in the warmer months thanks to the stronger sun, but humidity or dryness in the air also plays an important role,” says celebrity makeup artist Mai Quynh. In the winter, your dry skin might be craving coverage that’s more hydrating like a tinted moisturizer or liquid foundation, while powder formulas work well to counteract sweat and humidity during the spring and summer months.


You don’t throw out your foundation when you’re supposed to.

Not only is it possible for an ancient compact to be a petri dish of bacteria, but as foundation is exposed to air, it can dry out and change color. “Foundation can oxidize and get darker as it reacted with air. Now when I apply foundation I always put the product on the back of my hand and check the borders of the foundation after about 10-15 minutes,” says celebrity makeup artist Fiona Stiles. “If the borders are a shade or two darker than the center then I know the formula isn’t stable and I’ll use something different.”

You lay it on too thick.

“Apply makeup to your face based on the thickness of the supporting tissue. This means the lightest and thinnest application of makeup should be where the skin itself is the thinnest—for example, your forehead, around the eyes and bridge of the nose,” says French. “Use a heavier application of foundation on the thicker areas of the face (cheeks, nostrils, upper lip, chin, and jaw) where more coverage may be required because the skin structure can better support a more opaque product.” If you’re using a liquid foundation, try placing a couple of drops on the back of your hand or on a palette instead of directly on the sponge or brush to control the amount of makeup you apply on your face.

You use it to cover your pimples.

It’s tempting to double up on foundation on zits when the formula looks similar to that of a concealer. “But using an ultra-thick layer of foundation to cover up imperfections just ends up appearing cakey, dry and sits in your pores and lines,” says celebrity makeup artist Charlotte Tilbury. “Instead of masking zits and pimples with a heavier layer of foundation, target imperfections with a concealer that is designed to reflect light in a flattering way. Concealers have greater pigment than foundation so you can spot treat certain areas that need more attention and coverage without cakiness.”

You don’t blend your foundation past your jawline.

When it comes to makeup, there isn’t a word in the English language that’s more important than “blend.” “The space around your jaw and neck are usually overlooked, and blending those areas are particularly the key to a seamless look. You don’t want it to look like your neck and face are two entirely different colors and textures,” says Tilbury. “And of course, blending foundation across the cheek area and tricky places like around the eyes, nostrils and mouth are important, too.”

You don’t set it correctly.

A light dusting of finishing powder is great, but if you’re not careful, it’s easy to make skin look dry and settle into fine lines. “Plus, a powder can leave a ghostly white reflection in flash photography that’s a no-no for your selfies. Instead, try a makeup setting mist like e.l.f. Mist & Set, which not only hydrates your skin in dry, cold weather, but it reactivates your foundation throughout the day without having to apply a fresh layer of coverage,” says e.l.f. global artistic director Achelle Dunaway.


13088402602

NARS  Sheer Glow Foundation

  • A sheer makeup that provides buildable coverage
  • Helps even out skin & impart a glowing, satin-finish
  • Contains skin care benefits & NARS Complexion Brightening Formula
  • Improves skin brightness & texture with daily use
  • Fortified with powerful anti-oxidants to fight against free radical damage
  • Makes skin softer, smoother & hydrated
  • Suitable for normal, normal-to-dry & dry skin types
  • Dermatologist tested, non-comedogenic, fragrance-free

18429302602

NARS  Radiant Cream Compact Foundation (Case + Refill)


  • Creamy, lightweight compact makeup
  • Advanced Emulsion technology formula allows for wet or dry application
  • Provides medium & buildable coverage
  • Blends well with skin to boost radiance
  • Moisture content makes skin feel soft & comfortable
  • Reduces the appearance of fine lines & wrinkles
  • Leaves you a smooth & luminous complexion

15249303914

YOUNGBLOOD Purely The Basics Kit

  • Purely The Basics Kit – #Light:
  • 2 x Natural Mineral Foundation 3g/0.1oz (#Ivory, #Neutral)
  • 1 x Crushed Mineral Blush 3g/0.1oz (#Sherbet)
  • 1 x Mineral Rice Setting Powder 3g/0.1oz (#Light)
  • 1 x Mini Size Kabuki Brush
  • 1 x Hi Definition Hydrating Mineral Perfecting Powder Sample 5g/0.02oz (#Translucent)
  • Ideal both for personal use & as a gift

15184224714

LAURA MERCIER The Flawless Face Book

  • The Flawless Face Book – # Nude:
  • 1x Tinted Moisturizer Creme Compact SPF 20 2.5g/0.08oz (# Nude)
  • 1x Mineral Pressed Powder with Double Sided Sponge 3.8g/0.12oz (# Real Sand)
  • 1x Secret Camouflage 4.61g/0.16oz (# SC2)
  • 1x Secret Concealer 1.2g/0.04oz (# 2)
  • 1x Travel Size Secret Camouflage Brush
  • Ideal both for personal use & as a gift

19620524702

LAURA MERCIER  Silk Creme Moisturizing Photo Edition Foundation

  • A rich, creamy, hydrating foundation
  • Provides long lasting full coverage for up to 12 hours
  • Effectively hides wrinkles, lines, blemishes & other imperfections
  • Velvety texture & comfortable to wear
  • Leaves a smooth, luminous & flawless complexion
  • Perfect for video, photography & special events